Understanding ICs and PCBs
Before diving into the removal process, it’s important to have a basic understanding of what ICs and PCBs are and how they function together.
What is an Integrated Circuit (IC)?
An integrated circuit, also known as an IC or microchip, is a miniaturized electronic circuit that consists of transistors, resistors, capacitors, and other components. These components are fabricated onto a small semiconductor wafer, typically made of silicon. ICs are designed to perform specific functions and are used in a wide range of electronic devices, from computers and smartphones to appliances and automobiles.
ICs come in various packages, such as:
| Package Type | Description |
|---|---|
| DIP (Dual Inline Package) | Rectangular package with two rows of pins on opposite sides |
| SOIC (Small Outline Integrated Circuit) | Similar to DIP but with a smaller footprint and closer pin spacing |
| QFP (Quad Flat Package) | Square or rectangular package with pins on all four sides |
| BGA (Ball Grid Array) | Package with a grid of solder balls on the bottom for high-density connections |
What is a Printed Circuit Board (PCB)?
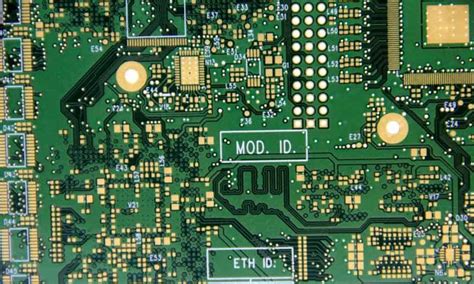
A printed circuit board is a flat board made of insulating material, such as fiberglass or composite epoxy, with conductive copper traces printed onto its surface. PCBs provide mechanical support and electrical connections for electronic components, including ICs, resistors, capacitors, and connectors. The copper traces route signals and power between components, allowing them to function as a complete electronic circuit.
PCBs can be classified by the number of layers they contain:
| Layers | Description |
|---|---|
| Single-layer | One conductive layer, typically used for simple circuits |
| Double-layer | Two conductive layers, one on each side of the board |
| Multi-layer | Three or more conductive layers, with insulating layers in between |
Tools and Materials Required for IC Removal
To safely and effectively remove an IC from a PCB, you’ll need the following tools and materials:
- Soldering iron with a fine tip
- Desoldering braid or desoldering pump
- Flux pen or flux paste
- Tweezers
- Solder
- Isopropyl alcohol and cleaning swabs
- Magnifying glass or microscope (optional)
- Hot air rework station (optional)
Safety Precautions
Before beginning the IC removal process, it’s crucial to take proper safety precautions to protect yourself and the electronic components:
- Work in a well-ventilated area to avoid inhaling fumes from the soldering process.
- Wear safety glasses to protect your eyes from solder splashes or debris.
- Use a grounded soldering iron to prevent electrostatic discharge (ESD) damage to sensitive components.
- Handle ICs and PCBs with care to avoid bending pins or damaging the board.

IC Removal Techniques
There are several techniques for removing ICs from PCBs, depending on the type of IC package and the tools available. We’ll cover the two most common methods: desoldering braid and desoldering pump.
Method 1: Desoldering Braid
Desoldering braid, also known as desoldering wick or solder wick, is a copper braid that absorbs molten solder through capillary action. To use desoldering braid for IC removal:
-
Apply flux to the pins of the IC you want to remove. This helps the solder flow more easily and prevents oxidation.
-
Place the desoldering braid over the pins and press it down gently with the tip of your soldering iron. The heat will melt the solder, and the braid will absorb it.
-
Slowly move the braid and soldering iron tip along the pins, ensuring that all the solder is absorbed. You may need to repeat this process several times to remove all the solder.
-
Once the solder is removed, gently lift the IC from the PCB using tweezers. If the IC doesn’t come off easily, apply more heat and try again.
Method 2: Desoldering Pump
A desoldering pump, also called a solder sucker, is a manual vacuum pump that sucks up molten solder from the pins of an IC. To use a desoldering pump:
-
Apply flux to the pins of the IC.
-
Heat the pins with your soldering iron to melt the solder.
-
While the solder is still molten, quickly place the tip of the desoldering pump over the pins and press the release button. The pump will suck up the molten solder.
-
Repeat the process for each pin until all the solder is removed.
-
Gently lift the IC from the PCB using tweezers.

Cleaning and Inspection
After removing the IC, it’s important to clean the PCB and inspect it for any damage:
-
Use isopropyl alcohol and cleaning swabs to remove any remaining flux or solder residue from the PCB.
-
Inspect the PCB for any lifted pads, broken traces, or other damage. Use a magnifying glass or microscope for a closer look.
-
If the PCB is damaged, you may need to repair it before installing a new IC or reusing the board.
Alternative Method: Hot Air Rework
For more delicate or high-density ICs, such as BGAs, a hot air rework station can be used for removal. This method involves heating the IC and PCB evenly to melt the solder, then lifting the IC off the board. Hot air rework requires specialized equipment and a higher level of skill, so it’s best left to experienced technicians.
Frequently Asked Questions (FAQ)
-
Can I reuse an IC after removing it from a PCB?
In most cases, yes, you can reuse an IC after removing it from a PCB, provided that the IC and its pins are not damaged during the removal process. However, some ICs may be more sensitive to heat or static electricity and could be damaged during removal or handling. -
What should I do if I accidentally lift a pad or damage the PCB during IC removal?
If you lift a pad or damage the PCB, you’ll need to repair it before installing a new IC or reusing the board. This may involve using a conductive epoxy or a small wire to bridge the damaged connection. If the damage is extensive, the PCB may not be repairable and will need to be replaced. -
Can I use a regular soldering iron for IC removal, or do I need a special desoldering iron?
You can use a regular soldering iron for IC removal, but it’s important to use one with a fine tip to avoid damaging the PCB or surrounding components. A desoldering iron, which has a built-in pump for sucking up molten solder, can make the process easier but is not essential. -
How can I prevent static electricity from damaging ICs during removal and handling?
To prevent electrostatic discharge (ESD) damage, always use a grounded soldering iron and work on an ESD-safe mat or surface. When handling ICs, wear an ESD wrist strap or regularly touch a grounded metal object to dissipate any static charge. -
What should I do if I can’t remove all the solder from the IC pins?
If you’re having trouble removing all the solder, try applying more flux and using fresh desoldering braid or a clean desoldering pump tip. You may also need to increase the temperature of your soldering iron slightly. If the solder still won’t budge, you can try using a hot air rework station or carefully cutting the pins with wire cutters and removing the IC in pieces.
Conclusion
Removing an IC from a PCB requires patience, skill, and the right tools. By understanding the proper techniques and taking necessary safety precautions, you can successfully desolder ICs for replacement, troubleshooting, or salvaging components. Remember to work slowly and carefully, and always clean and inspect the PCB after removal to ensure it’s ready for reuse or repair.
With practice and experience, you’ll become more confident and proficient in IC-PCB-Removal, enabling you to tackle a wide range of electronics projects and repairs.

No responses yet