
What is a PCB Kit?
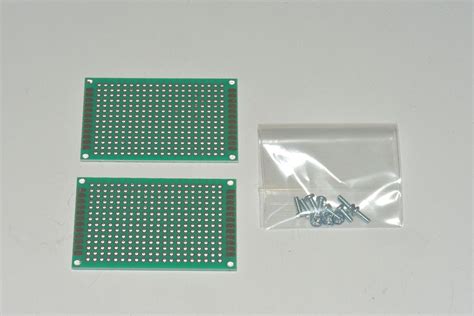
A PCB kit is a collection of components and instructions that allow you to assemble your own printed circuit board. PCB kits can range from simple projects, such as a blinking LED circuit, to more complex projects, such as a custom Arduino board. PCB kits typically include a blank PCB, electronic components (such as resistors, capacitors, and integrated circuits), and instructions for assembling the kit.
Why Build a PCB Kit?
Building a PCB kit can be a great way to learn about electronics and gain hands-on experience with circuit design and assembly. Some of the benefits of building a PCB kit include:
- Learning about electronic components and how they work together in a circuit
- Gaining experience with soldering and PCB assembly techniques
- Creating custom electronic projects tailored to your interests and needs
- Saving money by building your own electronic devices instead of buying pre-made ones
- Developing problem-solving skills as you troubleshoot any issues that may arise during the build process
Gathering Materials and Tools
Before you start building your PCB kit, you’ll need to gather the necessary materials and tools. Here’s what you’ll need:
Materials
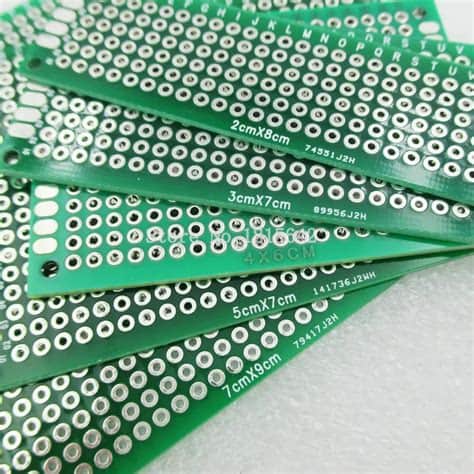
- PCB kit (including blank PCB and electronic components)
- Solder
- Soldering iron
- Soldering iron stand
- Solder wick or solder sucker (for removing solder if needed)
- Flux (optional, but can make soldering easier)
- Isopropyl alcohol and cotton swabs (for cleaning the PCB)
- Multimeter (for testing connections and troubleshooting)
Tools
- Wire cutters
- Wire strippers
- Needle-nose pliers
- Tweezers
- Magnifying glass or desk lamp (for seeing small components)
- Safety glasses (to protect your eyes from solder splatter)
Make sure you have all of these materials and tools on hand before you begin building your PCB kit.

Understanding the PCB Kit Instructions
Before you start assembling your PCB kit, it’s important to thoroughly read and understand the instructions that come with the kit. The instructions will typically include:
- A list of the components included in the kit
- A circuit diagram showing how the components are connected
- Step-by-step instructions for assembling the PCB
- Troubleshooting tips for common issues
Take the time to familiarize yourself with the instructions and the circuit diagram. Make sure you understand what each component does and where it goes on the PCB. If you have any questions, consult the manufacturer’s website or forums for guidance.
Preparing the PCB
Before you start soldering components onto the PCB, you’ll need to prepare the board. Here’s how:
-
Inspect the PCB for any defects or damage. Make sure all the holes are clear and there are no scratches or cracks on the board.
-
Clean the PCB with isopropyl alcohol and a cotton swab to remove any dirt, grease or oxidation. This will help the solder adhere better to the board.
-
Place the PCB in a PCB holder or tape it down to your work surface to keep it steady while you work.
Soldering Components onto the PCB
Now that your PCB is prepared, it’s time to start soldering the components onto the board. Here’s how:
-
Start with the lowest profile components first, such as resistors and diodes. Place the component in the correct location on the PCB, following the circuit diagram.
-
Bend the component leads on the underside of the board to hold them in place.
-
Heat up your soldering iron and apply a small amount of solder to the tip to tin it.
-
Touch the soldering iron to the component lead and the PCB pad at the same time. Hold it there for a few seconds to heat up the joint.
-
Apply solder to the joint, allowing it to flow around the lead and pad. Use just enough solder to create a smooth, shiny joint.
-
Remove the soldering iron and let the joint cool for a few seconds before moving on to the next component.
-
Repeat these steps for each component, working your way up to the taller components such as capacitors and connectors.
Tips for Successful Soldering
- Make sure your soldering iron is at the right temperature (around 700°F or 370°C) before you start soldering.
- Keep the tip of your soldering iron clean by wiping it on a damp sponge or brass wool between joints.
- Apply just enough solder to create a good joint – too much solder can cause bridges between adjacent pads, while too little solder can result in a weak or unreliable connection.
- If you make a mistake, use solder wick or a solder sucker to remove the excess solder before trying again.
- Take breaks as needed to avoid fatigue and maintain good soldering technique.
Inspecting and Testing the PCB
Once you’ve finished soldering all the components onto the PCB, it’s time to inspect and test your work. Here’s how:
-
Visually inspect the PCB for any missed joints, cold solder joints or solder bridges. Use a magnifying glass to get a closer look.
-
If you find any issues, use solder wick or a solder sucker to remove the problematic solder and redo the joint.
-
Once you’re satisfied with the visual inspection, it’s time to test the PCB with a multimeter.
-
Set your multimeter to the continuity setting and touch the probes to various points on the PCB to check for continuity between components that should be connected.
-
Next, set your multimeter to the appropriate setting for measuring resistance, voltage or current, depending on the circuit you’re testing.
-
Follow the testing procedures outlined in the kit instructions to verify that the PCB is functioning as intended.
-
If everything checks out, congratulations – you’ve successfully built your PCB kit!
Troubleshooting Common Issues
Even with careful assembly and testing, you may encounter issues with your PCB kit. Here are some common problems and how to troubleshoot them:
| Problem | Possible Cause | Solution |
|---|---|---|
| No power | Incorrect power supply, broken connection, or short circuit | Check power supply, inspect PCB for broken traces or solder bridges |
| Component not working | Incorrect component placement, bad solder joint, or faulty component | Double-check component placement and orientation, reflow solder joint, or replace component |
| Intermittent operation | Poor solder joint, loose connector, or damaged component | Inspect solder joints, tighten connectors, or replace damaged component |
| Incorrect output | Incorrect component value, wrong wiring, or software issue | Double-check component values and wiring, review code for errors |
If you’re still having trouble after trying these solutions, consult the kit manufacturer’s support resources or seek help from online forums or communities.
Taking Your Skills to the Next Level
Once you’ve successfully built your first PCB kit, you may be eager to tackle more advanced projects. Here are some ideas for taking your PCB skills to the next level:
- Design your own PCB using CAD software such as KiCad or Eagle
- Experiment with surface-mount components and reflow soldering techniques
- Build a custom Arduino or Raspberry Pi shield for a specific project
- Participate in online PCB Design Challenges or hackathons
- Join a local makerspace or electronics club to connect with other enthusiasts and learn new skills
With practice and persistence, you can become a skilled PCB designer and builder, and bring your electronic project ideas to life.
Frequently Asked Questions
- What is the best soldering iron for beginners?
-
For beginners, a good choice is a soldering iron with adjustable temperature control and a range of 600-800°F (315-425°C). Look for a soldering iron with a comfortable grip and a variety of tip sizes for different tasks.
-
Can I use lead-free solder for PCB kits?
-
Yes, lead-free solder is a good choice for PCB kits, especially if you’re concerned about the environmental and health risks of lead. However, lead-free solder may require a higher soldering temperature and a bit more skill to work with compared to leaded solder.
-
How do I avoid damaging components while soldering?
-
To avoid damaging components, use a soldering iron with temperature control and set it to the appropriate temperature for the component you’re soldering. Also, be careful not to apply too much heat for too long, and use a heat sink or tweezers to protect sensitive components if needed.
-
What should I do if I accidentally create a solder bridge between two pads?
-
If you accidentally create a solder bridge, use solder wick or a solder sucker to remove the excess solder. Place the solder wick over the bridge and apply heat with your soldering iron to wick up the solder. Alternatively, use a solder sucker to suck up the molten solder while heating the bridge with your soldering iron.
-
How can I make sure my PCB kit is working correctly?
- To ensure your PCB kit is working correctly, follow the testing procedures outlined in the kit instructions. Use a multimeter to check for continuity, resistance, voltage, and current as specified. If you encounter any issues, refer to the troubleshooting section of the instructions or seek help from the manufacturer’s support resources or online forums.
Conclusion
Building a PCB kit can be a fun and rewarding way to learn about electronics and create your own custom projects. By following the steps outlined in this guide, you can gather the necessary materials and tools, prepare your PCB, solder the components, and test your finished product with confidence. Remember to take your time, practice good soldering technique, and don’t be afraid to ask for help if you get stuck. With patience and persistence, you can become a skilled PCB builder and bring your electronic dreams to life. Happy soldering!
No responses yet