Introduction to ExpressPCB
ExpressPCB is a powerful and user-friendly software suite designed for creating and manufacturing printed circuit boards (PCBs). It offers a streamlined solution for engineers, hobbyists, and educators who need to design and produce high-quality PCBs quickly and efficiently. With its intuitive interface and comprehensive features, ExpressPCB simplifies the PCB Design process, making it accessible to users of all skill levels.
What is ExpressPCB?
ExpressPCB is a complete PCB design and manufacturing solution that consists of three main components:
- ExpressPCB: The PCB design software for creating schematics and layouts.
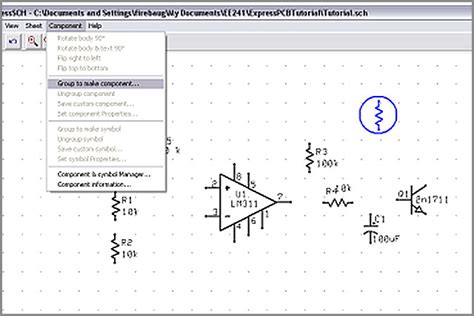
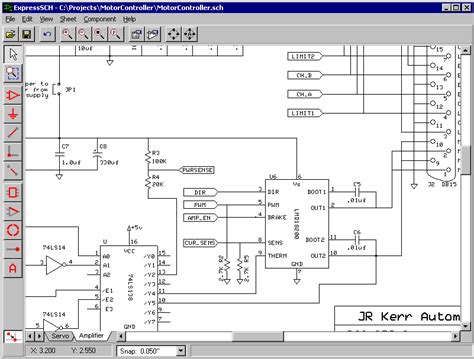
- ExpressSCH: The schematic capture software for designing electronic circuits.
- ExpressPCB Plus: An enhanced version of ExpressPCB with additional features and capabilities.
These tools work seamlessly together to provide users with a comprehensive PCB design experience, from concept to finished product.
Benefits of Using ExpressPCB
Ease of Use
One of the primary advantages of ExpressPCB is its user-friendly interface. The software is designed to be intuitive and easy to navigate, making it accessible to both beginners and experienced PCB designers. With its straightforward tools and clear documentation, users can quickly learn how to create professional-quality PCBs without a steep learning curve.
Rapid prototyping
ExpressPCB enables users to create PCB Prototypes quickly and efficiently. The software’s streamlined design process and integration with manufacturing services allow for fast turnaround times, reducing the time between concept and finished product. This rapid prototyping capability is particularly valuable for projects with tight deadlines or those requiring multiple iterations.
Cost-Effective Manufacturing
ExpressPCB offers cost-effective PCB manufacturing options, making it an attractive choice for individuals and small businesses with limited budgets. The software’s integration with manufacturing services allows users to easily obtain quotes and place orders for their PCBs, ensuring competitive pricing and high-quality results.
Comprehensive Libraries
ExpressPCB comes with extensive component libraries, which include a wide range of common electronic components. These libraries simplify the design process by providing ready-to-use components that can be easily incorporated into schematics and layouts. Additionally, users can create custom components and libraries to suit their specific needs.

Getting Started with ExpressPCB
System Requirements
Before installing ExpressPCB, ensure that your computer meets the following system requirements:
| Operating System | Minimum Requirements |
|---|---|
| Windows | Windows 7, 8, 10, or 11 |
| Mac | macOS 10.13 or later (using a Windows virtual machine) |
| Linux | Compatible with Wine (a Windows compatibility layer) |
Installation Process
To install ExpressPCB, follow these steps:
- Visit the official ExpressPCB website (www.expresspcb.com) and navigate to the download section.
- Select the appropriate version of ExpressPCB for your operating system and download the installation file.
- Run the installation file and follow the on-screen instructions to complete the installation process.
- Once the installation is complete, launch ExpressPCB to begin designing your PCBs.
ExpressPCB Interface Overview
The ExpressPCB interface consists of several key areas:
- Menu Bar: Located at the top of the window, the menu bar provides access to various tools and functions.
- Toolbar: The toolbar contains frequently used tools and commands for easy access.
- Workspace: The central area of the interface where you design your PCBs.
- Layers Panel: Allows you to manage and select the different layers of your PCB design.
- Properties Panel: Displays and allows editing of the properties of selected objects in your design.
- Library Panel: Provides access to the component libraries for easy component placement.

Designing PCBs with ExpressPCB
Creating a New Project
To create a new PCB project in ExpressPCB, follow these steps:
- Launch ExpressPCB and click on “File” in the menu bar.
- Select “New” and choose “PCB Design” from the dropdown menu.
- Enter a name for your project and choose a location to save it.
- Click “OK” to create the new project.
Designing the Schematic
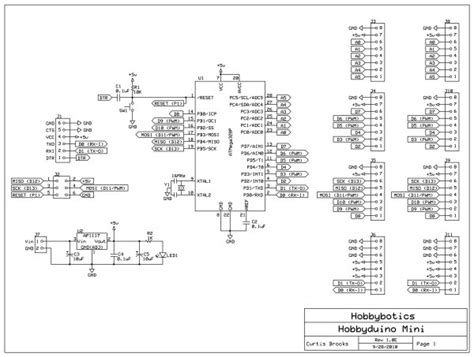
The first step in designing a PCB is to create a schematic using ExpressSCH. A schematic is a graphical representation of the electronic circuit, showing the components and their interconnections. To design a schematic:
- Open ExpressSCH from the ExpressPCB suite.
- Use the component library to place the required components on the schematic canvas.
- Connect the components using wires to define the electrical connections.
- Assign unique reference designators to each component for easy identification.
- Save the schematic and close ExpressSCH.
Converting Schematic to PCB layout
Once the schematic is complete, you can convert it into a PCB layout using ExpressPCB. To do this:
- Open your PCB project in ExpressPCB.
- Click on “File” in the menu bar and select “Import.”
- Choose “ExpressSCH Netlist” from the dropdown menu and select your schematic file.
- ExpressPCB will import the schematic and create a preliminary PCB layout.
Placing Components
After importing the schematic, you can place the components on the PCB layout. ExpressPCB offers several tools to help with component placement:
- Automatic Placement: Allows ExpressPCB to automatically place components based on the schematic connections.
- Manual Placement: Enables you to manually place components by dragging and dropping them onto the PCB layout.
- Placement by Reference Designator: Allows you to place components by entering their reference designators.
Routing Traces
Once the components are placed, you can route the traces to create the electrical connections between them. ExpressPCB provides several routing tools:
- Auto Router: Automatically routes traces based on the schematic connections and design rules.
- Manual Routing: Allows you to manually route traces using the available routing tools.
- Interactive Routing: Combines automatic and manual routing, allowing you to guide the auto router.
Design Rule Checking (DRC)
Before finalizing your PCB layout, it’s essential to perform a Design Rule Check (DRC) to ensure that your design meets the manufacturing requirements. ExpressPCB’s DRC tool checks for common issues such as:
- Minimum trace width and spacing
- Minimum drill size and spacing
- Copper-to-edge clearance
- Solder mask and silkscreen clearance
To run a DRC, click on “Tools” in the menu bar and select “Design Rule Check.” ExpressPCB will highlight any violations, allowing you to address them before proceeding.

Manufacturing PCBs with ExpressPCB
Generating Manufacturing Files
Once your PCB design is complete and has passed the DRC, you can generate the necessary manufacturing files. ExpressPCB supports the following file formats:
- Gerber Files: Industry-standard format for PCB fabrication.
- Drill Files: Contains information about the drill holes in the PCB.
- ExpressPCB Manufacturing Files: Proprietary format for ordering PCBs directly through ExpressPCB.
To generate manufacturing files, click on “File” in the menu bar and select “Export.” Choose the desired file format and specify the output location.
Ordering PCBs through ExpressPCB
ExpressPCB offers an integrated PCB manufacturing service, allowing you to easily order your PCBs directly from the software. To order PCBs:
- Click on “File” in the menu bar and select “Order PCBs.”
- Fill out the order form with your desired specifications, such as quantity, layer count, and shipping options.
- Review your order and submit it for manufacturing.
- Track your order status through the ExpressPCB website.
Advanced Features of ExpressPCB
Custom Components and Libraries
ExpressPCB allows you to create custom components and libraries to suit your specific needs. To create a custom component:
- Open the component library editor by clicking on “Tools” in the menu bar and selecting “Component Library Editor.”
- Click on “New Component” and specify the component type (e.g., through-hole, surface-mount).
- Design the component footprint and assign pin designations.
- Save the component and add it to your custom library.
Hierarchical Design
ExpressPCB supports hierarchical design, which allows you to create complex PCBs by breaking them down into smaller, more manageable sub-circuits. To create a hierarchical design:
- Design the sub-circuits as separate schematic sheets in ExpressSCH.
- Create a top-level schematic that incorporates the sub-circuits as hierarchical blocks.
- Assign net names to the hierarchical block pins to ensure proper connectivity.
- Import the top-level schematic into ExpressPCB to create the PCB layout.
Multi-Layer PCBs
ExpressPCB supports the design of multi-layer PCBs, which can accommodate more complex circuits and higher component density. To create a multi-layer PCB:
- Specify the number of layers in your PCB project settings.
- Assign components and traces to the appropriate layers using the Layers Panel.
- Use vias to create connections between layers.
- Ensure proper layer stackup and manufacturing requirements are met.
Frequently Asked Questions (FAQ)
1. Is ExpressPCB suitable for beginners?
Yes, ExpressPCB is designed to be user-friendly and accessible to users of all skill levels, including beginners. The software’s intuitive interface and comprehensive documentation make it easy for beginners to get started with PCB design.
2. Can I create custom components in ExpressPCB?
Yes, ExpressPCB allows you to create custom components and libraries to suit your specific needs. You can use the component library editor to design custom component footprints and assign pin designations.
3. Does ExpressPCB support multi-layer PCBs?
Yes, ExpressPCB supports the design of multi-layer PCBs. You can specify the number of layers in your PCB project settings and assign components and traces to the appropriate layers using the Layers Panel.
4. Can I order PCBs directly through ExpressPCB?
Yes, ExpressPCB offers an integrated PCB manufacturing service, allowing you to easily order your PCBs directly from the software. Simply click on “File” in the menu bar, select “Order PCBs,” and follow the prompts to place your order.
5. Is ExpressPCB compatible with other PCB design software?
ExpressPCB uses its own proprietary file formats, but it can import and export files in industry-standard formats such as Gerber and drill files. This allows you to use ExpressPCB in conjunction with other PCB design software if needed.
Conclusion
ExpressPCB is a powerful and user-friendly software suite that simplifies the PCB design and manufacturing process. With its intuitive interface, comprehensive features, and integrated manufacturing service, ExpressPCB is an excellent choice for engineers, hobbyists, and educators who need to create high-quality PCBs efficiently. By following the steps outlined in this guide, you can quickly learn how to design and manufacture PCBs using ExpressPCB, bringing your electronic projects to life.

No responses yet