How Analog Joysticks Work
An analog joystick consists of two potentiometers (variable resistors) mounted at 90 degrees to each other. As the joystick is moved, the resistance of the potentiometers changes. This change in resistance can be measured by an analog-to-digital converter (ADC) to determine the joystick’s exact position in two dimensions (X and Y axes).
Most analog joysticks also feature a push button that is activated when the joystick is pressed down vertically (Z axis). This button is read separately from the potentiometers as a digital input.
Here is a simplified diagram showing the key components of a typical analog joystick module:
   [Joystick Knob]
         ||
   [Potentiometer X]
         ||
   [Potentiometer Y]
         ||
     [Button]
         ||
[VCC]  [GND]  [VRX]  [VRY]  [SW]
- VCC: Positive voltage supply (usually 5V from microcontroller)
- GND: Ground connection
- VRX: Analog output of X-axis potentiometer
- VRY: Analog output of Y-axis potentiometer
- SW: Digital output of pushbutton switch
By connecting these pins to a microcontroller with an ADC like an Arduino, we can read the joystick position and button state to control things.
Types of Analog Joysticks
There are a few common types of analog joysticks available:
| Type | Description |
|---|---|
| Thumb Joystick | Compact joystick meant to be controlled with the thumb. Common in gamepads. |
| Arcade Joystick | Large joystick with ball top knob for precise control. Used in arcade fighting games. |
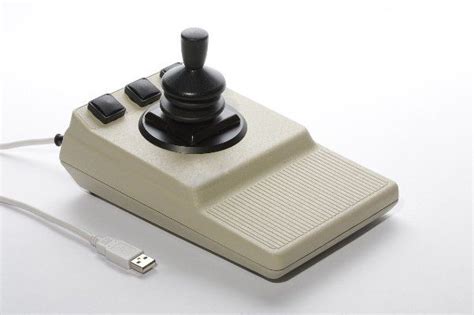
| Industrial Joystick | Rugged joystick with multiple buttons and options. Used for cranes, forklifts, etc. |
| 3-Axis Joystick | Joystick with three degrees of freedom (X, Y, Z). Z is usually a rotational axis. |
The most common and versatile type for hobbyist projects is the thumb joystick. These are inexpensive, easy to use modules that contain the potentiometers, button, and mechanical assembly in a convenient package.
Some popular analog thumb joysticks include:
- KY-023
- JoyStick Module PS2
- Keyes SJoys Analog Thumb Joystick module
While differing cosmetically, most analog thumb joysticks function the same electronically and can be used interchangeably for our purposes.

Using an Analog Joystick with Arduino
An analog joystick module can easily be interfaced with an Arduino or other microcontroller. The Arduino’s analog input pins connect to the VRx and VRy outputs to read the joystick position as values between 0-1023. The digital input connects to SW to read the button state.
Here are the steps to get started:
- Connect VCC and GND pins to 5V and ground on the Arduino.
- Connect VRx pin to an analog input on the Arduino (A0 for this example).
- Connect VRy pin to a second analog input on the Arduino (A1).
- Connect SW pin to a digital input on the Arduino (D2).
- Upload the example sketch provided below.
- Open the serial monitor and move the joystick to see the values change!
Example Arduino sketch:
const int JOYSTICK_X = A0;  // Analog input pin for X axis
const int JOYSTICK_Y = A1;  // Analog input pin for Y axis
const int JOYSTICK_SW = 2;  // Digital input pin for button

void setup() {
  pinMode(JOYSTICK_SW, INPUT_PULLUP);  // Set button as input with pullup
  Serial.begin(9600); // Initialize serial communication
}

void loop() {
  // Read the joystick inputs
  int xValue = analogRead(JOYSTICK_X);
  int yValue = analogRead(JOYSTICK_Y);
  int swValue = digitalRead(JOYSTICK_SW);

  // Print the values to serial monitor
  Serial.print("X: ");
  Serial.print(xValue);
  Serial.print("  Y: ");
  Serial.print(yValue);
  Serial.print("  Button: ");
  if(swValue == LOW) {
    Serial.println("PRESSED");
  }
  else {
    Serial.println("RELEASED");
  }

  delay(100); // Small delay
}
When no force is applied, the joystick should rest in the center position around (511, 511). Pushing the joystick in a direction will increase or decrease the X and Y values. Pressing the joystick button will change the button state from RELEASED to PRESSED.
By monitoring these values, you can determine the joystick position and use it to control LEDs, motors, servos, or any other output!

Example Analog Joystick Projects
To demonstrate the capabilities of analog joysticks, here are a few example projects you can build:
RC Car Controller
An analog joystick is perfect for radio controlling an RC car. The X axis can control steering/direction while the Y axis controls throttle/speed. Here’s a basic setup:
- Analog joystick connected to Arduino transmitter
- Arduino reads joystick position and sends values over radio link
- Receiving Arduino in RC car processes radio signals
- Applies X value to steering servo for direction
- Applies Y value to ESC for throttle
This gives intuitive and proportional control over the RC car from the analog joystick. Just push the direction you want to go! This project can be extended to other radio controlled vehicles like boats and drones.
Camera Gimbal Controller
A 3-axis analog joystick can be used to precisely control a camera gimbal for smooth video footage. Each axis of the joystick maps to a gimbal axis:
- Joystick X Axis = Gimbal Pan
- Joystick Y Axis = Gimbal Tilt
- Joystick Z Axis = Gimbal Roll
As the joystick is moved, the corresponding gimbal servos are adjusted to match. This allows the camera rig to be smoothly panned, tilted, and rolled to get the perfect shot. It’s a huge step up from regular switches or buttons.
Analog Robot Rover
An analog joystick can give you variable speed and turning control over a robot rover. Pushes on the joystick are translated to motor power. Further you push, the faster the motors spin.
The basic control scheme:
- Joystick Pushed Forward = Both motors forward (rover goes straight)
- Joystick Pulled Back = Both motors reverse (rover backs up)
- Joystick Pushed Left = Right motor forward, left motor reverse (rover turns left)
- Joystick Pushed Right = Left motor forward, right motor reverse (rover turns right)
The joystick values are scaled and applied to the left and right motors with the Arduino motor driver library. This allows you to drive the rover around intuitively by simply pushing the joystick in the direction you want to go.
These are just a few possibilities. Analog joysticks can be used for many applications requiring proportional control.

Analog Joystick FAQs
To wrap up, here are answers to some frequently asked questions about analog joysticks:
What is the difference between an analog joystick and a digital joystick?
An analog joystick outputs a range of values representing its position, allowing for proportional control. A digital joystick only outputs on/off states for each direction, allowing basic 8-way control.
How do I calibrate my analog joystick?
Calibrating center position can be done in code by reading the X and Y values when the joystick is centered and at rest. These become your new center points (511, 511) to compare against.
Can I use an analog joystick with a Raspberry Pi?
Yes, analog joysticks can be used with a Raspberry Pi using an ADC converter chip or board like an MCP3008. The Pi does not have analog inputs like an Arduino.
How do analog joysticks wear out over time?
The potentiometers in an analog joystick are mechanical components that can wear out over time with heavy use. This appears as “dead zones” or spots that don’t change value.
What can I do if my analog joystick drifts or is off-center?
First, try calibrating the center point in your sketch. If the joystick still drifts, it may be damaged. Some joysticks have small trim potentiometers to fine tune the center point. Others may need to be replaced.
I hope you found this guide informative and useful for learning about analog joysticks! Let me know if you have any other questions.
No responses yet