Introduction
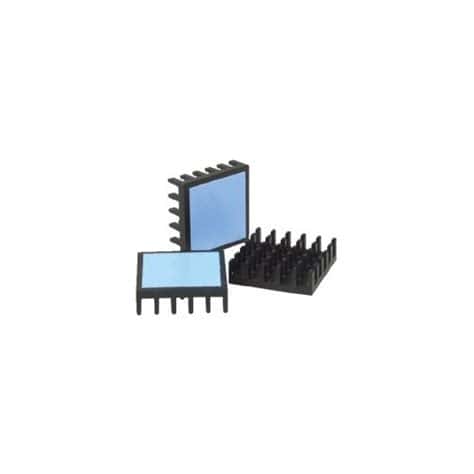
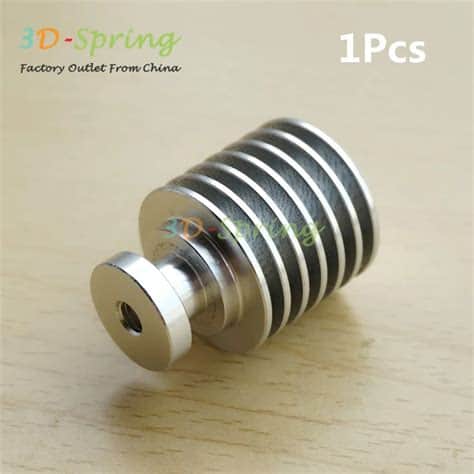
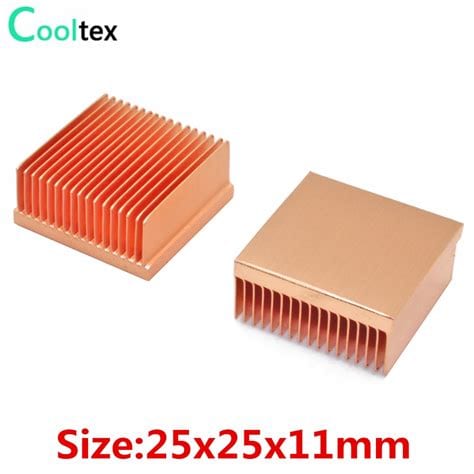
Heatsinks are essential components in electronic devices that help dissipate heat and prevent overheating. In this comprehensive guide, we will walk you through the process of building your own miniature heatsink. Whether you’re an electronics enthusiast or a curious DIY-er, this article will provide you with the knowledge and tools needed to create an efficient and compact heatsink for your projects.
Understanding Heat Dissipation
Before diving into the construction of a miniature heatsink, it’s crucial to understand the principles of heat dissipation. Heat is a byproduct of electronic components as they consume power and perform their functions. If left unchecked, excessive heat can lead to performance issues, component degradation, and even device failure.
Heatsinks work by providing a pathway for heat to transfer from the heat-generating component to the surrounding environment. They are typically made of materials with high thermal conductivity, such as aluminum or copper, which allow heat to flow efficiently.
The Role of Surface Area
One of the key factors in effective heat dissipation is surface area. The larger the surface area of a heatsink, the more heat it can dissipate. This is because a larger surface area allows for more contact with the surrounding air, enabling better heat transfer through convection.
When designing a miniature heatsink, it’s important to maximize the surface area while keeping the overall size compact. This can be achieved through the use of fins or other geometric features that increase the surface area without significantly increasing the heatsink’s dimensions.

Choosing Materials for Your Miniature Heatsink
The choice of materials plays a crucial role in the performance of your miniature heatsink. The two most commonly used materials for heatsinks are aluminum and copper.
Aluminum Heatsinks
Aluminum is a popular choice for heatsinks due to its affordability, lightweight nature, and good thermal conductivity. It is also relatively easy to work with, making it suitable for DIY projects.
Advantages of aluminum heatsinks:
– Lightweight and easy to handle
– Good thermal conductivity
– Affordable and readily available
– Easy to machine and shape
Disadvantages of aluminum heatsinks:
– Lower thermal conductivity compared to copper
– May require additional surface treatments for optimal performance
Copper Heatsinks
Copper is renowned for its excellent thermal conductivity, making it an ideal material for high-performance heatsinks. However, it is heavier and more expensive than aluminum.
Advantages of copper heatsinks:
– Excellent thermal conductivity
– Suitable for high-heat applications
– Durable and long-lasting
Disadvantages of copper heatsinks:
– Heavier than aluminum
– More expensive
– Harder to machine and shape compared to aluminum
Material Comparison
| Material | Thermal Conductivity (W/mK) | Density (g/cm³) | Cost |
|---|---|---|---|
| Aluminum | 205 | 2.70 | Low |
| Copper | 401 | 8.96 | High |

Designing Your Miniature Heatsink
Designing a miniature heatsink requires careful consideration of several factors, including the heat generation of the component, available space, and desired performance. Here are some key steps to follow when designing your heatsink:
-
Determine the heat generation: Identify the amount of heat generated by the component you want to cool. This information can usually be found in the component’s datasheet or specifications.
-
Consider the available space: Measure the dimensions of the area where you plan to install the heatsink. Ensure that your heatsink design fits within these constraints.
-
Choose the heatsink geometry: Decide on the shape and features of your heatsink. Common geometries include flat plates, pin fins, and extruded profiles. Consider factors such as surface area, airflow, and manufacturability.
-
Calculate the thermal resistance: Thermal resistance is a measure of how effectively a heatsink can dissipate heat. Use thermal resistance calculations to estimate the performance of your heatsink design. Lower thermal resistance indicates better heat dissipation.
-
Optimize the design: Iterate on your design to optimize its performance. This may involve adjusting fin spacing, thickness, or material choice based on the calculations and simulations.
Heatsink Geometry Examples
| Geometry | Description | Advantages | Disadvantages |
|---|---|---|---|
| Flat Plate | Simple flat surface with no additional features | Easy to manufacture, compact | Limited surface area, lower performance |
| Pin Fins | Array of cylindrical or rectangular fins | High surface area, good airflow | More complex to manufacture |
| Extruded Profile | Continuous fins extruded from a base plate | Good balance of surface area and manufacturability | May require specialized tooling |

Manufacturing Your Miniature Heatsink
Once you have finalized your heatsink design, it’s time to bring it to life through manufacturing. There are several methods you can use to create your miniature heatsink, depending on your available tools and resources.
CNC Machining
CNC (Computer Numerical Control) machining is a precise and automated method for creating heatsinks. It involves using a computer-controlled machine to cut and shape the heatsink material based on your design.
Advantages of CNC machining:
– High precision and accuracy
– Repeatability for large-scale production
– Suitable for complex geometries
Disadvantages of CNC machining:
– Requires access to specialized equipment
– Can be expensive for small-scale or one-off projects
3D Printing
3D printing has revolutionized the world of manufacturing, allowing for rapid prototyping and customization. With the right materials and printer settings, you can 3D print your miniature heatsink.
Advantages of 3D printing:
– Rapid prototyping and iteration
– Ability to create complex geometries
– Affordable for small-scale projects
Disadvantages of 3D printing:
– Limited material options with suitable thermal properties
– Potential for lower accuracy and surface finish compared to machining
Manual Fabrication
For those with limited access to advanced manufacturing technologies, manual fabrication techniques can still be used to create a miniature heatsink. This may involve cutting, drilling, and shaping the heatsink material using hand tools.
Advantages of manual fabrication:
– Accessible to a wide range of DIY enthusiasts
– Low cost and minimal equipment requirements
Disadvantages of manual fabrication:
– Time-consuming and labor-intensive
– Limited precision and accuracy compared to automated methods
Assembling and Mounting Your Miniature Heatsink
Once you have manufactured your miniature heatsink, the next step is to assemble and mount it onto the heat-generating component. Proper assembly and mounting ensure optimal heat transfer and performance.
Surface Preparation
Before mounting the heatsink, it’s important to prepare the surfaces of both the heatsink and the component. Clean the surfaces thoroughly to remove any dust, grease, or debris. A clean surface ensures better thermal contact and heat transfer.
Thermal Interface Materials
Thermal interface materials (TIMs) are substances applied between the heatsink and the component to enhance heat transfer. Common TIMs include thermal paste, thermal pads, and thermal adhesives.
| TIM Type | Description | Advantages | Disadvantages |
|---|---|---|---|
| Thermal Paste | Viscous compound applied between surfaces | High thermal conductivity, fills gaps | Can be messy to apply, requires clamping |
| Thermal Pad | Pre-cut solid material with adhesive backing | Easy to apply, no mess | Lower thermal conductivity compared to paste |
| Thermal Adhesive | Adhesive compound that bonds surfaces together | Strong bond, no clamping required | Permanent attachment, difficult to remove |
Mounting Methods
There are several methods for mounting your miniature heatsink onto the component. The choice of mounting method depends on factors such as the component type, available space, and permanence of the installation.
| Mounting Method | Description | Advantages | Disadvantages |
|---|---|---|---|
| Thermal Adhesive | Bonding the heatsink using thermal adhesive | Strong bond, no additional hardware required | Permanent attachment, difficult to remove |
| Mechanical Fasteners | Using screws or clips to secure the heatsink | Secure and removable | Requires additional hardware and mounting holes |
| Pressure Mounting | Applying pressure using springs or clamps | Adjustable pressure, no permanent modification | May require custom mounting hardware |
Testing and Optimization
After assembling and mounting your miniature heatsink, it’s essential to test its performance and make any necessary optimizations. Testing allows you to verify that the heatsink is effectively dissipating heat and keeping the component within its safe operating temperature range.
Temperature Monitoring
To assess the performance of your heatsink, you need to monitor the temperature of the component it is cooling. There are several methods for temperature monitoring, including:
- Thermocouples: Thermocouples are Temperature Sensors that can be attached to the component or heatsink surface to measure the temperature directly.
- Infrared thermometers: Non-contact infrared thermometers allow you to measure the surface temperature of the component or heatsink from a distance.
- Embedded temperature sensors: Some components, such as microprocessors, have built-in temperature sensors that can be accessed through software or firmware.
Optimization Techniques
If your initial tests reveal that the heatsink is not performing as expected, there are several optimization techniques you can consider:
-
Increase surface area: Add more fins or adjust the fin geometry to increase the surface area for better heat dissipation.
-
Improve thermal interface: Ensure that the thermal interface material is applied properly and consider using a higher-performance TIM if necessary.
-
Enhance airflow: Optimize the airflow around the heatsink by adding fans or improving the overall system airflow.
-
Modify mounting pressure: Adjust the mounting pressure to ensure proper contact between the heatsink and the component.
Safety Considerations
When working with heatsinks and electronic components, it’s important to prioritize safety. Here are some safety considerations to keep in mind:
-
Electrical safety: Ensure that the electronic component is powered off and disconnected from any power sources before installing the heatsink.
-
Thermal safety: Be cautious when handling hot components or heatsinks. Use appropriate protective gear, such as heat-resistant gloves, if necessary.
-
Mechanical safety: Take care when using tools and handling sharp edges or fins of the heatsink to avoid cuts or injuries.
-
Material safety: Some heatsink materials, such as certain thermal adhesives, may have specific handling or disposal requirements. Follow the manufacturer’s guidelines and safety data sheets.
Frequently Asked Questions (FAQ)
-
Can I use a heatsink without a fan?
Yes, passive heatsinks can be used without a fan in low-heat applications or when natural convection is sufficient for cooling. However, for high-heat components, adding a fan can significantly improve the heatsink’s performance. -
How do I choose the right size heatsink for my component?
The size of the heatsink depends on the heat generation of the component and the available space. As a general rule, larger heatsinks with more surface area provide better cooling. Refer to the component’s datasheet or consult with the manufacturer for specific heatsink recommendations. -
Can I mix different metals when making a heatsink?
While it’s possible to use different metals in a heatsink, it’s generally recommended to stick with one material to avoid potential issues such as galvanic corrosion or thermal expansion mismatches. If using different metals is necessary, ensure proper insulation and consider the compatibility of the materials. -
How often should I replace the thermal interface material?
The lifespan of thermal interface materials varies depending on the type and quality of the material. In general, thermal paste should be replaced if it dries out or becomes contaminated. Thermal pads and adhesives are usually more durable and may not require replacement unless they are damaged or lose their effectiveness over time. -
Can I paint my heatsink?
Painting a heatsink can affect its thermal performance. Most paints act as thermal insulators and can hinder heat dissipation. If you need to paint your heatsink for aesthetic reasons, use a thin layer of paint specifically designed for high-temperature applications and ensure that it does not obstruct any air gaps or fins.
Conclusion
Building a miniature heatsink is a rewarding and educational project for anyone interested in electronics and thermal management. By understanding the principles of heat dissipation, selecting the right materials, and following the design and manufacturing steps outlined in this guide, you can create an effective and compact heatsink for your electronic devices.
Remember to prioritize safety, test your heatsink’s performance, and make optimizations as needed. With practice and experimentation, you can develop your skills in heatsink design and push the boundaries of miniature thermal solutions.
Happy building, and may your electronic projects stay cool and reliable with your custom miniature heatsinks!

No responses yet