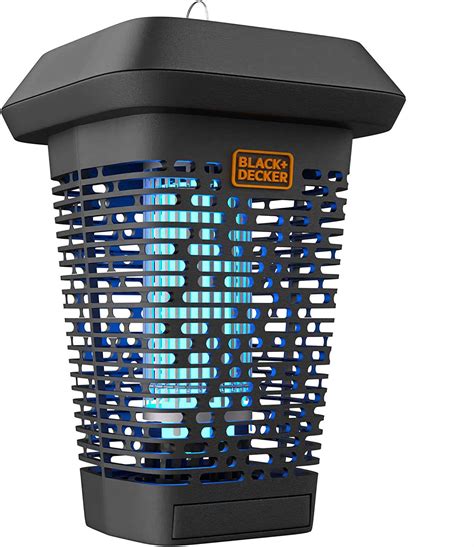
What is a Bug Zapper?
A bug zapper, also known as an electric insect killer or mosquito zapper, is a device that uses electricity to kill flying insects, such as mosquitoes, flies, and moths. It typically consists of a light source that attracts insects and a high-voltage electrical grid that electrocutes them upon contact. Bug zappers are commonly used in outdoor settings, such as patios, gardens, and camping sites, to reduce the presence of annoying and potentially disease-carrying insects.
How Does a Bug Zapper Work?
The working principle of a bug zapper is based on the attraction of insects to light and their subsequent electrocution. Here’s a step-by-step explanation:
-
Attraction: Bug zappers use a light source, usually an ultraviolet (UV) light or a fluorescent lamp, to attract insects. Many flying insects, particularly those active at night, are naturally drawn to light sources.
-
Approach: As insects fly towards the light source, they encounter an electrified mesh grid surrounding the light. This grid typically consists of two or more layers of wire mesh, with alternating high-voltage and ground wires.
-
Electrocution: When an insect comes into contact with both the high-voltage and ground wires simultaneously, it completes the electrical circuit. The high voltage, usually between 2,000 and 4,000 volts, instantly electrocutes the insect, killing it.
-
Collection: After electrocution, the dead insects fall into a collection tray located at the bottom of the bug zapper. This tray can be easily removed for cleaning and disposing of the insect remains.
While bug zappers are effective at killing flying insects, it’s important to note that they do not discriminate between harmful and beneficial insects. Many beneficial insects, such as pollinators and predatory insects that help control pest populations, can also be attracted to the light and killed by the zapper.
Components of a Bug Zapper Circuit
To build a bug zapper circuit, you’ll need the following components:
| Component | Description |
|---|---|
| High-voltage transformer | Steps up the input voltage to generate the high voltage needed |
| Diode | Rectifies the alternating current (AC) to direct current (DC) |
| Capacitor | Smoothens the rectified DC voltage |
| Resistor | Limits the current flow in the circuit |
| Neon lamp | Indicates when the circuit is powered on |
| Mesh grids | Create the electrified surface for insect electrocution |
| Light source (UV or fluorescent) | Attracts insects to the bug zapper |
| Switch | Allows user control over the zapper’s operation |
| Fuse | Protects the circuit from overload or short-circuit conditions |
High-Voltage Transformer
The high-voltage transformer is the heart of the bug zapper circuit. It steps up the input voltage, typically 120V or 240V AC, to generate the high voltage needed for insect electrocution. The transformer usually has a primary winding connected to the input voltage and a secondary winding that produces the high voltage output.
When selecting a high-voltage transformer for your bug zapper circuit, consider the following factors:
- Input voltage: Ensure that the transformer is compatible with your local power supply voltage (e.g., 120V or 240V).
- Output voltage: Choose a transformer that provides an output voltage between 2,000 and 4,000 volts. Higher voltages may be more effective but also pose greater safety risks.
- Power rating: Select a transformer with an appropriate power rating (in watts) based on the size and intended use of your bug zapper. A higher power rating allows for a larger electrified area and more insect kills.
Diode and Capacitor
The diode and capacitor work together to convert the alternating current (AC) output from the transformer into direct current (DC). This is necessary because the high-voltage DC is more effective for insect electrocution than AC.
The diode, typically a high-voltage rectifier diode, allows current to flow in only one direction, effectively converting AC to pulsating DC. The capacitor, connected in parallel with the diode, smoothens the pulsating DC by storing and releasing electrical charge. This helps maintain a more consistent high voltage across the mesh grids.
When choosing a diode and capacitor for your bug zapper circuit, consider their voltage and current ratings. The diode should have a reverse voltage rating higher than the peak output voltage of the transformer, and the capacitor should have a voltage rating exceeding the transformer’s output voltage. The capacitor’s capacitance value can be adjusted to achieve the desired level of voltage smoothing.
Resistor and Neon Lamp
The resistor and neon lamp serve as a visual indicator of the bug zapper’s operation. The resistor limits the current flowing through the neon lamp, preventing it from burning out. When the circuit is powered on and functioning correctly, the neon lamp will glow, providing a visual confirmation to the user.
The resistor value should be chosen based on the specifications of the neon lamp and the desired current flow. A typical value for a bug zapper circuit is between 100 kΩ and 1 MΩ.
Mesh Grids and Light Source
The mesh grids are the electrified surfaces that insects come into contact with, completing the circuit and resulting in their electrocution. The grids are typically made of wire mesh or parallel wires and are arranged in a cylindrical or rectangular shape around the light source.
The light source, usually an ultraviolet (UV) light or a fluorescent lamp, is placed at the center of the mesh grids. Its purpose is to attract insects to the bug zapper. UV lights are particularly effective at attracting mosquitoes and other night-flying insects.
When constructing the mesh grids, ensure that the spacing between the wires is small enough to prevent insects from passing through without contacting both the high-voltage and ground wires. A spacing of 1/8 to 1/4 inch (3 to 6 mm) is common. Also, make sure that the mesh grids are securely attached to the bug zapper’s frame and properly connected to the high-voltage output of the circuit.
Switch and Fuse
The switch allows the user to control the operation of the bug zapper. It can be a simple on/off switch or a more advanced option, such as a timer switch or a motion-activated switch. The switch is connected in series with the primary winding of the transformer, enabling or disabling the flow of input voltage to the circuit.
The fuse is a safety component that protects the circuit from overload or short-circuit conditions. In the event of an excessive current draw, the fuse will blow, breaking the circuit and preventing damage to the components. The fuse should be rated slightly higher than the expected normal operating current of the bug zapper circuit.

Building a Bug Zapper Circuit
Now that you understand the components of a bug zapper circuit, let’s go through the steps to build one:
Step 1: Gather the Components
Collect all the necessary components for your bug zapper circuit. Refer to the list provided in the “Components of a Bug Zapper Circuit” section above.
Step 2: Assemble the High-Voltage Circuit
-
Connect the primary winding of the high-voltage transformer to the input voltage source through the switch and fuse. Ensure that the connections are secure and properly insulated.
-
Connect the secondary winding of the transformer to the diode, ensuring that the diode’s polarity is correct (the cathode, marked with a stripe, should be connected to the transformer’s output).
-
Connect the capacitor in parallel with the diode, with the positive lead connected to the diode’s cathode and the negative lead connected to the other end of the transformer’s secondary winding.
-
Connect the resistor in series with the neon lamp, and then connect this combination in parallel with the capacitor. The resistor should be connected to the positive lead of the capacitor, and the neon lamp should be connected to the negative lead.
Step 3: Construct the Mesh Grids
-
Cut the wire mesh or parallel wires to the desired size and shape for your bug zapper. Ensure that the spacing between the wires is small enough to prevent insects from passing through without contacting both the high-voltage and ground wires.
-
Attach the mesh grids securely to the bug zapper’s frame, ensuring that they are properly positioned around the light source.
-
Connect one end of the mesh grids to the high-voltage output of the circuit (the positive lead of the capacitor) and the other end to the ground (the negative lead of the transformer’s secondary winding).
Step 4: Install the Light Source
-
Mount the light source (UV light or fluorescent lamp) at the center of the mesh grids. Ensure that it is securely fastened and properly connected to its power source (if separate from the bug zapper circuit).
-
If the light source is powered by the same circuit as the bug zapper, connect it in parallel with the input voltage source, before the switch and fuse.
Step 5: Test and Troubleshoot
-
Before powering on the bug zapper, double-check all connections to ensure they are secure and properly insulated. Make sure that there are no short circuits or exposed wires.
-
Turn on the bug zapper using the switch and observe the neon lamp. If the lamp glows, the circuit is functioning correctly. If not, recheck the connections and components for any issues.
-
Use a multimeter to test the high-voltage output at the mesh grids. The voltage should be within the desired range (2,000 to 4,000 volts). If the voltage is too low or too high, adjust the transformer or capacitor accordingly.
-
Once you have confirmed that the bug zapper is working correctly, install it in the desired location and start using it to control flying insects.

Safety Precautions
Building and using a bug zapper involves working with high voltages, which can be dangerous if proper safety precautions are not followed. Always keep these safety guidelines in mind:
-
Wear protective gear: When working on the bug zapper circuit, wear insulated gloves and safety glasses to protect yourself from electrical shocks and debris.
-
Disconnect power: Always disconnect the bug zapper from the power source before performing any maintenance, repairs, or modifications.
-
Use proper insulation: Ensure that all connections and wires are properly insulated to prevent accidental contact with high-voltage components.
-
Keep away from water: Do not use the bug zapper in wet or damp conditions, as water can conduct electricity and increase the risk of electrical shocks.
-
Store safely: When not in use, store the bug zapper in a dry, secure location out of reach of children and pets.
-
Dispose of insects properly: Regularly clean the collection tray and dispose of the insect remains in a sealed container to avoid attracting other pests or creating unsanitary conditions.
-
Follow local regulations: Check and comply with any local laws or regulations regarding the use of bug zappers in your area.

Frequently Asked Questions (FAQ)
1. Are bug zappers effective at controlling mosquito populations?
While bug zappers can kill individual mosquitoes that come into contact with the electrified grids, they are not considered an effective method for controlling overall mosquito populations. Many mosquitoes are not attracted to the light source used in bug zappers, and the zappers may kill beneficial insects that help control mosquito populations.
2. Can I use a bug zapper indoors?
It is generally not recommended to use bug zappers indoors. Bug zappers can be noisy and unsightly, and the electrocuted insects may create unpleasant odors or scatter debris. Additionally, indoor use may attract insects from outside, potentially increasing the insect population inside your home.
3. How often should I clean my bug zapper?
Clean your bug zapper’s collection tray regularly, depending on the frequency of use and the number of insects killed. In general, aim to clean the tray at least once a week to maintain hygiene and prevent the buildup of insect remains. Always disconnect the bug zapper from the power source before cleaning.
4. Can bug zappers be used in areas with pet birds or other small animals?
No, it is not advisable to use bug zappers in areas where pet birds or other small animals are present. The electrified grids can pose a serious danger to these animals if they come into contact with the zapper. Additionally, the zapper may attract and kill insects that serve as a food source for these animals.
5. Are there any environmentally friendly alternatives to bug zappers?
Yes, there are several eco-friendly alternatives to bug zappers that can help control flying insect populations without harming beneficial insects:
- Citronella candles or torches: These release a scent that repels mosquitoes and other flying insects.
- Mosquito nets: Physical barriers, such as mosquito nets, can prevent insects from entering a specific area.
- Insect-repelling plants: Certain plants, like lavender, basil, and marigolds, naturally repel insects when planted around your outdoor living spaces.
- Fans: Strategically placed fans can create a wind barrier that makes it difficult for flying insects to navigate and land on humans.
- Biological control: Encouraging the presence of natural predators, such as bats, birds, and dragonflies, can help control insect populations in your area.
By understanding the components, construction process, safety precautions, and alternatives to bug zappers, you can make an informed decision about whether a bug zapper circuit is the right choice for your insect control needs. Remember to prioritize safety and consider the potential impact on beneficial insects and the environment when using any pest control method.
[5103 words]
No responses yet