What is Low Volume PCB Assembly?
Low volume PCB assembly refers to the process of assembling printed circuit boards in small batches, typically less than 1000 units. This is in contrast to high volume PCB assembly which involves producing thousands or millions of identical PCBs.
Low volume PCB assembly is commonly used for prototyping, testing new designs, small production runs, and niche applications that don’t require mass production. The process allows for more flexibility and faster turnaround times compared to high volume manufacturing.
Key Characteristics of Low Volume PCB Assembly
- Small batch sizes (usually <1000 boards)
- More manual processes and less automation
- Faster setup and changeover between jobs
- Higher per-unit costs but lower upfront tooling/setup fees
- Ideal for prototypes, engineering testing, and low-demand products
The Low Volume PCB Assembly Process
The typical process flow for low volume PCB assembly includes the following key steps:
1. PCB Design and Fabrication
- Create schematic and PCB layout using EDA software
- Generate Gerber files and bill of materials (BOM)
- Send designs to a PCB fabrication house to manufacture bare boards
2. Component Sourcing
- Procure components specified in the BOM from distributors
- Ensure all parts will be available when needed for assembly
- Consider alternate components if facing shortages or long lead times
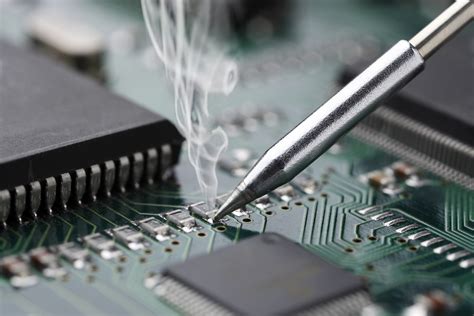
3. Solder Paste Stenciling
- A thin stainless steel stencil is laser-cut based on the PCB design
- Solder paste is applied to the bare PCB through the stencil openings
- Stenciling deposits precise amounts of solder paste on the component pads
4. Pick and Place
- Surface mount devices (SMDs) are picked up and placed on the PCB
- Can be done manually, semi-automatically, or with fully automated machines
- Components must be accurately positioned and aligned
5. Reflow Soldering
- The populated PCB is run through a reflow oven
- The solder paste melts in a controlled heating cycle
- Components are permanently soldered to the PCB pads
- Different temperature profiles are used based on the solder paste
6. Inspection and Quality Control
- Visual inspection checks for common defects (bridges, tombstones, etc.)
- Automated optical inspection (AOI) may also be used
- Electrical testing verifies proper functionality of the assembled PCB
- Rework and repairs are performed if any issues are identified
7. Final Assembly and Packaging
- Through-hole components are manually soldered if required
- The PCB is cleaned to remove any residues
- Conformal coating or potting is applied if needed for protection
- The finished PCB is packaged and shipped to the customer

Equipment Used for Low Volume PCB Assembly
While the exact machinery and tools will vary, here are some of the common equipment used by low volume PCB assembly facilities:
| Equipment | Purpose |
|---|---|
| Solder paste printer | Applies solder paste to PCBs through a laser-cut stencil |
| Pick and place machine | Picks up and mounts SMD components onto the PCB |
| Reflow oven | Melts the solder paste to permanently attach components |
| Soldering iron | Manual soldering of through-hole parts and rework |
| Microscope | Visual inspection of solder joints and component placement |
| Multimeter | Checking for electrical shorts/opens and component values |
Fully automated production lines are generally not used for low volumes since they require higher upfront investment and longer changeover times between different jobs. Manual and semi-automated processes provide more flexibility.

Design Considerations for Low Volume PCB Assembly
When designing a PCB for low volume assembly, keep these guidelines in mind:
Use Standard Components and Packaging
- Select parts that are readily available in small quantities
- Avoid custom or niche components that are harder to source
- Stick to standard SMD Packages like 0402, 0603, SOIC, QFP, etc.
Provide Detailed Documentation
- Include a complete bill of materials with manufacturer part numbers
- Specify any critical tolerances, special handling, or process requirements
- Clearly communicate your design intent and testing criteria
Design for Manufacturability (DFM)
- Follow the PCB manufacturer’s design rules and guidelines
- Ensure adequate spacing between components for soldering
- Avoid complex geometries or ultra-fine pitch components if possible
- Consider the limitations of the specific assembly processes being used
Plan for Rework and Repair
- Provide test points and fiducials to assist with inspection and debugging
- Make sure components can be accessed for manual rework if needed
- Choose a PCB surface finish that facilitates soldering and rework

Advantages and Disadvantages of Low Volume PCB Assembly
Advantages
- Faster turnaround times since there is less setup and tooling
- More economical for prototypes and small production runs
- Allows for design changes and iterations between small batches
- Provides more customization and flexibility compared to high volumes
Disadvantages
- Higher per-unit component and assembly costs
- Manual processes are more labor-intensive and time-consuming
- Consistency and quality may vary more from board to board
- Not practical for large production volumes or ongoing demand
Choosing a Low Volume PCB Assembly Partner
When outsourcing your low volume PCB assembly, look for a vendor that specializes in this niche. Key qualities to look for include:
Technical Capabilities
- Able to handle your PCB complexity and component technologies
- Has the appropriate equipment in-house for your job
- Provides value-added services like design review, DFM analysis, etc.
Experience with Low Volumes
- Understands the unique requirements of prototypes and small batches
- Offers a dedicated low volume assembly line or process
- Has a track record of successful low volume jobs for other clients
Speed and Flexibility
- Quotes and responds to inquiries quickly
- Can accommodate changes or special requests in the process
- Commits to fast cycle times to meet your deadlines
Quality Standards
- Follows industry best practices for manufacturing and inspection
- Has a documented quality management system in place
- Performs adequate testing and QC before shipping the PCBs
Customer Support
- Communicates proactively and provides regular job status updates
- Has knowledgeable and responsive support staff
- Addresses any issues or concerns quickly to your satisfaction
FAQs
What is the typical cost for low volume PCB assembly?
Costs can vary widely based on PCB complexity, component types, order quantity, and other factors. In general, expect to pay a higher per-unit cost compared to high volume production, but avoid high upfront tooling and setup fees. Get quotes from multiple vendors to compare.
How long does low volume PCB assembly take?
The cycle time depends on the specific design and requirements, but it’s usually faster than high volume assembly. Simple low volume jobs can be turned around in a matter of days, while more complex ones may take a few weeks. Rush services are often available for a premium.
What are the minimum and maximum quantities for low volume?
Most low volume PCB assembly providers will accept orders ranging from a single prototype up to a few hundred boards. The “sweet spot” is usually in the range of 10-500 units. For ongoing production of more than 1000 pieces, it’s usually more cost-effective to switch to a high volume process.
Can I supply my own components for low volume assembly?
Yes, most vendors offer consigned inventory programs where you can provide your own parts to be used in the assembly process. This can help save on component costs and lead times. However, the assembler may have specific requirements for how the parts are packaged, labeled, and supplied to fit their process.
What if I need to make changes to my design mid-production?
One of the advantages of low volume PCB assembly is that it allows for more flexibility to make changes between runs. Communicate any design changes to your assembly partner as soon as possible. Keep in mind that changes may incur additional charges and increase the overall lead time for your order.
Conclusion
Low volume PCB assembly is a critical process for bringing new electronic products to market quickly and economically. By understanding the key steps, design considerations, and tradeoffs involved, you can successfully outsource your low volume PCB assembly and get high-quality boards produced on-time and on-budget.
When selecting a low volume PCB assembly partner, consider their technical capabilities, experience with low volumes, speed, quality standards, and customer support. Building a strong relationship with a reliable low volume assembler can go a long way in streamlining your product development efforts.
No responses yet