Introduction to SMT Stencils
Surface Mount Technology (SMT) stencils are essential tools in the electronics manufacturing industry. They play a crucial role in the accurate and precise application of solder paste onto printed circuit boards (PCBs) during the SMT Assembly process. SMT stencils ensure that the right amount of solder paste is deposited on the PCB pads, enabling the proper placement and soldering of surface mount components.
In this Comprehensive Guide, we will dive deep into the world of SMT stencils, exploring their types, materials, design considerations, and best practices for optimal performance in the SMT assembly process.
What are SMT Stencils?
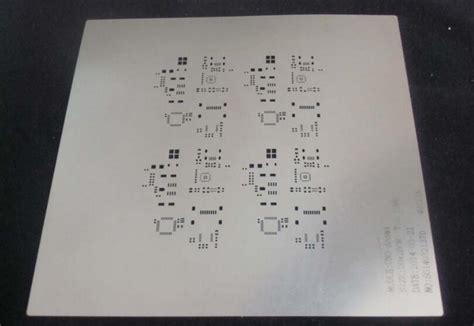
SMT stencils are thin, flat sheets of metal or other materials with precisely cut openings that correspond to the PCB pads where solder paste needs to be applied. These openings, also known as apertures, allow the solder paste to be deposited onto the PCB pads in a controlled and consistent manner.
The stencil is placed on top of the PCB, and solder paste is then spread across the stencil using a squeegee. The solder paste fills the apertures and is deposited onto the PCB pads as the squeegee moves across the stencil. After the solder paste is applied, the stencil is carefully removed, leaving the precise amount of solder paste on the PCB pads, ready for component placement.
Key Functions of SMT Stencils
-
Precise Solder Paste Deposition: SMT stencils ensure that the correct amount of solder paste is applied to each PCB pad, promoting proper component attachment and soldering.
-
Consistent Solder Paste Volume: The use of stencils guarantees that the solder paste volume remains consistent across all PCB pads, minimizing the risk of defects such as bridging or insufficient solder joints.
-
Improved Manufacturing Efficiency: SMT stencils enable the rapid and accurate application of solder paste, significantly reducing the time and effort required compared to manual methods.
-
Enhanced Product Quality: By providing precise solder paste deposition, SMT stencils contribute to improved product quality, reliability, and performance.

Types of SMT Stencils
There are several types of SMT stencils available, each with its own characteristics and advantages. The choice of stencil type depends on factors such as the PCB design, component size, and manufacturing requirements. Let’s explore the most common types of SMT stencils:
1. Laser-Cut Stencils
Laser-cut stencils are created using high-precision laser cutting technology. The laser beam accurately cuts the apertures in the stencil material according to the PCB pad layout. Laser-cut stencils offer several advantages:
- High precision and accuracy
- Smooth aperture walls for better solder paste release
- Suitable for fine-pitch components and intricate designs
- Quick turnaround time for stencil fabrication
2. Electroformed Stencils
Electroformed stencils are manufactured using an electroplating process. A photoresist pattern is created on a conductive substrate, and the stencil material, typically nickel, is electroplated onto the substrate. The photoresist is then removed, leaving the desired aperture pattern. Electroformed stencils provide:
- Excellent dimensional accuracy
- Smooth aperture walls for optimal solder paste release
- Ability to produce very fine apertures for miniature components
- Durability and long lifespan
3. Chemically Etched Stencils
Chemically etched stencils are produced by selectively etching the stencil material using a chemical process. A photoresist pattern is applied to the stencil material, and the exposed areas are etched away, creating the apertures. Chemically etched stencils offer:
- Cost-effectiveness for large-volume production
- Suitability for less complex PCB designs
- Reasonable accuracy and consistency
4. Additive Manufactured Stencils
Additive manufactured stencils, also known as 3D-printed stencils, are created using additive manufacturing techniques such as selective laser sintering (SLS) or direct metal laser sintering (DMLS). These stencils provide:
- Rapid prototyping capabilities
- Ability to create complex and intricate aperture shapes
- Potential for customization and design flexibility

Stencil Materials
The choice of stencil material is crucial for achieving optimal solder paste deposition and stencil performance. The most common materials used for SMT stencils are:
1. Stainless Steel
Stainless steel is the most widely used material for SMT stencils due to its durability, stability, and excellent solder paste release properties. It offers:
- High strength and rigidity
- Resistance to wear and tear
- Compatibility with various solder paste formulations
- Ease of cleaning and maintenance
2. Nickel
Nickel stencils, particularly electroformed nickel stencils, are known for their high precision and smooth aperture walls. They provide:
- Excellent dimensional accuracy
- Smooth surface finish for optimal solder paste release
- Durability and long lifespan
- Suitability for fine-pitch and ultra-fine-pitch applications
3. Polyimide
Polyimide stencils, also known as polymer stencils, are made from high-performance plastic materials. They offer:
- Flexibility and conformability to uneven PCB surfaces
- Non-stick properties for improved solder paste release
- Resistance to scratches and dents
- Lightweight and easy handling

Stencil Design Considerations
Designing an effective SMT stencil requires careful consideration of various factors to ensure optimal solder paste deposition and assembly quality. Here are some key design considerations:
1. Aperture Size and Shape
The size and shape of the apertures in the stencil determine the amount and distribution of solder paste on the PCB pads. Consider the following:
- Aperture width and length should match the PCB pad dimensions
- Aperture shape can be rectangular, circular, or custom-designed based on the pad geometry
- Aperture area ratio (AAR) should be optimized for proper solder paste release
2. Stencil Thickness
The thickness of the stencil directly affects the volume of solder paste deposited. Consider the following:
- Thicker stencils deposit more solder paste, while thinner stencils deposit less
- Stencil thickness should be selected based on the component size, pitch, and solder paste requirements
- Typical stencil thicknesses range from 0.1 mm to 0.2 mm (4 to 8 mils)
3. Aperture Wall Smoothness
The smoothness of the aperture walls influences the release of solder paste from the stencil. Consider the following:
- Smooth aperture walls ensure consistent and complete solder paste release
- Rough or uneven aperture walls can cause solder paste to stick or result in inconsistent deposition
- Laser-cut and electroformed stencils typically have smoother aperture walls compared to chemically etched stencils
4. Stencil Frame and Mounting
The stencil frame provides stability and facilitates the mounting of the stencil onto the printing machine. Consider the following:
- Stencil frames are typically made of aluminum or stainless steel
- The frame should be rigid and flat to ensure accurate stencil positioning
- Proper tensioning of the stencil in the frame is crucial for consistent solder paste deposition
- Mounting holes and fiducials should be incorporated into the stencil design for precise alignment
5. Stencil Aperture Aspect Ratio
The aspect ratio of the stencil apertures, which is the ratio of aperture width to stencil thickness, affects the solder paste release and print quality. Consider the following:
- Higher aspect ratios (larger aperture width relative to thickness) facilitate better solder paste release
- Lower aspect ratios (smaller aperture width relative to thickness) may result in solder paste sticking or incomplete release
- Optimal aspect ratio depends on the solder paste properties and printing process parameters
Best Practices for SMT Stencil Usage
To achieve the best results and maximize the benefits of SMT stencils, follow these best practices:
1. Stencil Cleaning and Maintenance
Regular cleaning and maintenance of the stencil are essential to ensure consistent solder paste deposition and prevent defects. Consider the following:
- Clean the stencil after each print cycle or as needed to remove solder paste residue
- Use appropriate cleaning agents and methods recommended by the stencil manufacturer
- Inspect the stencil for any damage, wear, or contamination and address issues promptly
- Store the stencil properly to prevent damage and contamination when not in use
2. Solder Paste Selection and Handling
Selecting the right solder paste and handling it properly is crucial for optimal stencil printing performance. Consider the following:
- Choose a solder paste that is compatible with the stencil material and PCB Surface Finish
- Ensure proper storage and handling of solder paste to maintain its rheological properties
- Follow the solder paste manufacturer’s recommendations for printing parameters and conditions
- Regularly monitor and control the solder paste viscosity and temperature during the printing process
3. Printing Process Optimization
Optimizing the stencil printing process parameters ensures consistent and reliable solder paste deposition. Consider the following:
- Adjust the squeegee pressure, speed, and angle for optimal solder paste transfer
- Maintain proper alignment between the stencil and PCB using fiducials and vision systems
- Control the printing environment, including temperature and humidity, to ensure consistent solder paste behavior
- Implement a quality control process to monitor and address any printing defects or inconsistencies
4. Stencil Design Verification and Testing
Verifying the stencil design and conducting thorough testing before production can help identify and resolve any potential issues. Consider the following:
- Perform a design review to ensure the stencil apertures match the PCB pad layout and component requirements
- Conduct solder paste volume and height measurements to validate the stencil performance
- Perform trial runs and evaluate the solder paste deposition quality and consistency
- Make necessary adjustments to the stencil design or printing parameters based on the testing results
Frequently Asked Questions (FAQ)
-
What is the difference between a stencil and a solder paste mask?
A stencil is a standalone tool used for applying solder paste onto the PCB pads, while a solder paste mask is a layer integrated into the PCB design that defines the areas where solder paste should be applied. -
How often should I clean my SMT stencil?
It is recommended to clean the stencil after each print cycle or as needed, depending on the solder paste type, printing volume, and environmental conditions. Regular cleaning helps maintain consistent solder paste deposition and prevents defects. -
Can I reuse a damaged or worn-out SMT stencil?
It is not advisable to reuse a damaged or worn-out stencil as it can lead to inconsistent solder paste deposition, defects, and reduced assembly quality. If a stencil is damaged or shows signs of wear, it should be replaced to ensure optimal performance. -
How do I choose the right stencil thickness for my application?
The choice of stencil thickness depends on factors such as component size, pitch, and solder paste requirements. Thicker stencils deposit more solder paste, while thinner stencils deposit less. Consult with your stencil manufacturer or follow industry guidelines to determine the appropriate thickness for your specific application. -
Can I use the same SMT stencil for different PCB designs?
Each PCB design requires a specific stencil that matches its pad layout and component requirements. Using the same stencil for different PCB designs may result in improper solder paste deposition and assembly issues. It is recommended to use a dedicated stencil for each unique PCB design to ensure optimal results.
Conclusion
SMT stencils are indispensable tools in the electronics manufacturing industry, enabling precise and consistent solder paste deposition for surface mount assembly. By understanding the types, materials, design considerations, and best practices associated with SMT stencils, manufacturers can optimize their SMT assembly process and achieve high-quality, reliable electronic products.
When selecting and using SMT stencils, it is essential to consider factors such as stencil type, material, aperture design, thickness, and printing process parameters. Regular cleaning, maintenance, and quality control measures should be implemented to ensure consistent performance and minimize defects.
As technology advances and electronic components become smaller and more complex, the importance of SMT stencils continues to grow. By staying up-to-date with the latest developments in stencil technology and following best practices, manufacturers can streamline their SMT assembly process, improve product quality, and meet the evolving demands of the electronics industry.
No responses yet