The Importance of PCB Design
PCB design plays a crucial role in the development of electronic devices. A well-designed PCB ensures that the device functions as intended, is reliable, and can be manufactured cost-effectively. Poor PCB design, on the other hand, can lead to various issues, such as signal integrity problems, electromagnetic interference (EMI), thermal management issues, and manufacturability challenges.
Some of the key benefits of good PCB design include:
- Improved device performance and reliability
- Reduced manufacturing costs
- Faster time-to-market
- Enhanced product quality and customer satisfaction
The PCB Design Process
The PCB design process typically involves several stages, each with its own set of tasks and considerations. These stages include:
1. Schematic Design
The first step in PCB design is to create a schematic diagram that represents the electrical connections between the various components of the device. The schematic is created using a CAD tool and includes symbols for each component, such as resistors, capacitors, integrated circuits (ICs), and connectors. The schematic also defines the power supply, ground connections, and signal paths.
2. Component Selection
Once the schematic is complete, the next step is to select the appropriate components for the PCB. This involves considering factors such as component availability, cost, performance, and physical size. The designer must also ensure that the selected components are compatible with each other and meet the required specifications.
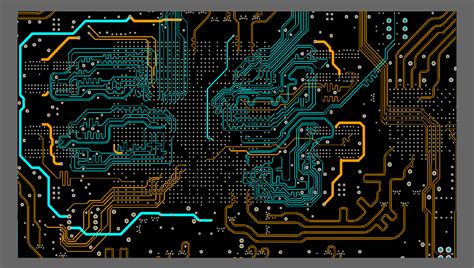
3. PCB Layout
With the schematic and components finalized, the designer can begin the PCB layout process. This involves arranging the components on the board, routing the copper traces to connect them, and adding vias to allow signals to pass between layers. The layout must take into account various design rules and constraints, such as minimum trace width, spacing, and clearance, to ensure that the board can be manufactured reliably.
4. Design Rule Check (DRC) and Verification
After the layout is complete, the designer must perform a design rule check (DRC) to verify that the board meets all the necessary design rules and constraints. This includes checking for issues such as short circuits, open circuits, and signal integrity problems. The designer may also use simulation tools to analyze the board’s performance and identify potential issues.
5. Manufacturing and Assembly
Once the PCB design is verified and approved, it can be sent for manufacturing and assembly. The manufacturing process involves creating the physical board, typically using a photolithographic process to etch the copper traces and drill the holes for vias and components. The components are then soldered onto the board, either manually or using automated assembly equipment.

PCB Design Best Practices
To ensure a successful PCB design, designers should follow several best practices and guidelines. Some of the key best practices include:
1. Use a Consistent Naming Convention
Using a consistent naming convention for components, nets, and other design elements can help make the design more organized and easier to understand. This is particularly important for large and complex designs with many components and connections.
2. Keep Signal Paths Short and Direct
Keeping signal paths as short and direct as possible can help reduce signal integrity issues and improve the overall performance of the board. This can be achieved by carefully placing components and routing traces to minimize the distance between connected components.
3. Use Appropriate Trace Widths and Spacing
Using appropriate trace widths and spacing is essential for ensuring that the board can handle the required current and voltage levels without overheating or causing signal integrity issues. The designer must also consider the manufacturing capabilities of the PCB fabricator and ensure that the trace widths and spacing meet their requirements.
4. Properly Terminate High-Speed Signals
High-speed signals, such as those used in digital interfaces like USB or HDMI, require proper termination to prevent reflections and other signal integrity issues. This can be achieved using techniques such as series termination, parallel termination, or differential pair routing.
5. Use Ground Planes and Power Planes
Using ground planes and power planes can help improve the overall signal integrity and EMI performance of the board. Ground planes provide a low-impedance return path for signals, while power planes distribute power evenly across the board and reduce voltage drop.
6. Consider Thermal Management
Thermal management is an important consideration in PCB design, particularly for high-power devices or those operating in harsh environments. The designer must ensure that the board can dissipate heat effectively to prevent component failure or performance degradation. This can be achieved using techniques such as thermal vias, heatsinks, or fans.

PCB Design Tools and Software
There are many tools and software packages available for PCB design, ranging from simple schematic capture tools to full-featured PCB layout and simulation suites. Some of the most popular PCB design tools include:
| Tool | Description |
|---|---|
| Altium Designer | A comprehensive PCB design tool that includes schematic capture, PCB layout, and simulation capabilities. |
| KiCad | A free and open-source PCB design tool that includes schematic capture, PCB layout, and 3D viewing capabilities. |
| Eagle | A popular PCB design tool that offers schematic capture, PCB layout, and autorouting capabilities. |
| OrCAD | A suite of PCB design tools that includes schematic capture, PCB layout, and simulation capabilities. |
| Mentor Graphics PADS | A PCB design tool that offers schematic capture, PCB layout, and signal integrity analysis capabilities. |
When selecting a PCB design tool, designers should consider factors such as ease of use, feature set, compatibility with other tools and formats, and cost. Many tools offer free trials or educational versions, allowing designers to evaluate them before committing to a purchase.

PCB Manufacturing and Assembly
Once the PCB design is complete, it must be manufactured and assembled to create the final product. PCB manufacturing typically involves the following steps:
- PCB fabrication: The physical board is created by etching the copper traces and drilling holes for vias and components.
- Solder mask application: A protective layer is applied to the board to prevent short circuits and protect the copper traces.
- Silkscreen printing: Text and graphics are printed on the board to identify components and provide assembly instructions.
- Surface finish application: A protective finish, such as HASL (Hot Air Solder Leveling) or ENIG (Electroless Nickel Immersion Gold), is applied to the exposed copper to prevent oxidation and improve solderability.
After the board is manufactured, the components are soldered onto it using either through-hole or surface-mount technology (SMT). Through-hole components have leads that are inserted into holes drilled in the board, while SMT components are placed on the surface of the board and soldered in place.
PCB assembly can be done manually or using automated equipment, such as pick-and-place machines and reflow ovens. Automated assembly is typically used for high-volume production, while manual assembly may be more cost-effective for low-volume or prototype builds.
Frequently Asked Questions (FAQ)
1. What is the difference between a schematic and a PCB layout?
A schematic is a symbolic representation of the electrical connections between components, while a PCB layout is the physical arrangement of those components on the board. The schematic defines the logical connections, while the layout determines the physical placement and routing of components and traces.
2. What is the purpose of a ground plane in PCB design?
A ground plane is a large area of copper on one or more layers of the PCB that is connected to the ground (0V) potential. It serves several purposes, including providing a low-impedance return path for signals, reducing EMI, and improving signal integrity.
3. What is the difference between through-hole and surface-mount technology (SMT)?
Through-hole technology involves inserting component leads through holes drilled in the PCB and soldering them on the opposite side. SMT involves placing components directly on the surface of the board and soldering them in place. SMT allows for smaller components and higher component density, while through-hole technology is often used for larger components or those subject to mechanical stress.
4. What is a via in PCB design?
A via is a small hole drilled through the PCB that allows a signal or power connection to pass from one layer of the board to another. Vias are typically plated with copper to provide an electrical connection between layers.
5. What is the purpose of a solder mask on a PCB?
A solder mask is a protective layer applied to the PCB that covers the copper traces and prevents short circuits. It also helps to prevent solder from bridging between adjacent pads or traces during the assembly process. Solder masks are typically green in color but can also be red, blue, or other colors.
Conclusion
PCB design and layout is a complex process that requires a combination of electrical engineering, mechanical engineering, and CAD skills. By following best practices and using the appropriate tools and techniques, designers can create reliable, high-performance PCBs that meet the required specifications and can be manufactured efficiently.
As electronic devices continue to become more complex and compact, the importance of good PCB design will only continue to grow. By staying up-to-date with the latest design tools, techniques, and manufacturing processes, PCB designers can ensure that they are able to meet the evolving needs of the electronics industry.
No responses yet