Introduction to PCB Visualizer
In the world of Electronic Design, Printed Circuit Boards (PCBs) play a crucial role in connecting various components and ensuring the smooth functioning of electronic devices. However, designing and visualizing PCBs can be a complex and time-consuming task, especially for beginners. This is where PCB Visualizer tools come into play, offering a user-friendly interface and powerful features to simplify the PCB design process.
In this article, we will focus on a free new PCB Visualizer tool called Drill & Slot editor. We will explore its features, benefits, and provide tips and tricks to help you make the most out of this powerful tool.
What is Drill & Slot editor?
Drill & Slot editor is a free, open-source PCB Visualizer tool that allows users to create, edit, and visualize PCB designs with ease. It offers a wide range of features, including:
- Intuitive user interface
- Support for various file formats (Gerber, Excellon, etc.)
- Real-time preview of PCB designs
- Customizable drill and slot sizes
- Export options for manufacturing
With Drill & Slot editor, users can quickly create and modify PCB designs, visualize the results in real-time, and export the final design for manufacturing.

Getting started with Drill & Slot editor
Installation
To get started with Drill & Slot editor, you first need to install the software on your computer. Follow these steps:
- Visit the official Drill & Slot editor website and download the latest version of the software.
- Run the installer and follow the on-screen instructions to complete the installation process.
- Launch Drill & Slot editor from your desktop or start menu.
Creating a new project
Once you have installed Drill & Slot editor, you can create a new project by following these steps:
- Click on the “New Project” button in the main menu.
- Choose the desired board size and layer stack-up.
- Set the grid size and units according to your preferences.
- Click “Create” to start designing your PCB.

Designing PCBs with Drill & Slot editor
Adding components
To add components to your PCB design, follow these steps:
- Click on the “Components” button in the left sidebar.
- Choose the desired component from the library or import a custom component.
- Place the component on the PCB by clicking on the desired location.
- Repeat the process for all the required components.
Routing traces
Once you have placed all the components, you can start routing traces to connect them. Follow these steps:
- Click on the “Routing” button in the left sidebar.
- Choose the desired trace width and clearance.
- Click on the starting pad and then click on the ending pad to create a trace.
- Repeat the process for all the required connections.
Adding drill holes and slots
Drill & Slot editor allows you to easily add drill holes and slots to your PCB design. Follow these steps:
- Click on the “Drill & Slot” button in the left sidebar.
- Choose the desired drill size and type (through-hole or blind/buried).
- Click on the desired location to place the drill hole.
- To add a slot, click and drag to define the slot size and orientation.

Visualizing and exporting PCB designs
Real-time preview
One of the key features of Drill & Slot editor is its real-time preview functionality. As you design your PCB, you can see the results in real-time, allowing you to quickly identify and fix any issues.
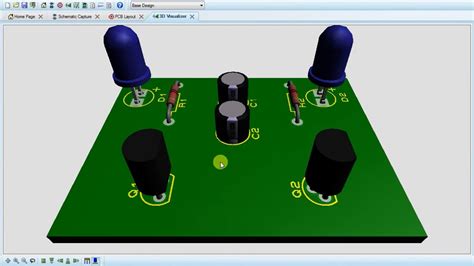
3D visualization
In addition to the 2D view, Drill & Slot editor also offers a 3D visualization mode. This allows you to see your PCB design from various angles and ensure that all the components and traces are properly placed.
Exporting for manufacturing
Once you have finalized your PCB design, you can easily export it for manufacturing. Drill & Slot editor supports various file formats, including:
- Gerber (RS-274X)
- Excellon drill files
- ODB++
- IPC-2581
To export your design, follow these steps:
- Click on the “Export” button in the main menu.
- Choose the desired file format and settings.
- Click “Export” to save the files.
Tips and tricks for using Drill & Slot editor
Use keyboard shortcuts
Drill & Slot editor offers various keyboard shortcuts to speed up your workflow. Some of the most useful shortcuts include:
- Ctrl + Z: Undo last action
- Ctrl + Y: Redo last action
- Ctrl + C: Copy selected object(s)
- Ctrl + V: Paste copied object(s)
- Ctrl + S: Save current project
Organize your components
As your PCB design grows in complexity, it becomes increasingly important to keep your components organized. Drill & Slot editor allows you to create custom component libraries and categories, making it easier to find and place components.
Use the grid and snap settings
To ensure precise placement of components and traces, make use of the grid and snap settings in Drill & Slot editor. You can customize the grid size and snap settings to suit your needs.
Collaborate with others
Drill & Slot editor allows you to easily collaborate with others on PCB designs. You can share your project files with team members, use version control systems like Git, and even collaborate in real-time using the built-in chat feature.
Keep your software up to date
To ensure that you have access to the latest features and bug fixes, make sure to keep your Drill & Slot editor software up to date. The software automatically checks for updates on startup, but you can also manually check for updates from the “Help” menu.
Frequently Asked Questions (FAQ)
-
Is Drill & Slot editor really free?
Yes, Drill & Slot editor is completely free and open-source software. You can use it for personal and commercial projects without any cost. -
Can I use Drill & Slot editor on Mac and Linux?
Yes, Drill & Slot editor is available for Windows, Mac, and Linux operating systems. You can download the appropriate version from the official website. -
Does Drill & Slot editor support multi-layer PCBs?
Yes, Drill & Slot editor supports multi-layer PCBs. You can easily define the layer stack-up and route traces on different layers. -
Can I import custom components into Drill & Slot editor?
Yes, you can import custom components into Drill & Slot editor. The software supports various file formats, including Eagle, KiCad, and Altium. -
Is there a user community for Drill & Slot editor?
Yes, there is an active user community for Drill & Slot editor. You can find forums, tutorials, and resources on the official website and various online communities.
Conclusion
Drill & Slot editor is a powerful and user-friendly PCB Visualizer tool that offers a wide range of features for designing and visualizing PCBs. With its intuitive interface, real-time preview, and export options, Drill & Slot editor is an excellent choice for both beginners and experienced PCB designers.
By following the tips and tricks outlined in this article, you can make the most out of Drill & Slot editor and create professional-quality PCB designs with ease. So why wait? Download Drill & Slot editor today and start designing your next PCB project!
| Feature | Benefit |
|---|---|
| Intuitive interface | Easy to learn and use, even for beginners |
| Real-time preview | Quickly identify and fix issues in your PCB design |
| Customizable drill and slot sizes | Adapt your design to your specific needs |
| Export options | Easily export your design for manufacturing |
| Cross-platform support | Available for Windows, Mac, and Linux |
| Active user community | Access to forums, tutorials, and resources |
In summary, Drill & Slot editor is a must-have tool for anyone involved in PCB design. Its free, open-source nature, combined with its powerful features and user-friendly interface, make it an attractive choice for hobbyists and professionals alike. By leveraging the tips and tricks provided in this article, you can streamline your PCB design process and create high-quality designs with ease.
No responses yet