Introduction to TFT LCD Panels and SD Cards
TFT (Thin-Film-Transistor) LCD (Liquid Crystal Display) panels are widely used in various electronic devices, such as smartphones, tablets, and embedded systems. These panels offer high-resolution displays and vibrant colors, making them ideal for displaying graphical user interfaces, images, and videos. On the other hand, SD (Secure Digital) cards are popular storage devices known for their portability, durability, and large storage capacities. By combining a TFT LCD panel with an SD card, developers and hobbyists can create interactive projects that showcase visual content stored on the SD card.
In this article, we will explore the process of downloading example designs stored on an SD card and displaying them on a TFT LCD panel. We will cover the necessary hardware components, software tools, and programming concepts required to achieve this task. Additionally, we will provide step-by-step instructions and code snippets to guide you through the implementation process.
Table of Contents
- Hardware Requirements
- Software Requirements
- Connecting the TFT LCD Panel and SD Card
- Preparing the SD Card
- Programming the TFT LCD Panel
- Initializing the TFT LCD Panel
- Reading Data from the SD Card
- Displaying Images on the TFT LCD Panel
- Displaying Text on the TFT LCD Panel
- Example Projects
- Image Slideshow
- User Interface with Buttons
- Data Logging and Visualization
- Troubleshooting Common Issues
- Conclusion
- Frequently Asked Questions (FAQ)
Hardware Requirements
To download example designs stored on an SD card and display them on a TFT LCD panel, you will need the following hardware components:
-
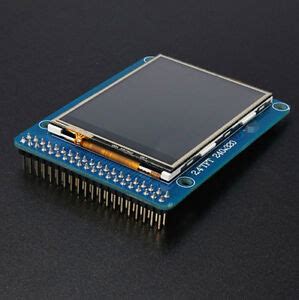
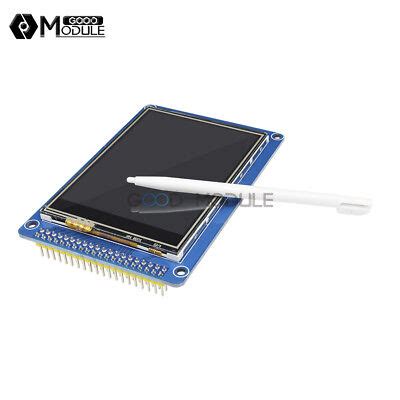
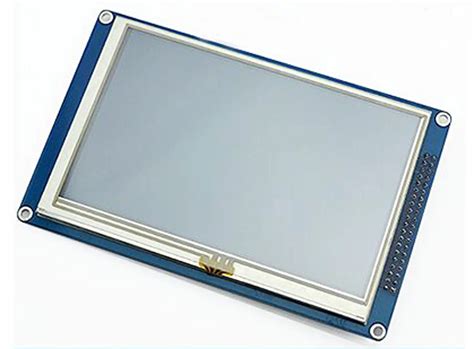
TFT LCD Panel: Choose a TFT LCD panel that is compatible with your microcontroller or development board. Common sizes include 1.8 inches, 2.4 inches, 2.8 inches, 3.2 inches, and 3.5 inches. Make sure to select a panel with a compatible interface (e.g., SPI, parallel) and appropriate resolution for your project.
-
SD Card Module: An SD card module allows you to interface an SD card with your microcontroller or development board. It typically includes an SD card slot and the necessary circuitry to communicate with the microcontroller using the SPI protocol.
-
Microcontroller or Development Board: You will need a microcontroller or development board to control the TFT LCD panel and communicate with the SD card module. Popular options include Arduino boards, ESP32, STM32, and Raspberry Pi.
-
Jumper Wires: Jumper wires are used to connect the TFT LCD panel and SD card module to the microcontroller or development board. Make sure to have enough wires of appropriate lengths to establish the required connections.
-
SD Card: Choose an SD card with sufficient storage capacity to store your example designs, images, and other relevant data. Class 10 SD cards are recommended for better performance.
-
Power Supply: Ensure that you have a suitable power supply to power your microcontroller or development board, TFT LCD panel, and SD card module. The power requirements may vary depending on the specific components you are using.
Here’s a table summarizing the hardware requirements:
| Component | Description |
|---|---|
| TFT LCD Panel | Choose a compatible panel with the desired size and interface |
| SD Card Module | Allows interfacing an SD card with the microcontroller |
| Microcontroller/Development Board | Controls the TFT LCD panel and communicates with the SD card |
| Jumper Wires | Used for connecting the components |
| SD Card | Stores the example designs, images, and data |
| Power Supply | Provides power to the components |

Software Requirements
To program the microcontroller or development board and interact with the TFT LCD panel and SD card module, you will need the following software tools and libraries:
-
Integrated Development Environment (IDE): Choose an IDE that is compatible with your microcontroller or development board. Popular options include Arduino IDE, PlatformIO, and Keil MDK.
-
TFT LCD Library: You will need a library that provides functions to initialize and control the TFT LCD panel. Some common libraries include Adafruit_GFX, TFT_eSPI, and UTFT. Make sure to select a library that is compatible with your specific TFT LCD panel and microcontroller.
-
SD Card Library: A library is required to communicate with the SD card module and read/write data from/to the SD card. The Arduino SD library is commonly used for this purpose.
-
Image Conversion Tool: If you plan to display images on the TFT LCD panel, you may need an image conversion tool to convert your images into a format compatible with the TFT LCD library. Popular tools include ImageMagick and online image converters specific to TFT LCD panels.
-
Text Editor: A text editor is useful for writing and editing your code, as well as creating and modifying configuration files for your project.
-
Serial Monitor: Most IDEs come with a built-in serial monitor that allows you to view debug messages and interact with your microcontroller or development board through a serial connection.
Here’s a table summarizing the software requirements:
| Software | Description |
|---|---|
| IDE | Integrated Development Environment for programming the microcontroller |
| TFT LCD Library | Provides functions to control the TFT LCD panel |
| SD Card Library | Enables communication with the SD card module |
| Image Conversion Tool | Converts images into a format compatible with the TFT LCD library |
| Text Editor | Used for writing and editing code and configuration files |
| Serial Monitor | Allows viewing debug messages and interacting with the microcontroller |

Connecting the TFT LCD Panel and SD Card
Before you start programming, you need to properly connect the TFT LCD panel and SD card module to your microcontroller or development board. The connection process may vary depending on the specific components you are using, so refer to the documentation or pinout diagrams provided by the manufacturers.
Here’s a general guide on how to connect the components:
-
Connect the power pins (VCC and GND) of the TFT LCD panel to the appropriate power supply pins on your microcontroller or development board. Make sure to provide the correct voltage level as specified in the TFT LCD panel’s datasheet.
-
Connect the data pins of the TFT LCD panel to the corresponding pins on your microcontroller or development board. The number and arrangement of data pins depend on the interface type (e.g., SPI, parallel) and the specific TFT LCD library you are using. Refer to the library’s documentation for the correct pin assignments.
-
Connect the control pins (e.g., CS, DC, RST) of the TFT LCD panel to the appropriate pins on your microcontroller or development board as specified by the TFT LCD library.
-
Connect the SD card module to your microcontroller or development board using the SPI interface. Typically, the following pins are used:
- MOSI (Master Out Slave In): Connect to the microcontroller’s SPI MOSI pin.
- MISO (Master In Slave Out): Connect to the microcontroller’s SPI MISO pin.
- SCK (Serial Clock): Connect to the microcontroller’s SPI SCK pin.
-
CS (Chip Select): Connect to a free digital pin on the microcontroller.
-
Ensure that the SD card module and TFT LCD panel share a common ground (GND) connection with your microcontroller or development board.
Here’s a table summarizing the common pin connections:
| TFT LCD Panel Pin | Microcontroller Pin |
|---|---|
| VCC | Power Supply |
| GND | Ground |
| Data Pins | Depends on interface and library |
| Control Pins | Depends on library |
| SD Card Module Pin | Microcontroller Pin |
|---|---|
| MOSI | SPI MOSI |
| MISO | SPI MISO |
| SCK | SPI SCK |
| CS | Digital Pin |

Preparing the SD Card
Before you can download and display example designs stored on an SD card, you need to prepare the SD card with the necessary files and format. Follow these steps to prepare your SD card:
-
Insert the SD card into your computer using an SD card reader.
-
Format the SD card with the FAT16 or FAT32 file system. This ensures compatibility with most microcontrollers and development boards. You can use the built-in formatting tools on your operating system or a third-party SD card formatting software.
-
Create a folder structure on the SD card to organize your example designs, images, and other relevant files. For example, you can create separate folders for images, fonts, and configuration files.
-
Copy your example design files, images, and any other necessary files to the appropriate folders on the SD card. Make sure to use file formats that are compatible with your TFT LCD library and microcontroller.
-
If you are using images, ensure that they are in a supported format (e.g., BMP, JPG, PNG) and have the correct dimensions and color depth for your TFT LCD panel. Some TFT LCD libraries may require specific image formats or have size limitations.
-
Safely eject the SD card from your computer and insert it into the SD card module connected to your microcontroller or development board.
Here’s an example folder structure for organizing files on the SD card:
SD Card Root
├── images/
│   ├── image1.bmp
│   ├── image2.jpg
│   └── ...
├── fonts/
│   ├── font1.fnt
│   ├── font2.fnt
│   └── ...
├── config/
│   ├── settings.txt
│   └── ...
└── ...
Programming the TFT LCD Panel
Now that you have connected the hardware components and prepared the SD card, it’s time to write the code to download and display the example designs on the TFT LCD panel. The programming process involves initializing the TFT LCD panel, reading data from the SD card, and displaying the content on the screen.
Initializing the TFT LCD Panel
To initialize the TFT LCD panel, you need to include the necessary libraries and configure the pins. Here’s an example code snippet for initializing the TFT LCD panel using the Adafruit_GFX and Adafruit_ST7735 libraries:
#include <Adafruit_GFX.h>
#include <Adafruit_ST7735.h>

#define TFT_CS   10
#define TFT_RST  9
#define TFT_DC   8

Adafruit_ST7735 tft = Adafruit_ST7735(TFT_CS, TFT_DC, TFT_RST);

void setup() {
  tft.initR(INITR_BLACKTAB);
  tft.fillScreen(ST77XX_BLACK);
}
In this example, the Adafruit_ST7735 library is used to control a 1.8-inch TFT LCD panel. The necessary pins (TFT_CS, TFT_RST, TFT_DC) are defined, and an instance of the Adafruit_ST7735 class is created. In the setup() function, the TFT LCD panel is initialized with the initR() function, and the screen is filled with a black background using fillScreen().
Reading Data from the SD Card
To read data from the SD card, you need to include the SD library and initialize the SD card. Here’s an example code snippet for initializing the SD card and reading a file:
#include <SD.h>

#define SD_CS 4

void setup() {
  if (!SD.begin(SD_CS)) {
    // Handle SD card initialization error
    return;
  }

  File dataFile = SD.open("data.txt");
  if (dataFile) {
    while (dataFile.available()) {
      // Read data from the file
      String data = dataFile.readStringUntil('\n');
      // Process the data
    }
    dataFile.close();
  }
}
In this example, the SD library is included, and the chip select pin (SD_CS) for the SD card module is defined. Inside the setup() function, the SD card is initialized using SD.begin(). If the initialization is successful, a file named “data.txt” is opened using SD.open(). The contents of the file are read line by line using readStringUntil('\n') and can be processed further as needed.
Displaying Images on the TFT LCD Panel
To display images on the TFT LCD panel, you can use the drawBitmap() function provided by the TFT LCD library. Here’s an example code snippet for displaying an image stored on the SD card:
void setup() {
  // Initialize TFT LCD panel and SD card

  File imageFile = SD.open("image.bmp");
  if (imageFile) {
    tft.drawBitmap(0, 0, imageFile);
    imageFile.close();
  }
}
In this example, an image file named “image.bmp” is opened from the SD card using SD.open(). If the file is successfully opened, the drawBitmap() function is called to display the image on the TFT LCD panel at the specified coordinates (0, 0). After displaying the image, the file is closed using close().
Displaying Text on the TFT LCD Panel
To display text on the TFT LCD panel, you can use the print() and println() functions provided by the TFT LCD library. Here’s an example code snippet for displaying text:
void setup() {
  // Initialize TFT LCD panel

  tft.setCursor(0, 0);
  tft.setTextColor(ST77XX_WHITE);
  tft.setTextSize(2);
  tft.println("Hello, World!");
}
In this example, the setCursor() function is used to set the starting position for the text. The setTextColor() function sets the color of the text, and setTextSize() sets the size of the text. Finally, the println() function is used to display the text “Hello, World!” on the TFT LCD panel.
Example Projects
Here are a few example projects that demonstrate the use of a TFT LCD panel and SD card:
Image Slideshow
Create an image slideshow that displays a sequence of images stored on the SD card. The images can be cycled automatically or controlled using buttons.
User Interface with Buttons
Design a user interface that includes buttons for navigation and interaction. The buttons can be used to select options, switch between screens, or trigger specific actions. The TFT LCD panel can display menus, icons, and feedback to the user.
Data Logging and Visualization
Use the TFT LCD panel to display real-time data or logged data stored on the SD card. The data can be sensor readings, system statistics, or any other relevant information. The TFT LCD panel can present the data in the form of graphs, charts, or numerical values.
Troubleshooting Common Issues
-
TFT LCD panel not displaying anything: Check the wiring connections between the TFT LCD panel and the microcontroller. Ensure that the power supply is properly connected and providing the correct voltage. Verify that the correct pins are being used for communication and control.
-
SD card not detected: Make sure that the SD card is properly inserted into the SD card module. Check the wiring connections between the SD card module and the microcontroller. Verify that the SD card is formatted correctly (FAT16 or FAT32) and contains the necessary files.
-
Image not displaying correctly: Ensure that the image file is in a supported format and has the correct dimensions and color depth for your TFT LCD panel. Check the file path and name in your code to make sure it matches the actual file on the SD card.
-
Text not appearing on the screen: Verify that the correct font file is being used and is properly loaded. Check the text color and size settings to ensure they are appropriate for your TFT LCD panel. Make sure the text coordinates are within the visible

No responses yet