What is a Solder Bridge?
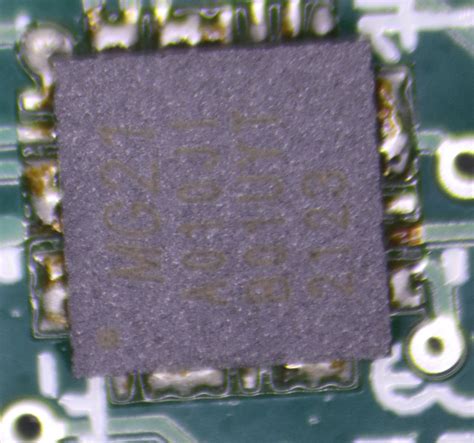
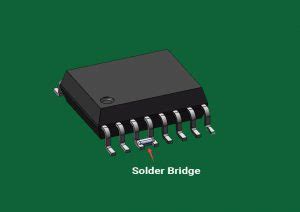
A solder bridge, also known as a solder short, is an unintentional connection between two or more solder pads on a printed circuit board (PCB) caused by excess solder. This unwanted connection can lead to electrical shorts, circuit malfunctions, and even permanent damage to the components or the PCB itself. Solder bridges are a common issue in soldering, especially for beginners or when working with small, densely packed components.
Causes of Solder Bridges
Several factors can contribute to the formation of solder bridges:
- Excessive solder: Applying too much solder to the pads can cause the molten solder to flow and connect adjacent pads.
- Improper soldering technique: Poor soldering techniques, such as holding the soldering iron on the pad for too long or using incorrect temperature settings, can lead to solder bridges.
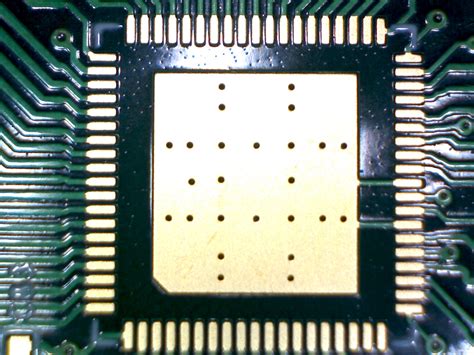
- Inadequate PCB design: If the PCB design has pads that are too close together or lacks proper solder mask between pads, it can increase the likelihood of solder bridges forming.
- Component misalignment: Misaligned components can cause their leads to touch adjacent pads, creating a bridge when soldered.
Identifying Solder Bridges
Solder bridges can be identified through visual inspection or by using electronic testing methods.
Visual Inspection
A visual inspection involves carefully examining the soldered connections on the PCB using a magnifying glass or microscope. Look for any signs of excess solder connecting adjacent pads or component leads. Solder bridges may appear as shiny, smooth connections between pads that should not be connected.
Electronic Testing
Electronic testing methods can help identify solder bridges that may not be visible to the naked eye. Some common testing methods include:
- Continuity testing: Using a multimeter set to continuity mode, you can check for shorts between pins or pads that should not be connected. If the multimeter beeps or shows a low resistance, it indicates the presence of a solder bridge.
- Power-on testing: After soldering, power on the circuit and check for any unusual behavior, such as components not functioning correctly or the circuit drawing excessive current. These issues may be caused by solder bridges.

Preventing Solder Bridges
To minimize the occurrence of solder bridges, follow these best practices:
Proper Soldering Technique
- Use the right amount of solder: Apply just enough solder to create a strong, reliable connection without excessive buildup.
- Control the soldering iron temperature: Set the soldering iron to the appropriate temperature for the solder and components you are working with. Too high a temperature can cause the solder to flow excessively, increasing the risk of bridges.
- Maintain a clean soldering iron tip: A clean, well-tinned soldering iron tip ensures better heat transfer and reduces the likelihood of solder buildup.
PCB Design Considerations
- Adequate pad spacing: Ensure that the PCB design has sufficient spacing between pads to reduce the risk of solder bridges. The space between pads should be at least as wide as the pads themselves.
- Solder mask: Use a solder mask to cover the areas between pads, preventing solder from flowing and creating bridges.
Component Placement
- Proper component alignment: Carefully align components on the PCB to ensure that their leads do not touch adjacent pads.
- Use a PCB holder: A PCB holder can help keep the board steady and components in place during soldering, reducing the chances of misalignment.

Repairing Solder Bridges
If you identify a solder bridge on your PCB, it is essential to remove it promptly to avoid potential damage or malfunctions. There are several methods for removing solder bridges:
Solder Wick
Solder wick, also known as desoldering braid, is a copper braid that can be used to absorb excess solder from the PCB.
- Place the solder wick on the solder bridge and apply the soldering iron tip to the wick.
- As the solder melts, it will be drawn up into the wick by capillary action.
- Remove the soldering iron and the wick, and the excess solder should be removed along with the wick.
Desoldering Pump
A desoldering pump, or solder sucker, is a manual vacuum tool that can remove molten solder from the PCB.
- Heat the solder bridge with the soldering iron until it melts.
- Position the desoldering pump close to the molten solder and press the plunger to release the vacuum and suck up the excess solder.
Soldering Iron and Tweezers
For small solder bridges, you can often remove them using just a soldering iron and a pair of tweezers.
- Heat the solder bridge with the soldering iron until it melts.
- Use the tweezers to gently pull the components or leads apart, breaking the solder bridge.
- If necessary, use the soldering iron to remove any remaining excess solder from the pads or leads.

Solder Bridge Prevention and Repair: A Visual Guide
| Cause of Solder Bridge | Prevention Method | Repair Method |
|---|---|---|
| Excessive solder | Use the right amount of solder | Solder wick, desoldering pump |
| Improper soldering technique | Control soldering iron temperature, maintain clean tip | Soldering iron and tweezers |
| Inadequate PCB design | Ensure adequate pad spacing, use solder mask | Solder wick, desoldering pump |
| Component misalignment | Properly align components, use PCB holder | Soldering iron and tweezers |
Frequently Asked Questions (FAQ)
-
Q: Can solder bridges cause permanent damage to my PCB or components?
A: Yes, if left unchecked, solder bridges can cause short circuits that may damage components or the PCB itself. It is essential to identify and remove solder bridges promptly. -
Q: How can I avoid creating solder bridges when working with small, closely spaced components?
A: To minimize the risk of solder bridges when working with small components, use a fine-tipped soldering iron, apply just enough solder, and ensure proper component alignment. A magnifying glass or microscope can help with accurate placement and inspection. -
Q: Is it necessary to remove all solder bridges, even if the circuit seems to function correctly?
A: Yes, it is crucial to remove all solder bridges, even if the circuit appears to work. Solder bridges can cause intermittent issues, degrade circuit performance, or lead to future failures. -
Q: Can I use a regular soldering iron to remove solder bridges, or do I need special tools?
A: In most cases, you can remove solder bridges using a standard soldering iron along with solder wick, a desoldering pump, or tweezers. However, for more challenging or delicate repairs, specialized desoldering tools, such as a desoldering station or a hot air rework station, may be helpful. -
Q: How can I practice soldering to improve my skills and reduce the occurrence of solder bridges?
A: To enhance your soldering skills and minimize solder bridges, practice on scrap PCBs or soldering practice kits. Focus on maintaining proper soldering iron temperature, applying the right amount of solder, and keeping components aligned. Regular practice and attention to detail will help you improve your soldering technique and reduce the likelihood of creating solder bridges.
Conclusion
Solder bridges are a common issue in PCB Soldering that can lead to circuit malfunctions and potential damage. By understanding the causes of solder bridges and employing proper prevention methods, such as using the correct soldering technique, ensuring adequate PCB design, and maintaining proper component alignment, you can minimize the occurrence of these unwanted connections.
If solder bridges do occur, identifying them through visual inspection or electronic testing is crucial. Promptly removing solder bridges using methods like solder wick, desoldering pumps, or soldering irons with tweezers can help prevent further issues and ensure the proper functioning of your electronic circuits.
By following best practices for solder bridge prevention and being prepared to repair them when necessary, you can create reliable, high-quality solder joints and improve the overall performance and longevity of your PCBs.

No responses yet