Introduction to Raspberry Pi ADC
The Raspberry Pi is a versatile single-board computer that has revolutionized the world of hobbyist electronics and DIY projects. One of the essential components of any electronic project is the ability to measure and process analog signals. This is where an Analog-to-Digital Converter (ADC) comes into play. In this comprehensive guide, we will explore the concept of ADCs, their importance in Raspberry Pi projects, and how to effectively utilize them.
What is an ADC?
An Analog-to-Digital Converter (ADC) is an electronic circuit that converts continuous analog signals into discrete digital values. Analog signals are continuously variable, such as voltage or current, and can take on any value within a specific range. On the other hand, digital signals have a finite number of possible values, typically represented by binary numbers (0s and 1s).
ADCs play a crucial role in bridging the gap between the analog world and the digital domain. They allow microcontrollers and computers, like the Raspberry Pi, to interpret and process real-world analog signals.
Why is an ADC important for Raspberry Pi projects?
The Raspberry Pi, being a digital device, cannot directly interpret analog signals. However, many real-world sensors and transducers produce analog outputs. Some common examples include:
- Temperature sensors (e.g., thermistors, thermocouples)
- Light sensors (e.g., photoresistors, photodiodes)
- Pressure sensors
- Humidity sensors
- Potentiometers (variable resistors)
To interface these sensors with the Raspberry Pi and obtain meaningful data, an ADC is necessary. The ADC converts the analog signal from the sensor into a digital value that the Raspberry Pi can read and process.
Types of ADCs
There are several types of ADCs available, each with its own characteristics and suitability for different applications. Let’s explore some common types of ADCs:
1. Successive Approximation ADC (SAR ADC)
SAR ADCs are widely used due to their balanced performance in terms of speed, accuracy, and cost. They work by comparing the input analog signal with a series of reference voltages generated by an internal digital-to-analog converter (DAC). The comparison process is performed in a binary search manner, successively narrowing down the range until the closest digital approximation is found.
Key characteristics of SAR ADCs:
– Moderate sampling rates (up to a few megasamples per second)
– Good resolution (typically 8 to 16 bits)
– Low power consumption
– Suitable for general-purpose applications
2. Delta-Sigma ADC (ΔΣ ADC)
Delta-Sigma ADCs, also known as oversampling ADCs, are known for their high resolution and excellent noise performance. They operate by sampling the input signal at a much higher rate than the desired output rate (oversampling) and then applying noise shaping and digital filtering to achieve high accuracy.
Key characteristics of Delta-Sigma ADCs:
– High resolution (up to 24 bits)
– Excellent noise performance
– Lower sampling rates compared to SAR ADCs
– Suitable for audio and precision measurement applications
3. Flash ADC
Flash ADCs, also called parallel ADCs, are known for their high-speed operation. They consist of a set of comparators, each connected to a reference voltage divider. The input signal is simultaneously compared with all the reference voltages, and the output is encoded into a digital value.
Key characteristics of Flash ADCs:
– Very high sampling rates (up to gigasamples per second)
– Lower resolution compared to SAR and Delta-Sigma ADCs
– High power consumption
– Suitable for high-speed applications like radar and communications
4. Dual-Slope ADC
Dual-Slope ADCs are known for their high accuracy and low cost. They work by integrating the input signal over a fixed time period and then integrating a reference voltage in the opposite direction until the integrator output reaches zero. The time taken for the second integration is proportional to the input voltage.
Key characteristics of Dual-Slope ADCs:
– High accuracy and linearity
– Slow sampling rates
– Low cost
– Suitable for precision measurement applications

ADC Specifications
When selecting an ADC for your Raspberry Pi project, it’s essential to understand the key specifications that define its performance. Let’s explore some important ADC specifications:
1. Resolution
The resolution of an ADC refers to the number of discrete digital values it can produce to represent the analog input signal. It is typically expressed in bits. For example, an 8-bit ADC can represent the analog signal using 2^8 = 256 discrete levels, while a 12-bit ADC offers 2^12 = 4096 levels.
Higher resolution ADCs provide finer granularity and can capture smaller changes in the analog signal. However, higher resolution also means increased cost and complexity.
2. Sampling Rate
The sampling rate, also known as the conversion rate, represents the number of times per second the ADC measures and converts the analog signal into a digital value. It is usually expressed in samples per second (SPS) or hertz (Hz).
The required sampling rate depends on the bandwidth of the analog signal being measured. According to the Nyquist-Shannon sampling theorem, the sampling rate should be at least twice the highest frequency component of the analog signal to avoid aliasing and accurately reconstruct the signal.
3. Voltage Range
The voltage range specifies the minimum and maximum voltages that the ADC can measure. It is important to ensure that the voltage range of the ADC is compatible with the output range of the sensor or signal being measured.
Some ADCs have fixed voltage ranges, while others offer programmable or adjustable ranges. Adjustable voltage ranges provide flexibility in accommodating different sensor outputs.
4. Accuracy and Linearity
Accuracy and linearity are crucial factors in determining the overall performance of an ADC. Accuracy refers to how close the digital output of the ADC is to the actual analog input value. It is affected by factors such as offset error, gain error, and quantization error.
Linearity, on the other hand, represents the consistency of the ADC’s step size across its entire range. A highly linear ADC will have uniform step sizes, ensuring consistent performance throughout its measurement range.
5. Input Impedance
Input impedance is a measure of the resistance and capacitance presented by the ADC’s input circuitry to the analog signal source. A high input impedance is desirable to minimize loading effects on the signal source and ensure accurate measurements.

Interfacing ADCs with Raspberry Pi
Now that we have a basic understanding of ADCs and their specifications, let’s explore how to interface them with the Raspberry Pi.
1. SPI ADCs
SPI (Serial Peripheral Interface) is a widely used communication protocol for interfacing ADCs with microcontrollers and single-board computers like the Raspberry Pi. SPI ADCs communicate with the Raspberry Pi using a synchronous serial interface.
To interface an SPI ADC with the Raspberry Pi, you’ll need to connect the following pins:
– MOSI (Master Out Slave In): Connects to the ADC’s DIN pin
– MISO (Master In Slave Out): Connects to the ADC’s DOUT pin
– SCLK (Serial Clock): Connects to the ADC’s CLK pin
– CS (Chip Select): Connects to the ADC’s CS pin
Here’s an example of how to read data from an SPI ADC using Python on the Raspberry Pi:
import spidev

# Create an SPI object
spi = spidev.SpiDev()

# Open the SPI bus and device
spi.open(0, 0)  # Bus 0, Device 0

# Set SPI parameters
spi.max_speed_hz = 1000000  # 1 MHz clock speed
spi.mode = 0  # SPI mode 0

# Read data from the ADC
data = spi.xfer2([0x01, 0x80, 0x00])  # Send command and receive data

# Convert the received data to a 12-bit value
value = ((data[1] & 0x0F) << 8) | data[2]

# Print the value
print("ADC value:", value)

# Close the SPI connection
spi.close()
In this example, we create an SpiDev object to communicate with the SPI ADC. We open the SPI bus and device, set the clock speed and mode, and then send a command to read data from the ADC. The received data is then converted to a 12-bit value and printed.
2. I2C ADCs
I2C (Inter-Integrated Circuit) is another popular communication protocol for interfacing ADCs with the Raspberry Pi. I2C uses a master-slave architecture, where the Raspberry Pi acts as the master and the ADC as the slave.
To interface an I2C ADC with the Raspberry Pi, you’ll need to connect the following pins:
– SDA (Serial Data): Connects to the ADC’s SDA pin
– SCL (Serial Clock): Connects to the ADC’s SCL pin
Here’s an example of how to read data from an I2C ADC using Python on the Raspberry Pi:
import smbus

# Create an I2C bus object
bus = smbus.SMBus(1)  # Use I2C bus 1

# ADC I2C address
adc_address = 0x48

# Read data from the ADC
data = bus.read_i2c_block_data(adc_address, 0x00, 2)

# Convert the received data to a 12-bit value
value = (data[0] << 4) | (data[1] >> 4)

# Print the value
print("ADC value:", value)
In this example, we create an SMBus object to communicate with the I2C ADC. We specify the I2C bus number and the ADC’s I2C address. We then read a block of data from the ADC using the read_i2c_block_data() function. The received data is combined to form a 12-bit value and printed.
3. Analog Input Pins
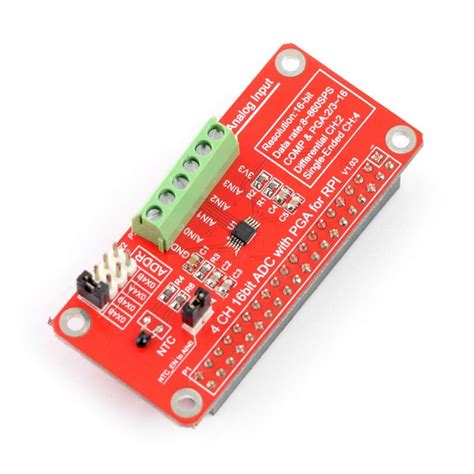
Some Raspberry Pi models, such as the Raspberry Pi 4B, do not have built-in analog input pins. However, you can still interface analog sensors with the Raspberry Pi using external ADCs or expansion boards that provide analog input capabilities.
One popular option is the MCP3008 ADC, which is an 8-channel, 10-bit ADC that communicates with the Raspberry Pi using SPI. It allows you to connect multiple analog sensors to the Raspberry Pi.
Here’s an example of how to read data from an MCP3008 ADC using Python on the Raspberry Pi:
import spidev

# Create an SPI object
spi = spidev.SpiDev()

# Open the SPI bus and device
spi.open(0, 0)  # Bus 0, Device 0

# Set SPI parameters
spi.max_speed_hz = 1000000  # 1 MHz clock speed
spi.mode = 0  # SPI mode 0

# Function to read data from a specific channel of the MCP3008 ADC
def read_adc(channel):
    # Send the read command and channel number
    adc_data = spi.xfer2([1, (8 + channel) << 4, 0])

    # Extract the 10-bit value from the received data
    value = ((adc_data[1] & 3) << 8) + adc_data[2]

    return value

# Read data from channel 0 of the MCP3008 ADC
channel = 0
value = read_adc(channel)

# Print the value
print("ADC value from channel", channel, ":", value)

# Close the SPI connection
spi.close()
In this example, we create an SpiDev object to communicate with the MCP3008 ADC over SPI. We define a function read_adc() that takes the channel number as input and returns the corresponding 10-bit ADC value. We then read data from a specific channel (channel 0 in this case) and print the value.

ADC Applications with Raspberry Pi
ADCs find numerous applications in Raspberry Pi projects. Let’s explore a few common use cases:
1. Temperature Monitoring
One of the most popular applications of ADCs with Raspberry Pi is temperature monitoring. By connecting a temperature sensor, such as a thermistor or a thermocouple, to an ADC, you can measure and record temperature data.
Here’s an example of how to measure temperature using a thermistor and an ADC:
import spidev
import math

# Create an SPI object
spi = spidev.SpiDev()

# Open the SPI bus and device
spi.open(0, 0)  # Bus 0, Device 0

# Set SPI parameters
spi.max_speed_hz = 1000000  # 1 MHz clock speed
spi.mode = 0  # SPI mode 0

# Function to read data from a specific channel of the MCP3008 ADC
def read_adc(channel):
    # Send the read command and channel number
    adc_data = spi.xfer2([1, (8 + channel) << 4, 0])

    # Extract the 10-bit value from the received data
    value = ((adc_data[1] & 3) << 8) + adc_data[2]

    return value

# Thermistor parameters
thermistor_channel = 0
thermistor_nominal_resistance = 10000  # 10k ohm
thermistor_nominal_temperature = 25  # 25°C
thermistor_beta_coefficient = 3950

# Read data from the thermistor channel
adc_value = read_adc(thermistor_channel)

# Convert ADC value to resistance
resistance = (1023 / adc_value) - 1
resistance = thermistor_nominal_resistance / resistance

# Convert resistance to temperature using the Steinhart-Hart equation
temperature = resistance / thermistor_nominal_resistance
temperature = math.log(temperature)
temperature /= thermistor_beta_coefficient
temperature += 1.0 / (thermistor_nominal_temperature + 273.15)
temperature = 1.0 / temperature
temperature -= 273.15

# Print the temperature
print("Temperature: %.2f°C" % temperature)

# Close the SPI connection
spi.close()
In this example, we connect a thermistor to channel 0 of the MCP3008 ADC. We read the ADC value, convert it to resistance, and then calculate the temperature using the Steinhart-Hart equation. The temperature is then printed in degrees Celsius.
2. Light Intensity Measurement
Another common application of ADCs with Raspberry Pi is measuring light intensity using light sensors such as photoresistors or photodiodes. By connecting a light sensor to an ADC, you can detect changes in ambient light levels.
Here’s an example of how to measure light intensity using a photoresistor and an ADC:
import spidev

# Create an SPI object
spi = spidev.SpiDev()

# Open the SPI bus and device
spi.open(0, 0)  # Bus 0, Device 0

# Set SPI parameters
spi.max_speed_hz = 1000000  # 1 MHz clock speed
spi.mode = 0  # SPI mode 0

# Function to read data from a specific channel of the MCP3008 ADC
def read_adc(channel):
    # Send the read command and channel number
    adc_data = spi.xfer2([1, (8 + channel) << 4, 0])

    # Extract the 10-bit value from the received data
    value = ((adc_data[1] & 3) << 8) + adc_data[2]

    return value

# Photoresistor parameters
photoresistor_channel = 1

# Read data from the photoresistor channel
adc_value = read_adc(photoresistor_channel)

# Convert ADC value to light intensity (in arbitrary units)
light_intensity = adc_value

# Print the light intensity
print("Light Intensity:", light_intensity)

# Close the SPI connection
spi.close()
In this example, we connect a photoresistor to channel 1 of the MCP3008 ADC. We read the ADC value, which represents the light intensity in arbitrary units. The light intensity is then printed.
3. Analog Sensor Interfacing
ADCs are essential for interfacing various analog sensors with the Raspberry Pi. Some common analog sensors that can be connected to the Raspberry Pi using ADCs include:
- Pressure sensors
- Humidity sensors
- Gas sensors
- pH sensors
- Accelerometers
The process of interfacing these sensors with the Raspberry Pi is similar to the examples shown above. You connect the sensor’s output to an ADC channel, read the ADC value, and then
No responses yet