What is the PICKit 3?
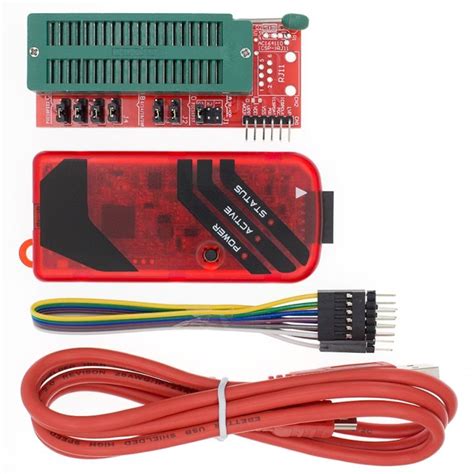
The PICKit 3 is an in-circuit debugger and programmer for Microchip’s PIC microcontrollers. It allows developers to program and debug their PIC-based projects easily. The PICKit 3 connects to your computer via a USB port and interfaces with your target board through a variety of connector options.
PICKit 3 Pinout Overview
The PICKit 3 features a 6-pin ICSP (In-Circuit Serial Programming) connector, which is the primary interface for programming and debugging PIC microcontrollers. Additionally, it has a 5-pin UART (Universal Asynchronous Receiver/Transmitter) connector for serial communication.
ICSP Connector Pinout
| Pin | Name | Description |
|---|---|---|
| 1 | VPP | Programming voltage (up to 14V) |
| 2 | VDD | Target system power (2.0V to 6.0V) |
| 3 | GND | Ground |
| 4 | PGD | Programming data (ICSPDAT) |
| 5 | PGC | Programming clock (ICSPCLK) |
| 6 | NC/PGM | Not connected or additional programming pin |
UART Connector Pinout
| Pin | Name | Description |
|---|---|---|
| 1 | VDD | Target system power (2.0V to 6.0V) |
| 2 | TX | UART transmit (output from PICKit 3) |
| 3 | RX | UART receive (input to PICKit 3) |
| 4 | GND | Ground |
| 5 | NC | Not connected |

Connecting the PICKit 3
To connect the PICKit 3 to your target board, follow these steps:
- Ensure your target board has an ICSP header compatible with the PICKit 3 pinout.
- Connect the ICSP cable from the PICKit 3 to the ICSP header on your target board, making sure to match the pinout.
- If your target board does not have a separate power supply, connect the VDD pin on the PICKit 3 to the appropriate power pin on your target board.
- Connect the PICKit 3 to your computer using a USB cable.

Using the PICKit 3 for Programming and Debugging
Once you have connected the PICKit 3 to your target board and computer, you can use Microchip’s MPLAB X IDE to program and debug your PIC microcontroller. The IDE will recognize the PICKit 3 automatically, and you can select it as your programming and debugging tool.
To program your PIC microcontroller:
- Open your project in MPLAB X IDE.
- Ensure the correct PIC device is selected in your project settings.
- Click on the “Make and Program Device” button to compile your code and program the microcontroller.
To debug your PIC microcontroller:
- Set breakpoints in your code where you want the execution to pause.
- Click on the “Debug” button to start a debugging session.
- Use the debugging controls to step through your code, view variable values, and analyze your program’s behavior.

Advanced Features of the PICKit 3
In addition to basic programming and debugging, the PICKit 3 offers several advanced features:
Logic Tool
The PICKit 3 includes a logic tool that allows you to monitor and analyze digital signals on your target board. To use the logic tool:
- Connect the PICKit 3 to your target board and computer.
- Open the MPLAB X IDE and navigate to the “Debugger” menu.
- Select “PICKit 3” and then “Logic Tool.”
- Configure the logic tool settings, such as the sampling rate and trigger conditions.
- Start the logic tool to capture and display the digital signals.
UART Tool
The PICKit 3’s UART connector allows you to communicate with your target board using serial communication. To use the UART tool:
- Connect the UART cable from the PICKit 3 to the appropriate pins on your target board.
- Open the MPLAB X IDE and navigate to the “Debugger” menu.
- Select “PICKit 3” and then “UART Tool.”
- Configure the UART settings, such as baud rate and data format.
- Start the UART tool to send and receive data between your computer and target board.
Scripting Support
The PICKit 3 supports scripting, allowing you to automate tasks and create custom programming and debugging sequences. Scripts can be written in Python or other supported languages and executed through the MPLAB X IDE.
Troubleshooting Common PICKit 3 Issues
If you encounter problems while using the PICKit 3, consider the following troubleshooting tips:
- Double-check your connections: Ensure that the PICKit 3 is properly connected to your target board and computer, and that the pinout is correct.
- Verify your target board’s power supply: Make sure your target board has a stable power supply within the acceptable range (2.0V to 6.0V).
- Check your project settings: Ensure that you have selected the correct PIC device and configuration settings in your MPLAB X IDE project.
- Update your software: Make sure you have the latest versions of MPLAB X IDE and the PICKit 3 firmware installed.
- Consult the documentation: Refer to the PICKit 3 User’s Guide and your target board’s documentation for specific troubleshooting advice.
PICKit 3 Pinout FAQ
-
Q: Can I use the PICKit 3 to program and debug other Microchip devices besides PIC microcontrollers?
A: No, the PICKit 3 is designed specifically for programming and debugging Microchip’s PIC microcontrollers. For other Microchip devices, you’ll need to use the appropriate programming and debugging tools. -
Q: Is the PICKit 3 compatible with all PIC microcontrollers?
A: The PICKit 3 supports a wide range of PIC microcontrollers, but not all of them. Check the PICKit 3 User’s Guide or Microchip’s website for a list of supported devices. -
Q: What is the maximum voltage the PICKit 3 can provide for programming?
A: The PICKit 3 can provide a programming voltage (VPP) of up to 14V. -
Q: Can I use the PICKit 3 with non-Microchip IDE?
A: While the PICKit 3 is primarily designed for use with Microchip’s MPLAB X IDE, it may be possible to use it with other IDEs that support PIC programming and debugging. However, compatibility and functionality may be limited. -
Q: What should I do if my PICKit 3 is not recognized by the MPLAB X IDE?
A: First, ensure that the PICKit 3 is properly connected to your computer and that the USB drivers are installed. If the problem persists, try updating the PICKit 3 firmware and the MPLAB X IDE to the latest versions. If the issue still occurs, contact Microchip’s technical support for further assistance.
Conclusion
The PICKit 3 is an essential tool for anyone working with Microchip’s PIC microcontrollers. By understanding the PICKit 3 pinout and its various features, you’ll be able to effectively program and debug your PIC-based projects. Remember to follow the connection guidelines, use the appropriate software tools, and consult the documentation when needed. With the knowledge gained from this article, you’re now equipped to make the most of your PICKit 3 and create successful PIC-based designs.
No responses yet