Introduction to Raspberry Pi
The Raspberry Pi is a small, affordable, and highly versatile single-board computer that has revolutionized the world of computing. Since its introduction in 2012, the Raspberry Pi has become a popular choice for hobbyists, educators, and professionals alike. Its low cost, small size, and extensive capabilities make it an ideal platform for learning about computer science, electronics, and programming.
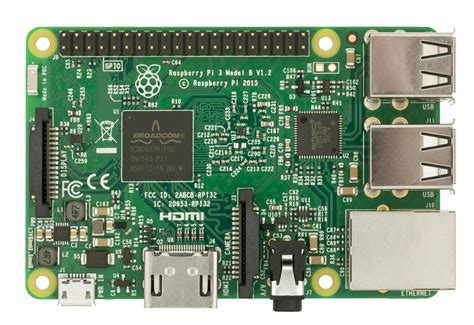
What is a Raspberry Pi?
A Raspberry Pi is a credit card-sized computer that plugs into a computer monitor or TV and uses a standard keyboard and mouse. It is a capable little device that enables people of all ages to explore computing and learn how to program in languages like Scratch and Python.
Raspberry Pi Models
There are several models of Raspberry Pi available, each with its own specifications and features. Here is a table comparing the most popular models:
| Model | Release Date | SoC | CPU | RAM | USB Ports | Ethernet | Wireless | GPIO Pins |
|---|---|---|---|---|---|---|---|---|
| Pi Zero | Nov 2015 | BCM2835 | 1 GHz Single-core | 512MB | 1 Micro-USB | No | No | 40 |
| Pi Zero W | Feb 2017 | BCM2835 | 1 GHz Single-core | 512MB | 1 Micro-USB | No | 802.11n Wi-Fi, Bluetooth 4.1 | 40 |
| Pi 3 A+ | Nov 2018 | BCM2837B0 | 1.4 GHz Quad-core | 512MB | 1 | No | 802.11ac Wi-Fi, Bluetooth 4.2 | 40 |
| Pi 3 B | Feb 2016 | BCM2837 | 1.2 GHz Quad-core | 1GB | 4 | 10/100 Mbps | 802.11n Wi-Fi, Bluetooth 4.1 | 40 |
| Pi 3 B+ | Mar 2018 | BCM2837B0 | 1.4 GHz Quad-core | 1GB | 4 | 300 Mbps | 802.11ac Wi-Fi, Bluetooth 4.2 | 40 |
| Pi 4 B | Jun 2019 | BCM2711 | 1.5 GHz Quad-core | 1GB, 2GB, 4GB, 8GB | 2 USB 3.0, 2 USB 2.0 | 1 Gbps | 802.11ac Wi-Fi, Bluetooth 5.0 | 40 |
Setting Up Your Raspberry Pi
What You’ll Need
To get started with your Raspberry Pi, you’ll need a few essential components:
- Raspberry Pi board
- Power supply (5V, at least 2.5A for Pi 4, 2A for earlier models)
- microSD card (at least 8GB, Class 10)
- HDMI cable
- Monitor or TV with HDMI input
- USB keyboard and mouse
- Ethernet cable (optional, for wired network connection)
Installing the Operating System
The Raspberry Pi uses a microSD card as its storage device, which contains the operating system and all your files. To set up your Pi, you’ll need to install an operating system on the microSD card. The most common choice is the official Raspberry Pi OS (previously known as Raspbian), which is based on Debian Linux.
Here’s how to install the operating system:
- Download the Raspberry Pi Imager from the official website: https://www.raspberrypi.org/software/
- Insert your microSD card into your computer’s card reader.
- Open the Raspberry Pi Imager and select your operating system and microSD card.
- Click “Write” and wait for the process to complete.
- Insert the microSD card into your Raspberry Pi.
Connecting the Hardware
Once you have your microSD card ready, it’s time to connect the hardware:
- Insert the microSD card into the slot on the underside of the Raspberry Pi.
- Connect the HDMI cable from your monitor or TV to the HDMI port on the Pi.
- Connect the USB keyboard and mouse to the USB ports.
- If using a wired network connection, connect the Ethernet cable to the Ethernet port.
- Finally, connect the power supply to the micro-USB power port and plug it into an outlet.
Your Raspberry Pi should now boot up, and you’ll see the desktop environment on your monitor.

Exploring the Raspberry Pi OS
The Desktop Environment
The Raspberry Pi OS uses the LXDE desktop environment, which is lightweight and easy to use. The desktop consists of the following main components:
- Menu Bar: Located at the top of the screen, it provides access to various applications and settings.
- Desktop Area: The main workspace where you can place shortcuts and open windows.
- Task Bar: Situated at the bottom of the screen, it shows running applications and allows switching between them.
- File Manager: Helps you navigate and manage your files and folders.
Basic Configuration
Upon first boot, it’s a good idea to perform some basic configuration:
- Open the Raspberry Pi Configuration tool from the Menu Bar.
- In the “System” tab, you can change your password, set the hostname, and configure boot options.
- In the “Interfaces” tab, you can enable or disable various interfaces like Camera, SSH, and VNC.
- Click “OK” to apply the changes.
Updating the System
It’s important to keep your Raspberry Pi OS up to date with the latest security fixes and improvements. To update the system, open a terminal and run the following commands:
sudo apt update
sudo apt upgrade
This will download and install any available updates.

Programming on the Raspberry Pi
One of the primary purposes of the Raspberry Pi is to help people learn to code. The Pi supports a wide range of programming languages, including Python, Scratch, Java, and C/C++.
Python
Python is a popular choice for beginners due to its simplicity and readability. The Raspberry Pi OS comes with Python 3 pre-installed. To start coding in Python:
- Open the Thonny Python IDE from the Menu Bar.
- Write your Python code in the editor.
- Click the “Run” button or press F5 to execute the code.
Here’s a simple example that prints “Hello, World!” to the console:
print("Hello, World!")
Scratch
Scratch is a visual programming language designed for children and beginners. It allows you to create interactive stories, games, and animations by dragging and connecting blocks of code. To start with Scratch:
- Open Scratch from the Menu Bar.
- Drag and connect code blocks in the editor to create your program.
- Click the green flag button to run your program.

Physical Computing with the Raspberry Pi
One of the most exciting aspects of the Raspberry Pi is its ability to interact with the physical world through its GPIO (General Purpose Input/Output) pins. These pins allow you to connect various sensors, actuators, and other electronic components to your Pi.
GPIO Pinout
The Raspberry Pi’s GPIO pins are located along the edge of the board. Each pin has a specific function and can be used for input or output. Here’s a simplified diagram of the GPIO pinout:
   3V3  (1) (2)  5V
 GPIO2  (3) (4)  5V
 GPIO3  (5) (6)  GND
 GPIO4  (7) (8)  GPIO14
   GND  (9) (10) GPIO15
GPIO17 (11) (12) GPIO18
GPIO27 (13) (14) GND
GPIO22 (15) (16) GPIO23
   3V3 (17) (18) GPIO24
GPIO10 (19) (20) GND
 GPIO9 (21) (22) GPIO25
GPIO11 (23) (24) GPIO8
   GND (25) (26) GPIO7
 GPIO0 (27) (28) GPIO1
 GPIO5 (29) (30) GND
 GPIO6 (31) (32) GPIO12
GPIO13 (33) (34) GND
GPIO19 (35) (36) GPIO16
GPIO26 (37) (38) GPIO20
   GND (39) (40) GPIO21
Controlling an LED
Let’s look at a simple example of controlling an LED using Python and the GPIO pins:
- Connect an LED to GPIO pin 17 and GND using a resistor.
- Open Thonny Python IDE and create a new file.
- Copy and paste the following code:
import RPi.GPIO as GPIO
import time

GPIO.setmode(GPIO.BCM)
GPIO.setup(17, GPIO.OUT)

while True:
    GPIO.output(17, GPIO.HIGH)
    time.sleep(1)
    GPIO.output(17, GPIO.LOW)
    time.sleep(1)

GPIO.cleanup()
- Save the file and run the code.
The LED should now blink on and off at one-second intervals.
Resources and Further Learning
There’s a vast amount of resources available for learning more about the Raspberry Pi and its capabilities. Here are a few to get you started:
- Official Raspberry Pi Documentation: https://www.raspberrypi.org/documentation/
- Raspberry Pi Forums: https://www.raspberrypi.org/forums/
- Adafruit Learning System: https://learn.adafruit.com/category/raspberry-pi
- PyImageSearch: https://www.pyimagesearch.com/category/raspberry-pi/
- MagPi Magazine: https://magpi.raspberrypi.org/
As you progress in your Raspberry Pi journey, you’ll find countless projects, tutorials, and communities to help you learn and create amazing things.
FAQ
-
What is the best Raspberry Pi model for beginners?
For beginners, the Raspberry Pi 4 Model B is an excellent choice due to its improved performance and features. However, if you’re on a tight budget, the Raspberry Pi 3 Model B+ is also a good option. -
Can I use the Raspberry Pi as a desktop computer?
Yes, the Raspberry Pi 4 is powerful enough to be used as a basic desktop computer for tasks like web browsing, word processing, and light multimedia use. However, it may not be suitable for more demanding tasks like video editing or gaming. -
What programming languages can I learn on the Raspberry Pi?
The Raspberry Pi supports a wide range of programming languages, including Python, Scratch, Java, C/C++, and more. Python and Scratch are particularly well-suited for beginners. -
Can I connect multiple sensors and components to the Raspberry Pi?
Yes, the Raspberry Pi’s GPIO pins allow you to connect various sensors, actuators, and other electronic components. You can also use add-on boards called HATs (Hardware Attached on Top) to extend the Pi’s capabilities. -
Where can I find projects and inspiration for my Raspberry Pi?
There are numerous resources available online for Raspberry Pi Projects and inspiration. The official Raspberry Pi blog, MagPi magazine, and websites like Instructables and Hackster.io are great places to start.
No responses yet