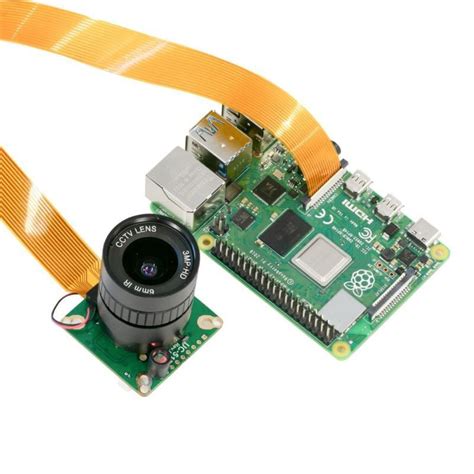
Introduction to the Raspberry Pi IMX477 Camera
The Raspberry Pi Foundation has recently released its latest addition to the Raspberry Pi ecosystem: the IMX477 High Quality Camera. This camera module is a significant upgrade from the previous camera modules, offering higher resolution, better low-light performance, and improved image quality. The IMX477 camera is designed to cater to the needs of photographers, videographers, and makers who require a high-quality camera for their projects.
Key Features of the IMX477 Camera
- 12.3-megapixel Sony IMX477 sensor
- 7.9mm diagonal sensor size
- 1.55μm pixel size
- Support for C- and CS-mount lenses
- Back-illuminated sensor architecture for improved low-light performance
- Integrated IR cut filter
- Tripod mount included
Understanding the Sony IMX477 Sensor
The heart of the Raspberry Pi HQ Camera is the Sony IMX477 sensor. This sensor is a significant upgrade from the OmniVision OV5647 sensor used in the previous Raspberry Pi camera modules. The IMX477 is a back-illuminated sensor, which means that the light-sensitive photodiodes are placed on the back of the sensor, allowing more light to reach them. This design results in improved low-light performance and reduced noise in the images.
IMX477 Sensor Specifications
| Specification | Value |
|---|---|
| Resolution | 4056 x 3040 (12.3MP) |
| Sensor Size | 7.9mm diagonal |
| Pixel Size | 1.55μm |
| Sensor Type | Back-illuminated |
| Optical Format | 1/2.3-inch |
| Lens Mount | C/CS-mount |
The IMX477 sensor has a resolution of 12.3 megapixels, which is a significant increase from the 8-megapixel resolution of the previous Raspberry Pi Camera Module v2. The higher resolution allows for more detailed images and the ability to crop images without losing quality.

Lens Compatibility and Mounting Options
One of the key features of the Raspberry Pi HQ Camera is its compatibility with C- and CS-mount lenses. This compatibility opens up a wide range of lens options for users, allowing them to choose the best lens for their specific application.
C-Mount and CS-Mount Lenses
C-mount and CS-mount are two common lens mounts used in industrial and scientific applications. The main difference between the two is the flange focal distance (FFD), which is the distance from the lens mounting flange to the sensor.
- C-mount lenses have an FFD of 17.526mm
- CS-mount lenses have an FFD of 12.526mm
The Raspberry Pi HQ Camera is designed to work with both C-mount and CS-mount lenses. When using a C-mount lens, a 5mm spacer ring is required to achieve the correct FFD.
Tripod Mounting
The IMX477 camera comes with a tripod mount included in the box. This mount allows users to easily attach the camera to a tripod or other mounting solutions, providing stability and flexibility in camera positioning.

Configuring and Using the IMX477 Camera
Setting up and using the Raspberry Pi HQ Camera is a straightforward process, thanks to the excellent support provided by the Raspberry Pi Foundation and the community.
Connecting the Camera to the Raspberry Pi
- Ensure that your Raspberry Pi is powered off.
- Locate the camera connector on the Raspberry Pi board. It is a small, flat connector located near the HDMI port.
- Gently lift the connector’s plastic clip.
- Insert the flexible ribbon cable of the camera module into the connector, ensuring that the blue side of the cable is facing the HDMI port.
- Press down the plastic clip to secure the cable in place.
Enabling the Camera in Raspberry Pi Configuration
Before using the camera, you need to enable it in the Raspberry Pi configuration.
- Open the Raspberry Pi Configuration tool by clicking on the Raspberry Pi icon in the top-left corner of the screen and selecting “Preferences” > “Raspberry Pi Configuration”.
- In the “Interfaces” tab, locate the “Camera” option and click on the “Enable” radio button.
- Click “OK” to save the changes and exit the configuration tool.
- Reboot your Raspberry Pi for the changes to take effect.
Capturing Images and Videos with the IMX477 Camera
The Raspberry Pi HQ Camera can be used with various software applications to capture images and videos. Some popular options include:
- raspistill: A command-line tool for capturing still images.
- raspivid: A command-line tool for capturing videos.
- libcamera: A new camera stack developed by the Raspberry Pi Foundation, offering improved performance and flexibility.
- Python Picamera library: A Python library for controlling the Raspberry Pi camera module.
Here’s an example of capturing an image using raspistill:
raspistill -o image.jpg
This command will capture an image and save it as “image.jpg” in the current directory.

Example Projects and Applications
The Raspberry Pi HQ Camera’s high-quality imaging capabilities make it suitable for a wide range of applications, from photography and videography to scientific imaging and machine vision.
Time-lapse Photography
Time-lapse photography involves capturing images at regular intervals and combining them into a video that shows the passage of time. The Raspberry Pi HQ Camera is well-suited for this application, thanks to its high resolution and the ability to control the camera programmatically.
Here’s an example of a simple time-lapse script using the raspistill command:
#!/bin/bash
for i in {1..100}; do
    raspistill -o image_$i.jpg -t 1000
    sleep 60
done
This script captures an image every 60 seconds, saving each image with a unique filename.
Microscopy and Scientific Imaging
The IMX477 camera’s compatibility with C- and CS-mount lenses makes it an excellent choice for microscopy and scientific imaging applications. By using appropriate lenses and lighting, the camera can capture detailed images of microscopic specimens or other small objects.
Machine Vision and Robotics
The Raspberry Pi HQ Camera can be used in machine vision and robotics applications, where high-quality imaging is essential for object detection, recognition, and tracking. The camera’s high resolution and the ability to use various lenses make it a versatile choice for these applications.
Comparison with Other Raspberry Pi Camera Modules
The Raspberry Pi Foundation offers several camera modules, each with its own strengths and weaknesses. Here’s a comparison of the IMX477 camera with other popular Raspberry Pi camera modules:
| Camera Module | Resolution | Sensor Size | Lens Mount | IR Cut Filter |
|---|---|---|---|---|
| IMX477 HQ Camera | 12.3MP | 7.9mm | C/CS-mount | Yes |
| Camera Module v2 | 8MP | 4.6mm | Fixed | Yes |
| Camera Module v1 | 5MP | 4.6mm | Fixed | No |
| NoIR Camera v2 | 8MP | 4.6mm | Fixed | No |
The IMX477 camera stands out with its higher resolution, larger sensor size, and the ability to use interchangeable lenses. However, the other camera modules may be more suitable for certain applications, such as low-light imaging (NoIR Camera v2) or projects requiring a smaller form factor (Camera Module v1/v2).
Frequently Asked Questions (FAQ)
-
Q: What is the difference between the IMX477 camera and the previous Raspberry Pi camera modules?
A: The IMX477 camera features a higher resolution (12.3MP) sensor, a larger sensor size (7.9mm), and the ability to use interchangeable C- and CS-mount lenses. It also has improved low-light performance and an integrated IR cut filter. -
Q: Do I need any additional hardware to use the IMX477 camera with my Raspberry Pi?
A: No, the IMX477 camera connects directly to the Raspberry Pi’s camera connector. However, you will need a compatible C- or CS-mount lens to use with the camera. -
Q: Can I use the IMX477 camera with any Raspberry Pi model?
A: The IMX477 camera is compatible with all Raspberry Pi models that have a camera connector, including the Raspberry Pi 4, 3, 2, and Zero. -
Q: How do I focus the lens on the IMX477 camera?
A: The focusing method depends on the specific lens you are using. Most C- and CS-mount lenses have a focusing ring or a focusing mechanism that allows you to adjust the focus manually. -
Q: Can I use the IMX477 camera for infrared (IR) imaging?
A: No, the IMX477 camera has an integrated IR cut filter, which blocks infrared light. If you require IR imaging capabilities, you should consider using the Raspberry Pi NoIR Camera v2.
Conclusion
The Raspberry Pi IMX477 High Quality Camera is a significant upgrade from the previous Raspberry Pi camera modules, offering higher resolution, better low-light performance, and the ability to use interchangeable lenses. Its versatility and imaging capabilities make it an excellent choice for a wide range of applications, from photography and videography to scientific imaging and machine vision.
By understanding the key features of the IMX477 sensor, lens compatibility, and the various software options available, users can leverage the full potential of this camera module in their projects. Whether you are a photographer, maker, or researcher, the Raspberry Pi HQ Camera opens up new possibilities for high-quality imaging in a compact and affordable package.
No responses yet