What is EagleCAD?
EagleCAD is a powerful electronic design automation (EDA) software that enables users to create professional-grade printed circuit board (PCB) layouts and schematics. Developed by Autodesk, EagleCAD has become a popular choice among engineers, hobbyists, and students for its user-friendly interface, extensive component libraries, and versatile design tools.
Key Features of EagleCAD
- Schematic Editor: Create and edit electronic schematics with a wide range of components and symbols.
- PCB Layout Editor: Design PCB layouts with advanced routing tools, design rule checks (DRC), and manufacturing outputs.
- Component Libraries: Access an extensive collection of pre-made components and create custom libraries.
- Design Rule Checks: Ensure your designs adhere to manufacturing specifications and avoid common errors.
- Multi-Layer Support: Create complex designs with up to 16 signal layers and 4 supply layers.
Getting Started with EagleCAD
System Requirements
Before installing EagleCAD, ensure that your system meets the following minimum requirements:
| Operating System | Processor | RAM | Hard Disk Space |
|---|---|---|---|
| Windows 10/8/7 | 1 GHz | 2 GB | 2 GB |
| macOS 10.14+ | 1 GHz | 2 GB | 2 GB |
| Linux 64-bit | 1 GHz | 2 GB | 2 GB |
Installation Process
- Download the EagleCAD installer from the official Autodesk website.
- Run the installer and follow the on-screen instructions to complete the installation.
- Launch EagleCAD and activate your license or start the free trial.

Creating a New Project
Project Structure
EagleCAD projects are organized into two main files:
- Schematic (.sch): Contains the electronic schematic of your design.
- Board (.brd): Contains the PCB layout based on the schematic.
Steps to Create a New Project
- Open EagleCAD and click on “File” > “New” > “Project”.
- Choose a location to save your project and give it a name.
- Right-click on your project in the “Projects” panel and select “New” > “Schematic”.
- Design your electronic schematic using components from libraries and wiring them together.
- Once your schematic is complete, click on “File” > “Switch to Board” to create the PCB layout.

Designing Schematics
Adding Components
- Click on the “Add” tool in the schematic editor.
- Browse through the available libraries to find the desired component.
- Click on the component and place it on the schematic canvas.
- Repeat the process for all required components.
Wiring Components
- Click on the “Net” tool in the schematic editor.
- Click on the first pin you want to connect.
- Move the cursor to the second pin and click to create a wire.
- Continue connecting pins until your schematic is complete.
Naming and Labeling
- Use the “Name” tool to assign names to components and nets.
- Use the “Value” tool to assign values to components (e.g., resistor values, capacitor values).
- Use the “Text” tool to add additional labels and notes to your schematic.

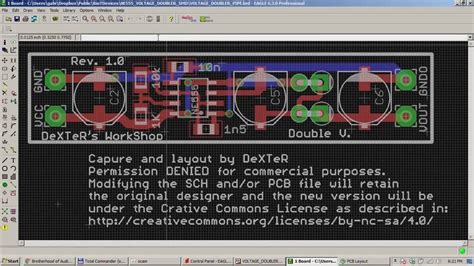
Creating PCB Layouts
Board Outline
- Switch to the board editor and click on the “Wire” tool.
- Draw the outline of your PCB by clicking and dragging the cursor.
- Use the “Circle” tool to create rounded corners if desired.
Placing Components
- Click on the “Move” tool in the board editor.
- Select the components from the schematic and place them on the PCB layout.
- Arrange the components in a logical manner, considering factors like signal flow and physical size.
Routing Traces
- Click on the “Route” tool in the board editor.
- Select the appropriate trace width based on the current requirements of your design.
- Click on the starting pad and move the cursor to the destination pad.
- Click to create a trace segment and continue routing until all connections are made.
Design Rule Checks (DRC)
- Click on “Tools” > “DRC” to open the Design Rule Checks dialog.
- Configure the DRC settings based on your PCB manufacturer’s specifications.
- Run the DRC to identify any design rule violations and correct them accordingly.
Generating Manufacturing Outputs
Gerber Files
- Click on “File” > “CAM Processor” to open the CAM Processor dialog.
- Select the “gerb274x” device and click on “Process Job”.
- Choose the desired layers (e.g., Top Copper, Bottom Copper, Silkscreen) and click “Process”.
- Save the generated Gerber files in a separate folder.
Drill Files
- In the CAM Processor dialog, select the “excellon” device.
- Click on “Process Job” and choose the appropriate drill settings.
- Save the generated drill files in the same folder as the Gerber files.
BOM and Pick & Place Files
- Click on “File” > “Export” > “BOM” to generate the Bill of Materials.
- Click on “File” > “Export” > “Pick & Place” to generate the Pick & Place file for automated assembly.
Frequently Asked Questions (FAQ)
-
Q: Can I use EagleCAD for free?
A: Yes, EagleCAD offers a free version with limited features and board size. For more advanced features and larger board sizes, you need to purchase a subscription. -
Q: Is EagleCAD compatible with other EDA software?
A: EagleCAD can import and export files in various formats, including Gerber, DXF, and Excellon, which makes it compatible with most other EDA software. -
Q: Can I create custom component libraries in EagleCAD?
A: Yes, EagleCAD allows you to create and manage custom component libraries. You can create new components from scratch or modify existing ones to suit your needs. -
Q: Does EagleCAD support multi-layer PCB designs?
A: Yes, EagleCAD supports up to 16 signal layers and 4 supply layers, making it suitable for complex multi-layer PCB designs. -
Q: Can I automate repetitive tasks in EagleCAD?
A: Yes, EagleCAD supports scripting using the User Language Program (ULP), which allows you to automate repetitive tasks and create custom tools.
By following these guidelines and utilizing the powerful features of EagleCAD, you can streamline your electronic design process and create professional-grade PCBs with ease. Remember to keep your designs organized, adhere to design rules, and always double-check your work before sending it for manufacturing.
No responses yet