Introduction to PCB Baking
PCB (Printed Circuit Board) baking is a process that helps to remove moisture from the board and its components before the soldering process. This is especially important for PCBs that have been stored for an extended period or have been exposed to humid environments. Baking PCBs can help to prevent component failure, improve soldering quality, and increase the overall reliability of the electronic device.
In this Comprehensive Guide, we will dive into the details of PCB baking, including why it’s necessary, the equipment needed, and the step-by-step process to properly bake your PCBs and components.
Why is PCB Baking Necessary?
Moisture Absorption
PCBs and electronic components can absorb moisture from the environment, especially if they are stored in humid conditions or not properly sealed. This moisture absorption can lead to various issues during the soldering process and affect the long-term reliability of the electronic device.
Some common problems caused by moisture in PCBs include:
- Delamination of the PCB Layers
- Cracking of the PCB substrate
- Popcorning of plastic component packages
- Reduced soldering quality
- Corrosion of metal parts
Benefits of PCB Baking
By baking PCBs and components before soldering, you can:
- Remove absorbed moisture
- Improve soldering quality
- Reduce the risk of component failure
- Enhance the long-term reliability of the electronic device
- Comply with industry standards (e.g., IPC-1601)

Equipment Needed for PCB Baking
To properly bake your PCBs and components, you’ll need the following equipment:
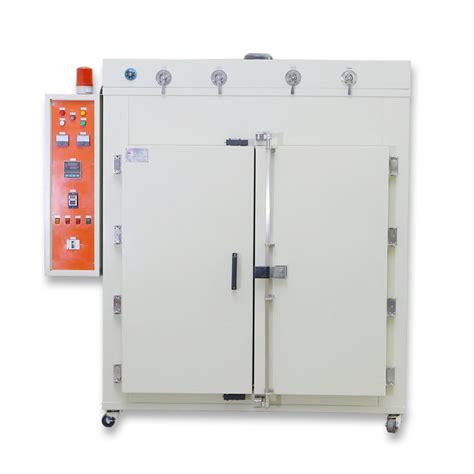
- Baking oven (convection or reflow oven)
- Temperature control system
- Moisture-barrier bags (MBBs) or vacuum bags
- Desiccants
- Thermocouples or temperature sensors
- Oven racks or trays
- ESD (Electrostatic Discharge) protection equipment
Choosing the Right Oven
When selecting an oven for PCB baking, consider the following factors:
- Temperature range and accuracy
- Size and capacity
- Airflow and temperature uniformity
- Cost and maintenance requirements
Some common types of ovens used for PCB baking include:
| Oven Type | Pros | Cons |
|---|---|---|
| Convection Oven | – Readily available – Lower cost |
– Less precise temperature control – Potential hot spots |
| Reflow Oven | – Precise temperature control – Even heat distribution |
– Higher cost – More complex setup |
Temperature Control and Monitoring
To ensure proper baking, it’s crucial to maintain accurate temperature control and monitoring throughout the process. Use thermocouples or temperature sensors to track the oven temperature and make adjustments as needed.

PCB Baking Process
Step 1: Preparation
- Ensure the PCBs and components are clean and free from contaminants
- Place the PCBs and components in moisture-barrier bags (MBBs) or vacuum bags with desiccants
- Label the bags with the date, component type, and baking parameters
Step 2: Baking
- Preheat the oven to the recommended temperature (typically 125°C/257°F for PCBs and 60-90°C/140-194°F for components)
- Place the bagged PCBs and components on oven racks or trays, allowing space for airflow
- Bake the PCBs and components for the recommended time (typically 4-6 hours for PCBs and 1-2 hours for components)
- Monitor the oven temperature throughout the baking process
Step 3: Cooling and Storage
- After baking, allow the PCBs and components to cool down gradually to room temperature
- Store the baked PCBs and components in a dry, controlled environment until ready for use
- Use the PCBs and components within the recommended time frame (typically 1-3 days) to prevent moisture reabsorption

Baking Parameters for Common Components
Different components may require specific baking parameters. Here are some general guidelines for common component types:
| Component Type | Baking Temperature | Baking Time |
|---|---|---|
| PCBs | 125°C (257°F) | 4-6 hours |
| Plastic BGA | 90°C (194°F) | 1-2 hours |
| Ceramic BGA | 90°C (194°F) | 1-2 hours |
| Connectors | 60°C (140°F) | 1-2 hours |
| Capacitors | 60°C (140°F) | 1-2 hours |
Always refer to the component manufacturer’s recommendations for specific baking parameters.
Frequently Asked Questions (FAQ)
1. Can I use a household oven for PCB baking?
While it’s possible to use a household oven for PCB baking, it’s not recommended. Household ovens lack precise temperature control and may not provide even heat distribution, which can lead to inconsistent results or damage to the PCBs and components.
2. How often should I bake my PCBs and components?
The frequency of PCB baking depends on the storage conditions and the moisture sensitivity level (MSL) of the components. In general, if the PCBs and components have been properly stored in a dry environment, baking may not be necessary. However, if they have been exposed to humid conditions or stored for an extended period, baking before soldering is recommended.
3. Can I bake PCBs and components together?
It’s generally not recommended to bake PCBs and components together, as they may require different baking parameters. Baking them separately ensures that each item receives the appropriate temperature and duration for optimal moisture removal.
4. What happens if I don’t bake my PCBs and components?
If you don’t bake your PCBs and components when necessary, you may encounter issues such as delamination, popcorning, or poor soldering quality. These problems can lead to component failure and reduce the overall reliability of the electronic device.
5. How long can I store baked PCBs and components before use?
Ideally, baked PCBs and components should be used within 1-3 days to prevent moisture reabsorption. If you need to store them for longer, ensure they are kept in a dry, controlled environment with desiccants and moisture-barrier packaging.
Conclusion
PCB baking is a crucial process for ensuring the quality and reliability of electronic devices. By removing absorbed moisture from PCBs and components before soldering, you can prevent various issues such as delamination, popcorning, and poor soldering quality.
To effectively bake your PCBs and components, it’s essential to use the right equipment, follow the proper baking process, and adhere to the recommended baking parameters for each component type. By doing so, you can enhance the long-term performance of your electronic devices and comply with industry standards.
As technology continues to advance, it’s important to stay up-to-date with the latest best practices and guidelines for PCB baking. This comprehensive guide serves as a foundation for understanding the PCB baking process, and by following these principles, you can ensure the success of your electronic projects in 2024 and beyond.
No responses yet