What is an FTDI Chip?
FTDI chips are USB-to-serial converter integrated circuits that enable communication between a USB host and a serial device. They are designed to simplify the process of adding USB functionality to devices with serial interfaces, such as UART, SPI, and I2C. FTDI chips handle the USB protocol stack and provide a simple, transparent interface for the serial device.
Some of the most popular FTDI chips include:
- FT232R: USB to UART converter
- FT2232H: Dual USB to UART/FIFO converter
- FT4232H: Quad USB to UART/FIFO converter
- FT230X: USB to basic UART converter
FTDI Module Types
FTDI modules are breakout boards that incorporate FTDI chips, making it easier to integrate USB-to-serial functionality into projects. These modules come in various form factors and pinouts, depending on the specific FTDI chip and the intended application. Some common FTDI module types include:
FTDI Basic Breakout
The FTDI Basic Breakout is a simple module that features the FT232RL chip. It provides a USB-to-UART interface and is compatible with 3.3V and 5V logic levels. The module includes a mini-USB connector, a voltage regulator, and basic UART pins (TX, RX, VCC, and GND).
FTDI Cable
FTDI cables are USB-to-serial converter cables that incorporate an FTDI chip. They are available in different lengths and connector types, such as male or female headers, and are often used for programming microcontrollers or communicating with serial devices.
FTDI Friend
The FTDI Friend is a compact, breadboard-friendly module that features the FT232RL chip. It includes a USB Type-C connector, a voltage regulator, and basic UART pins (TX, RX, VCC, and GND). The module also has an onboard LED that indicates the status of the USB connection.

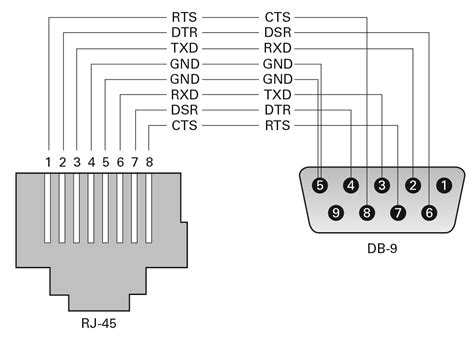
FTDI Pinout
The pinout of an FTDI module depends on the specific chip and module type. However, most FTDI modules share a common set of pins that are essential for USB-to-serial communication. These pins include:
| Pin | Name | Description |
|---|---|---|
| 1 | GND | Ground |
| 2 | CTS# | Clear to Send (active low) |
| 3 | VCC | Supply voltage (3.3V or 5V) |
| 4 | TXD | Transmit Data (output from FTDI) |
| 5 | RXD | Receive Data (input to FTDI) |
| 6 | RTS# | Request to Send (active low) |
Some FTDI modules may have additional pins for advanced features or alternate functions, such as:
- DTR#: Data Terminal Ready (active low)
- DSR#: Data Set Ready (active low)
- DCD#: Data Carrier Detect (active low)
- RI#: Ring Indicator (active low)
- CBUS0-3: Configurable CBUS pins (can be used for GPIO, PWM, etc.)

Connecting an FTDI Module
To connect an FTDI module to a serial device, follow these steps:
- Identify the appropriate pins on the FTDI module and the serial device.
- Connect the GND pin of the FTDI module to the GND pin of the serial device.
- Connect the VCC pin of the FTDI module to the appropriate power supply (3.3V or 5V, depending on the device).
- Connect the TXD pin of the FTDI module to the RXD pin of the serial device.
- Connect the RXD pin of the FTDI module to the TXD pin of the serial device.
- If required, connect the CTS# and RTS# pins for hardware flow control.
- Connect the USB end of the FTDI module to a USB host (computer or USB power supply).

Using FTDI Modules with Microcontrollers
FTDI modules are commonly used for programming and communicating with microcontrollers, such as Arduino boards. To use an FTDI module with a microcontroller:
- Connect the FTDI module to the microcontroller as described in the previous section.
- Install the necessary drivers on your computer (FTDI provides drivers for Windows, macOS, and Linux).
- Open the Arduino IDE (or your preferred development environment).
- Select the appropriate board and serial port in the IDE settings.
- Upload your sketch to the microcontroller using the FTDI module.
Troubleshooting FTDI Connections
If you encounter issues while using an FTDI module, consider the following troubleshooting steps:
- Double-check the wiring connections between the FTDI module and the serial device.
- Verify that the voltage levels are compatible between the FTDI module and the serial device.
- Ensure that the appropriate drivers are installed on your computer.
- Check the serial port settings in your software (baud rate, data bits, parity, stop bits).
- Try using a different USB port or cable.
- If using a breadboard, ensure that the connections are secure and free from shorts.
Advanced FTDI Features
FTDI chips and modules offer several advanced features that can be leveraged in specific applications:
GPIO and PWM
Some FTDI chips, such as the FT232H and FT4232H, have configurable CBUS pins that can be used as general-purpose input/output (GPIO) or pulse-width modulation (PWM) pins. These features allow for additional control and functionality in projects.
Bit Bang Mode
FTDI chips support bit bang mode, which enables the emulation of various serial protocols, such as SPI and I2C, using GPIO pins. This feature is useful when working with devices that require specific serial protocols not natively supported by the FTDI chip.
MPSSE Mode
The Multi-Protocol Synchronous Serial Engine (MPSSE) mode is available on certain FTDI chips, such as the FT2232H and FT4232H. MPSSE allows for the implementation of synchronous serial protocols, including SPI, I2C, and JTAG, with higher performance compared to bit bang mode.
FAQ
-
Q: Can I use an FTDI module to program an Arduino board?
A: Yes, FTDI modules are commonly used to program Arduino boards. Simply connect the FTDI module to the Arduino’s UART pins and select the appropriate board and serial port in the Arduino IDE. -
Q: What is the difference between 3.3V and 5V FTDI modules?
A: The voltage level (3.3V or 5V) of an FTDI module determines its compatibility with the serial device. 3.3V modules are suitable for devices that operate at 3.3V logic levels, while 5V modules are compatible with 5V devices. Using the incorrect voltage level can damage the connected device. -
Q: How do I install FTDI drivers on my computer?
A: FTDI provides drivers for Windows, macOS, and Linux. Visit the FTDI website (https://www.ftdichip.com/Drivers/VCP.htm) and download the appropriate driver for your operating system. Follow the installation instructions provided with the driver package. -
Q: What should I do if my FTDI module is not recognized by my computer?
A: First, ensure that the FTDI module is properly connected to your computer. Check the USB cable and try a different USB port. If the issue persists, verify that the correct drivers are installed and try reinstalling them. If the problem still occurs, the FTDI module may be damaged and need replacement. -
Q: Can I use an FTDI module to communicate with a device that uses a different serial protocol, such as SPI or I2C?
A: Some FTDI chips, like the FT232H and FT4232H, support bit bang mode and MPSSE mode, which allow for the emulation of various serial protocols. By configuring the CBUS pins and using the appropriate software libraries, you can communicate with devices that use SPI, I2C, or other serial protocols.
Conclusion
Understanding the FTDI pinout and how to use FTDI modules is essential for anyone working with USB-to-serial communication. FTDI chips and modules provide a simple and efficient way to add USB functionality to devices with serial interfaces. By familiarizing yourself with the different types of FTDI modules, their pinouts, and the connection process, you can easily integrate USB-to-serial communication into your projects. Whether you are programming microcontrollers, communicating with sensors, or debugging serial devices, FTDI modules offer a reliable and versatile solution.
No responses yet