What is Eagle PCB?
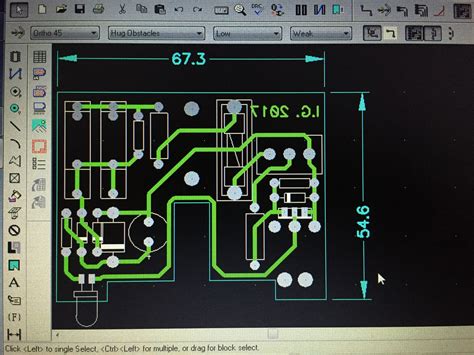
Eagle PCB is a powerful and popular software tool used for designing printed circuit boards (PCBs). Developed by Autodesk, Eagle PCB provides a comprehensive set of features for creating schematic diagrams, designing PCB layouts, and generating manufacturing files. Whether you are a hobbyist, a student, or a professional electronics engineer, Eagle PCB offers a user-friendly interface and extensive libraries to streamline your PCB design process.
Key Features of Eagle PCB
| Feature | Description |
|---|---|
| Schematic Capture | Create schematic diagrams with a wide range of components and symbols |
| PCB Layout Design | Design PCB layouts with multilayer support, routing, and placement tools |
| Library Management | Access extensive libraries of components and create custom libraries |
| Design Rule Checking (DRC) | Verify your designs against predefined design rules to ensure manufacturability |
| CAM Processor | Generate manufacturing files such as Gerber files, drill files, and pick-and-place files |
| 3D Visualization | View your PCB designs in 3D for better visualization and presentation |
Why Choose Eagle PCB?
Eagle PCB has gained popularity among PCB designers for several reasons:
-
User-Friendly Interface: Eagle PCB offers an intuitive and user-friendly interface that makes it easy for beginners to get started with PCB design while providing advanced features for experienced users.
-
Extensive Libraries: Eagle PCB comes with a vast collection of libraries containing a wide range of components and symbols. These libraries can be easily extended or customized to suit your specific design needs.
-
Cross-Platform Compatibility: Eagle PCB is available for Windows, macOS, and Linux operating systems, making it accessible to designers regardless of their preferred platform.
-
Community Support: Eagle PCB has a large and active community of users who share knowledge, tutorials, and custom libraries. This community support can be invaluable when learning the software or seeking assistance with specific design challenges.
-
Affordable Pricing: Autodesk offers various pricing options for Eagle PCB, including a free version for non-commercial use and educational purposes. The paid versions provide additional features and larger design limits, making it suitable for professional use.

System Requirements
Before downloading and installing Eagle PCB, ensure that your system meets the following minimum requirements:
| Operating System | Minimum Requirements |
|---|---|
| Windows | Windows 10 (64-bit) |
| macOS | macOS 10.14 (Mojave) or later |
| Linux | 64-bit Linux (Ubuntu 18.04 or later, Fedora 29 or later) |
Additionally, your system should have:
– At least 8 GB of RAM
– At least 5 GB of free disk space
– A compatible graphics card with at least 1 GB of VRAM

Downloading Eagle PCB
To download Eagle PCB, follow these steps:
-
Visit the official Autodesk Eagle website: https://www.autodesk.com/products/eagle/overview
-
Click on the “Download” button on the Eagle PCB product page.
-
If you don’t have an Autodesk account, you’ll need to create one. Click on the “Create Account” button and follow the registration process.
-
Once you have an Autodesk account, log in to your account.
-
Select the appropriate version of Eagle PCB based on your operating system (Windows, macOS, or Linux).
-
Choose the desired download option (e.g., free trial, subscription, or educational license).
-
Agree to the terms and conditions and click on the “Download” button.
-
Save the downloaded installer file to your preferred location on your computer.

Installing Eagle PCB
Once you have downloaded the Eagle PCB installer, follow these steps to install the software:
Windows Installation
-
Locate the downloaded installer file (e.g.,
EagleSetup.exe) and double-click on it to start the installation process. -
The installer will guide you through the installation steps. Click “Next” to proceed.
-
Read and accept the license agreement by selecting the appropriate option and clicking “Next”.
-
Choose the installation directory where you want to install Eagle PCB. The default location is usually sufficient for most users. Click “Next” to continue.
-
Select the components you want to install. It is recommended to keep the default selections unless you have specific requirements. Click “Next”.
-
Review the installation settings and click “Install” to begin the installation process.
-
Wait for the installation to complete. This may take several minutes.
-
Once the installation is finished, click “Finish” to close the installer.
macOS Installation
-
Locate the downloaded installer file (e.g.,
Eagle.dmg) and double-click on it to mount the disk image. -
In the Finder window that opens, drag the Eagle PCB application icon to the “Applications” folder to install it.
-
If prompted, enter your macOS account password to authorize the installation.
-
Wait for the installation to complete.
-
Once the installation is finished, you can launch Eagle PCB from the Applications folder.
Linux Installation
- Extract the downloaded tarball file (e.g.,
eagle-linux-x64-9.6.2.tar.gz) to a directory of your choice using the following command in the terminal:
tar -xvzf eagle-linux-x64-9.6.2.tar.gz
- Navigate to the extracted directory:
cd eagle-9.6.2
- Run the installation script with root privileges:
sudo ./eagle-9.6.2.run
-
Follow the on-screen instructions to complete the installation process.
-
Once the installation is finished, you can launch Eagle PCB from the terminal or create a desktop shortcut for convenience.
Getting Started with Eagle PCB
After installing Eagle PCB, you can start using the software to design your PCBs. Here are some basic steps to get started:
-
Launch Eagle PCB: Open the Eagle PCB application from your computer’s application menu or desktop shortcut.
-
Create a New Project: Click on “File” in the menu bar and select “New Project”. Choose a location to save your project and give it a name.
-
Create a Schematic: In the Eagle PCB Control Panel, right-click on your project and select “New” > “Schematic”. This will open the schematic editor where you can start designing your circuit.
-
Add Components: Use the “Add” tool in the schematic editor to place components from the libraries onto your schematic. You can search for specific components or browse through the available libraries.
-
Connect Components: Use the “Wire” tool to connect the components in your schematic according to your circuit design.
-
Create a Board: Once you have completed your schematic, right-click on your project in the Control Panel and select “New” > “Board”. This will open the PCB layout editor.
-
Place Components: In the PCB layout editor, use the “Move” tool to place the components on the board. You can arrange them to optimize the layout and minimize the board size.
-
Route Traces: Use the “Route” tool to manually route the traces between the components. Eagle PCB also provides an autorouter that can automatically route the traces based on predefined rules.
-
Run Design Rule Checks: Before finalizing your PCB design, it’s important to run design rule checks (DRC) to ensure that your layout meets the manufacturing requirements. Go to “Tools” > “DRC” to configure and run the design rule checks.
-
Generate Manufacturing Files: Once your PCB design is complete and has passed the DRC, you can generate the necessary manufacturing files. Go to “File” > “CAM Processor” to generate Gerber files, drill files, and other required files for PCB fabrication.
Frequently Asked Questions (FAQ)
- Is Eagle PCB free to use?
- Eagle PCB offers a free version for non-commercial use and educational purposes. The free version has some limitations in terms of board size and layer count.
-
For commercial use or advanced features, you can purchase a subscription or a perpetual license.
-
Can I import designs from other PCB software into Eagle PCB?
- Yes, Eagle PCB supports importing designs from various file formats, including Altium Designer files (.PcbDoc), Cadence OrCAD files (.dsn), and PADS files (.asc).
-
To import a design, go to “File” > “Import” and select the appropriate file format.
-
How can I create custom libraries in Eagle PCB?
- Eagle PCB allows you to create custom libraries to store your own components and symbols.
- To create a custom library, go to “File” > “New” > “Library” in the Eagle PCB Control Panel.
-
You can then use the library editor to create new components, symbols, and footprints.
-
Can I collaborate with others on Eagle PCB projects?
- Yes, Eagle PCB supports collaboration through the Autodesk 360 cloud platform.
-
You can share your projects with team members, manage version control, and access your designs from anywhere with an internet connection.
-
Where can I find additional resources and tutorials for learning Eagle PCB?
- Autodesk provides official documentation and tutorials on their website: https://www.autodesk.com/products/eagle/learn
- There are also numerous third-party tutorials, video courses, and forums available online where you can find helpful resources and connect with the Eagle PCB community.
Conclusion
Eagle PCB is a powerful and versatile software tool for designing printed circuit boards. With its user-friendly interface, extensive libraries, and comprehensive features, Eagle PCB caters to the needs of both beginners and experienced PCB designers. By following this guide, you should be able to download, install, and get started with Eagle PCB successfully.
Remember to explore the official documentation, tutorials, and community resources to further enhance your skills and make the most out of Eagle PCB’s capabilities. Happy PCB designing!

No responses yet