What is a Drone Board?
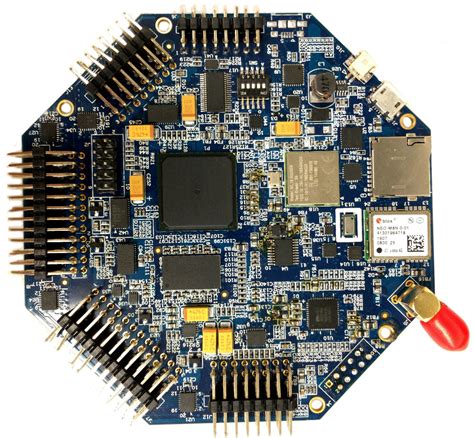
A drone board, also known as a flight controller board, is the brain of your drone. It’s responsible for managing and controlling various aspects of your drone’s flight, such as:
- Stabilization
- Navigation
- Sensor integration
- Motor control
- Battery management
The drone board receives input from sensors, processes the data, and sends commands to the motors and other components to ensure smooth and stable flight. It’s essentially the central hub that integrates all the crucial elements of your drone.
Why is Choosing the Right Drone Board Important?
Selecting the appropriate drone board is crucial for several reasons:
-
Performance: The right drone board can significantly enhance your drone’s flight performance, providing better stability, responsiveness, and overall control.
-
Compatibility: Ensuring that your drone board is compatible with other components, such as motors, ESCs, and sensors, is essential for seamless integration and optimal functionality.
-
Features: Different drone boards offer various features, such as GPS integration, autonomous flight modes, and programmability. Choosing a board that aligns with your specific requirements can greatly expand your drone’s capabilities.
-
Future-proofing: Investing in a high-quality, feature-rich drone board can future-proof your setup, allowing you to upgrade and expand your drone’s functionality as your skills and needs evolve.

Factors to Consider When Choosing a Drone Board
When selecting a drone board, there are several key factors to keep in mind:
1. Size and Weight
The size and weight of your drone board should be proportional to your drone’s frame and overall setup. A board that is too large or heavy can affect your drone’s performance and flight time. Consider the following aspects:
- Frame compatibility
- Weight distribution
- Mounting options
2. Processing Power
The processing power of your drone board determines its ability to handle complex calculations and real-time data processing. Look for boards with:
- High-performance processors
- Ample RAM
- Efficient architectures
3. Sensor Integration
Your drone board should seamlessly integrate with various sensors to enable advanced features and enhance flight stability. Consider boards that support:
- Gyroscopes
- Accelerometers
- Barometers
- GPS modules
- Magnetometers
4. Connectivity Options
Having a range of connectivity options on your drone board can greatly expand its functionality and ease of use. Look for boards that offer:
- UART ports
- I2C and SPI interfaces
- USB connectivity
- Telemetry support
5. Firmware and Software Compatibility
Ensure that your chosen drone board is compatible with popular firmware and software platforms, such as:
- Betaflight
- PX4
- ArduPilot
- cleanflight
Compatibility with these platforms allows for easy configuration, customization, and access to a wide range of features and community support.
6. Community Support and Documentation
Selecting a drone board with a strong community presence and comprehensive documentation can be invaluable when it comes to troubleshooting, firmware updates, and expanding your knowledge. Look for boards that have:
- Active forums and user groups
- Detailed documentation and tutorials
- Regular firmware updates and bug fixes

Popular Drone Board Options
To help you narrow down your choices, here are some popular drone board options along with their key features:
| Drone Board | Key Features |
|---|---|
| Matek F405-Wing | – STM32F405 processor – Built-in OSD, BEC, and SD card slot – Supports GPS, telemetry, and various sensors |
| Holybro Kakute F7 | – STM32F745 processor – Dual gyros for redundancy – Supports up to 6S batteries – Integrated PDB and BEC |
| SPRacing F7 Dual | – Dual STM32F745 processors – Supports up to 6S batteries – Integrated PDB, BEC, and programmable LEDs – Dual gyros for redundancy |
| Pixhawk 4 | – STM32F765 processor – Supports PX4 and ArduPilot firmware – Integrated GPS, telemetry, and sensor support – Modular design for easy customization |

Installation and Configuration
Once you’ve chosen your drone board, it’s essential to properly install and configure it for optimal performance. Here are some general steps to follow:
-
Mounting: Securely mount your drone board to your frame using appropriate hardware and vibration-dampening materials.
-
Wiring: Connect your motors, ESCs, sensors, and other peripherals to the designated ports on your drone board, following the manufacturer’s wiring diagrams.
-
Firmware Setup: Flash the appropriate firmware onto your drone board using the recommended software tools and procedures.
-
Configuration: Use the firmware’s configuration software to set up your drone board’s parameters, such as PID values, sensor calibration, and failsafe settings.
-
Testing: Perform thorough testing to ensure that your drone board is functioning correctly and all components are properly integrated.
Always refer to your specific drone board’s documentation and community resources for detailed installation and configuration instructions.
Frequently Asked Questions (FAQ)
-
What is the difference between a 4-in-1 ESC and individual ESCs?
A 4-in-1 ESC combines four ESCs into a single board, simplifying wiring and reducing weight. Individual ESCs offer more flexibility in placement and can be easily replaced if one fails. -
Can I use a drone board designed for a quadcopter on a hexacopter or octocopter?
While it’s possible to use a quadcopter drone board on a hexacopter or octocopter, it’s recommended to choose a board specifically designed for the number of motors your drone has to ensure optimal performance and stability. -
How do I update the firmware on my drone board?
Firmware updates are typically performed using the drone board’s compatible configuration software. Always refer to the manufacturer’s instructions and community resources for specific update procedures. -
What should I do if my drone board is not recognized by my computer?
First, ensure that you have the proper drivers installed for your drone board. If the issue persists, try using a different USB cable or port, and check your board’s documentation for troubleshooting steps. -
Can I customize the PID values on my drone board?
Yes, most drone boards allow users to fine-tune PID values to achieve desired flight characteristics. However, it’s essential to have a good understanding of how PID tuning works and to make small incremental changes to avoid instability.
Conclusion
Choosing the best drone board is a crucial step in building or upgrading your drone setup. By considering factors such as size, processing power, sensor integration, connectivity, and compatibility, you can select a board that will enhance your drone’s performance and expand its capabilities.
Remember to prioritize your specific needs and preferences when making your decision, and don’t hesitate to leverage community resources and documentation for guidance. With the right drone board at the heart of your setup, you’ll be ready to take your aerial adventures to new heights and unlock the full potential of your drone.
Happy flying!
No responses yet