Introduction
Soldering is an essential skill for anyone interested in electronics, whether you’re a hobbyist or a professional. A good solder iron is a crucial tool for this task, but buying a high-quality one can be expensive. Fortunately, it’s possible to make your own Homemade Solder Iron with readily available materials. In this comprehensive guide, we’ll walk you through the process of creating a DIY solder iron that’s both effective and affordable.
What is a Solder Iron?
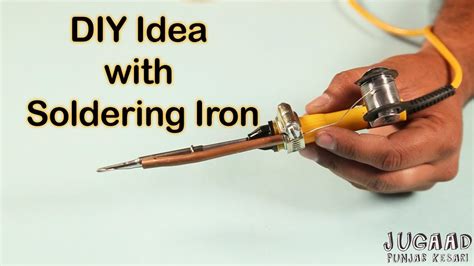
A solder iron is a hand tool used to heat and melt solder, allowing you to join electronic components together. It consists of a heated metal tip and a handle, often with a power cord or battery pack. Solder irons come in various shapes, sizes, and power ratings, depending on the intended use.
Types of Solder Irons
There are several types of solder irons available on the market:
| Type | Description |
|---|---|
| Pencil Solder Iron | The most common type, featuring a slender handle and a pointed tip |
| Soldering Gun | A pistol-shaped tool with a trigger for quick heating |
| Soldering Station | A high-end setup with temperature control and interchangeable tips |
| Cordless Solder Iron | Battery-powered for portability |

Why Make a Homemade Solder Iron?
There are several reasons why you might want to make your own solder iron:
-
Cost Savings: Commercial solder irons can be expensive, especially high-quality models. Making your own can save you money.
-
Customization: By building your own solder iron, you can tailor it to your specific needs and preferences.
-
Learning Experience: Creating a DIY solder iron is an excellent way to learn about electronics and develop your skills.
-
Sense of Accomplishment: There’s a certain satisfaction that comes from using a tool you’ve made yourself.

Materials Needed for a Homemade Solder Iron
To make your own solder iron, you’ll need the following materials:
- A soldering iron tip (can be salvaged from an old solder iron or purchased separately)
- A heating element (such as a high-wattage resistor or a repurposed heating element from an appliance)
- A power source (battery pack or AC adapter)
- Wiring and connectors
- A handle (wood, plastic, or 3D-printed)
- Insulation material (such as ceramic fiber or mica sheets)
- Screws, nuts, and bolts
- Solder and flux

Step-by-Step Guide to Making a Homemade Solder Iron
Step 1: Prepare the Heating Element
The heating element is the heart of your solder iron. You can use a high-wattage resistor (50W or more) or repurpose a heating element from an old appliance, such as a hair dryer or a clothes iron. If using a resistor, mount it securely on a heat-resistant base.
Step 2: Attach the Soldering Tip
Secure the soldering tip to the heating element using high-temperature adhesive or by mechanical means, such as screws or clamps. Ensure that the tip makes good contact with the heating element for efficient heat transfer.
Step 3: Insulate the Heating Assembly
Wrap the heating element and soldering tip with insulation material, such as ceramic fiber or mica sheets, to minimize heat loss and protect the user from burns. Leave the very end of the soldering tip exposed.
Step 4: Prepare the Handle
Choose a material for your handle that’s comfortable to hold and heat-resistant. Wood, plastic, or 3D-printed handles work well. Drill a hole through the handle to accommodate the wiring and heating assembly.
Step 5: Wire the Solder Iron
Connect the heating element to your power source using appropriate wiring and connectors. For AC-powered solder irons, include a switch and a fuse for safety. Battery-powered irons may require a Voltage Regulator to maintain consistent performance.
Step 6: Assemble the Solder Iron
Insert the heating assembly into the handle and secure it with screws, nuts, or bolts. Ensure that the wiring is properly insulated and not exposed. Test your homemade solder iron on a scrap piece of electronics to verify that it heats up and melts solder effectively.
Tips for Using Your Homemade Solder Iron
-
Always wear safety goggles and work in a well-ventilated area to avoid inhaling solder fumes.
-
Use a soldering iron stand to safely rest your iron when not in use.
-
Keep the soldering tip clean by wiping it on a damp sponge or brass wool between uses.
-
Apply a small amount of solder to the tip before storing to prevent oxidation.
-
Practice on scrap components before working on actual projects to refine your technique.
Frequently Asked Questions (FAQ)
1. Can I use any type of solder with my homemade iron?
A: It’s best to use rosin-core solder designed for electronics. Avoid acid-core solder, as it can damage components.
2. How hot should my solder iron get?
A: For most electronics work, a temperature between 600°F and 800°F (315°C to 425°C) is sufficient.
3. How do I know if my homemade solder iron is safe to use?
A: Ensure that all wiring is properly insulated and that your power source is correctly rated for your heating element. Include a fuse and a switch for added safety.
4. Can I use my homemade solder iron for heavy-duty tasks?
A: Homemade solder irons are best suited for light to medium-duty electronics work. For heavy-duty tasks, invest in a commercial high-wattage solder iron.
5. How long will my homemade solder iron last?
A: With proper care and maintenance, your DIY solder iron can last for many projects. However, the lifespan will depend on the quality of the components used and the frequency of use.
Conclusion
Making your own solder iron can be a rewarding and cost-effective way to get started with electronics projects. By following this guide and using the right materials, you can create a functional and reliable tool that meets your soldering needs. Remember to prioritize safety, practice good soldering techniques, and maintain your homemade solder iron for optimal performance. Happy soldering!
No responses yet