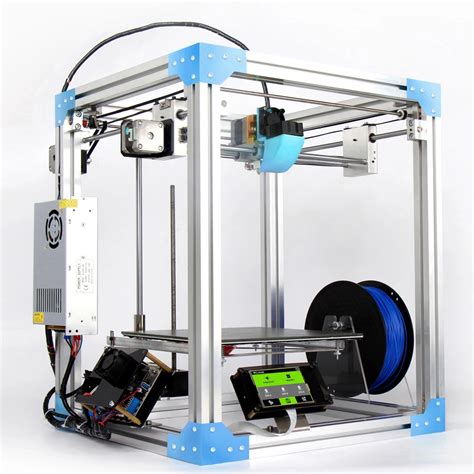
What is a DIY 3D Printer?
A DIY 3D printer is a 3D printer that you build yourself using a kit or sourcing individual components. Building your own 3D printer can be a cost-effective way to get started with 3D printing, as well as a great learning experience. DIY 3D printers come in various sizes and configurations, from small desktop models to large-scale industrial machines.
Why Build a DIY 3D Printer?
There are several reasons why you might want to build your own DIY 3D printer:
-
Cost savings: Building your own 3D printer can be significantly cheaper than buying a pre-built model, especially if you’re willing to source your own components.
-
Customization: When you build your own 3D printer, you have complete control over the components and features you include. This allows you to tailor your printer to your specific needs and preferences.
-
Learning experience: Building a 3D printer from scratch can be a great way to learn about the technology and how it works. You’ll gain a deeper understanding of the various components and how they interact with each other.
-
Upgradability: DIY 3D printers are often more upgradable than pre-built models, as you can easily swap out components as new technologies become available.

Choosing the Right Components
One of the most important aspects of building a DIY 3D printer is choosing the right components. Here are some of the key components you’ll need:
Frame
The frame is the backbone of your 3D printer, providing structure and support for the other components. There are several types of frames to choose from, including:
-
Aluminum extrusion: Aluminum extrusion frames are strong, lightweight, and easy to assemble. They’re a popular choice for DIY 3D printers.
-
Acrylic: Acrylic frames are cheaper than aluminum extrusion frames but are less sturdy and can be prone to cracking.
-
Wood: Wooden frames are cheap and easy to work with but are not as durable as other materials.
Motors and Drivers
Motors and drivers are responsible for moving the print head and build plate. There are two main types of motors used in 3D printers:
-
Stepper motors: Stepper motors are the most common type of motor used in 3D printers. They provide precise movement and are relatively inexpensive.
-
Servo motors: Servo motors are more expensive than stepper motors but offer higher torque and faster movement.
You’ll also need motor drivers to control the motors. The most common types of motor drivers are:
-
A4988: A4988 drivers are cheap and easy to use but can be noisy and generate a lot of heat.
-
DRV8825: DRV8825 drivers are more expensive than A4988 drivers but offer quieter operation and better performance.
-
TMC2208: TMC2208 drivers are the most expensive option but offer the best performance and quietest operation.
Extruder and Hot End
The extruder and hot end are responsible for melting and extruding the filament. There are several types of extruders and hot ends to choose from:
-
Direct drive extruder: Direct drive extruders are mounted directly on the print head, providing better control over the filament feed but adding extra weight to the print head.
-
Bowden extruder: Bowden extruders are mounted separately from the print head, reducing the weight of the print head but potentially introducing issues with filament feed.
-
E3D V6 hot end: The E3D V6 is a popular choice for DIY 3D printers, offering good performance and reliability.
-
Mosquito hot end: The Mosquito hot end is a high-performance option that offers faster printing speeds and better temperature control.
Build Plate
The build plate is where your 3D printed objects will be created. There are several types of build plates to choose from:
-
Heated bed: A heated bed helps prevent warping and improves adhesion, especially with materials like ABS and PETG.
-
Glass bed: Glass beds provide a smooth, flat surface for printing and are easy to clean.
-
PEI sheet: PEI (polyetherimide) sheets offer excellent adhesion and are less prone to warping than other materials.
Electronics
The electronics control the various components of your 3D printer. The main components you’ll need are:
-
Microcontroller: The microcontroller is the brain of your 3D printer, controlling the motors, heating elements, and other components. Popular choices include the Arduino Mega and the Duet series.
-
Power supply: You’ll need a power supply to provide power to the various components of your 3D printer. A 12V or 24V power supply with at least 10A of current is recommended.
-
Stepper drivers: As mentioned earlier, stepper drivers control the stepper motors that move the print head and build plate.
-
Heated bed MOSFET: If you’re using a heated bed, you’ll need a MOSFET to control the high current draw.
-
Endstops: Endstops are used to detect the limits of the print head and build plate movement, preventing damage to the printer.

Assembling Your DIY 3D Printer
Once you’ve gathered all the necessary components, it’s time to assemble your DIY 3D printer. The exact assembly process will vary depending on the specific components you’ve chosen, but here are the general steps:
-
Assemble the frame according to the instructions provided with your kit or the plans you’re following.
-
Install the motors and drivers, making sure they’re properly secured and aligned.
-
Install the extruder and hot end, ensuring that they’re properly aligned and secured.
-
Install the build plate, making sure it’s level and secure.
-
Wire the electronics, following the wiring diagram provided with your kit or the plans you’re following.
-
Install the firmware on your microcontroller and configure it according to your specific setup.
-
Calibrate your 3D printer, including setting the Z-offset, leveling the bed, and tuning the extruder steps per mm.

Troubleshooting Common Issues
Even with careful assembly and calibration, you may encounter issues with your DIY 3D printer. Here are some common issues and how to troubleshoot them:
Poor Bed Adhesion
If your prints are not sticking to the bed, there are several things you can try:
-
Clean the bed with isopropyl alcohol to remove any dirt or grease.
-
Adjust the bed temperature according to the filament you’re using.
-
Use a bed adhesive like glue stick or hairspray.
-
Level the bed to ensure that it’s flat and even.
Stringing or Oozing
Stringing or oozing occurs when filament leaks out of the nozzle during non-printing moves. To prevent this:
-
Adjust the retraction settings in your slicer software.
-
Lower the printing temperature slightly.
-
Increase the travel speed during non-printing moves.
Layer Shifting
Layer shifting occurs when the layers of your print become misaligned. This can be caused by:
-
Loose belts or pulleys.
-
Overheating stepper drivers.
-
Incorrect steps per mm settings.
To fix layer shifting, check that all belts and pulleys are tight, ensure that your stepper drivers are not overheating, and double-check your steps per mm settings.
Clogged Nozzle
A clogged nozzle can cause poor print quality or even prevent printing altogether. To unclog your nozzle:
-
Heat the nozzle to the printing temperature of the filament you were using.
-
Use a needle or thin wire to carefully remove any debris from the nozzle opening.
-
Push filament through the nozzle manually to ensure that it’s flowing freely.
FAQs
-
What is the best material for a DIY 3D printer frame?
Aluminum extrusion is the most popular choice for DIY 3D printer frames due to its strength, lightweight, and ease of assembly. However, other materials like acrylic and wood can also be used, depending on your budget and preferences. -
Can I use any type of filament with a DIY 3D printer?
Most DIY 3D printers can handle a wide range of filament types, including PLA, ABS, PETG, and TPU. However, some filaments may require specific hot end or extruder configurations, so it’s important to research the requirements for the filament you plan to use. -
How much does it cost to build a DIY 3D printer?
The cost of building a DIY 3D printer can vary widely depending on the components you choose and whether you buy a kit or source the components individually. A basic DIY 3D printer can be built for around $200-$500, while more advanced models can cost $1000 or more. -
What is the best firmware for a DIY 3D printer?
There are several popular firmware options for DIY 3D printers, including Marlin, Repetier, and Smoothieware. Marlin is the most widely used and has a large community of users and developers, making it a good choice for beginners. -
Can I use a DIY 3D printer for commercial purposes?
Yes, you can use a DIY 3D printer for commercial purposes, but it’s important to ensure that you have the necessary licenses and permissions for any designs or models you plan to sell. Additionally, you may need to invest in higher-quality components and more advanced features to produce professional-grade prints.
Conclusion
Building your own DIY 3D printer can be a fun and rewarding project, offering cost savings, customization, and a valuable learning experience. By choosing the right components, carefully assembling your printer, and troubleshooting common issues, you can create a reliable and efficient machine that will bring your 3D printing ideas to life. Whether you’re a hobbyist or a professional, a DIY 3D printer can open up a world of possibilities for creating and manufacturing objects of all kinds.
No responses yet