Why a PCB Checklist is Critical for Successful Board Design
Designing a printed circuit board (PCB) involves juggling many complex factors and details. Missing just one small but important item can cause your board to fail or not function as intended. This is where having and following a comprehensive PCB design checklist becomes absolutely critical.
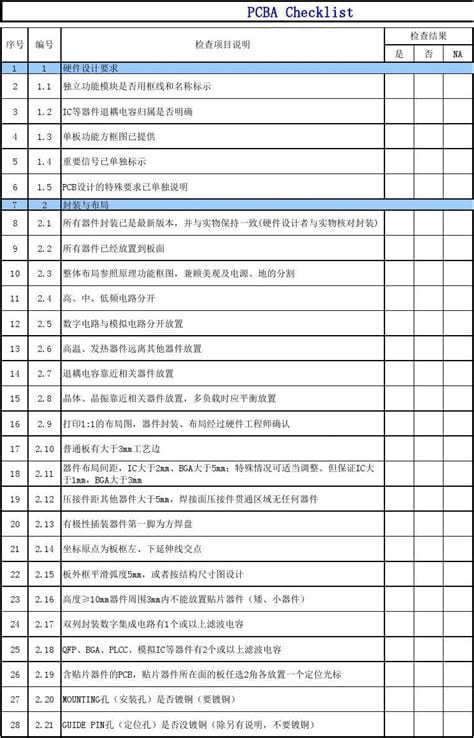
A PCB checklist serves as a systematic guide to make sure you don’t overlook any crucial aspects during the design process. It helps you stay organized, reduces the risk of errors, and ultimately saves time and money by catching potential issues early on before the board goes to fabrication.
Some key reasons to use a PCB checklist include:
- Ensures all necessary design steps and verifications are completed
- Helps maintain consistency and quality across designs
- Acts as a reminder of important details that could be easily forgotten
- Provides a structured workflow to keep the project on track
- Enables design reviews and collaboration with team members
Essential Elements of a Pre-Layout PCB Checklist
While the specific contents of a pre-layout checklist can vary depending on the project requirements and complexity, there are some fundamental elements that should always be included. Let’s explore the key categories and items to have in your PCB design checklist before beginning layout:
1. Schematic Design Review
- [ ] Schematic matches the system block diagram and requirements
- [ ] Part numbers and values of all components are correct
- [ ] Power and ground connections are properly made
- [ ] Unused pins are correctly terminated
- [ ] Polarities of components are correct
- [ ] Decoupling capacitors are used where needed
- [ ] Appropriate connectors and headers are selected
- [ ] Schematic is well organized and easy to follow
- [ ] Schematic has been reviewed and approved
2. Component Selection and Availability
- [ ] Components meet the electrical and environmental requirements
- [ ] Components are available from reliable suppliers
- [ ] Component footprints and pin assignments are correct
- [ ] Alternative components are identified if needed
- [ ] Components are RoHS compliant (if required)
- [ ] Component price and lead time are acceptable
3. PCB Stackup and Materials
- [ ] Number of layers in the stackup is determined
- [ ] Layer stack-up is symmetric and balanced
- [ ] Appropriate materials (substrate, copper, solder mask, silk screen) are selected
- [ ] Material properties (Tg, CTE, Dk, Df) are suitable for the application
- [ ] Copper weights are specified for each layer
- [ ] Controlled impedance requirements are defined
4. Design Rules and Constraints
- [ ] Electrical clearances and creepage distances are specified
- [ ] Minimum trace width and spacing rules are established
- [ ] Via sizes and drill pairs are defined
- [ ] Hole sizes and pad dimensions are specified
- [ ] Solder mask and silk screen rules are determined
- [ ] Differential pair routing requirements are set
- [ ] High-speed design rules are considered
5. Manufacturing and Assembly
- [ ] Design fits within the maximum board dimensions
- [ ] Keep-out and restricted areas are defined
- [ ] Mounting holes and mechanical features are specified
- [ ] Labeling and marking requirements are determined
- [ ] Testpoints and probe targets are added
- [ ] Fiducials for automated assembly are included
- [ ] Panelization and board separation method is selected
- [ ] Gerber and drill file generation settings are configured

How to Use the Pre-Layout PCB Checklist
Having a comprehensive checklist is one thing, but effectively using it is another. Here are some tips to get the most out of your pre-layout PCB checklist:
-
Make it a habit: Incorporate the checklist into your standard design workflow. Reference it at the beginning of every project and make sure to go through each item systematically.
-
Customize as needed: While the checklist provides a solid foundation, feel free to tailor it to your specific needs. Add, remove, or modify items based on the project requirements and your company’s best practices.
-
Collaborate with your team: Share the checklist with your design team and get everyone on the same page. Encourage team members to provide feedback and suggestions for improving the checklist over time.
-
Use it as a communication tool: The checklist can serve as a basis for design reviews and discussions with stakeholders. It helps ensure that everyone is aware of the critical design aspects and decisions.
-
Keep it updated: As technologies, standards, and requirements evolve, make sure to regularly review and update your pre-layout checklist. This ensures that it remains relevant and effective in catching potential issues.

Real-World Example: How a PCB Checklist Prevented a Design Disaster
To illustrate the importance of a pre-layout checklist, let’s consider a real-world scenario where it saved a company from a costly design mistake.
A medical device manufacturer was developing a new patient monitoring system that required a complex, multi-layer PCB. The design team was working under tight deadlines and pressure to get the board ready for production.
In the rush to complete the design, the team nearly skipped the pre-layout checklist review. However, the lead engineer insisted on going through the checklist, and it turned out to be a vital decision.
During the review, they discovered that the selected power supply component did not meet the required medical safety certifications. Using this component would have resulted in the device failing regulatory compliance testing, leading to significant delays and redesign costs.
Thanks to the pre-layout checklist, the team caught the issue early, sourced an alternative certified component, and proceeded with the design. The board went through fabrication and assembly smoothly, and the product launched on time, meeting all the necessary certifications.
This example demonstrates how a simple checklist can be a powerful tool in preventing costly mistakes and ensuring the success of your PCB design projects.

PCB Checklist FAQs
-
Q: Why is a pre-layout PCB checklist important?
A: A pre-layout PCB checklist is important because it helps ensure that all critical design aspects are considered and verified before starting the layout process. It reduces the risk of errors, saves time and money, and improves the overall quality of the PCB design. -
Q: What are the key categories in a pre-layout PCB checklist?
A: The key categories in a pre-layout PCB checklist typically include schematic design review, component selection and availability, PCB stackup and materials, design rules and constraints, and manufacturing and assembly considerations. -
Q: How can I customize the pre-layout PCB checklist for my specific needs?
A: To customize the pre-layout PCB checklist, review the provided template and add, remove, or modify items based on your project requirements, industry standards, and company best practices. Consider the specific technologies, materials, and manufacturing processes you’ll be using. -
Q: How often should I review and update my pre-layout PCB checklist?
A: It’s a good practice to review and update your pre-layout PCB checklist regularly, at least once a year or whenever there are significant changes in technologies, standards, or requirements. This ensures that your checklist remains relevant and effective in catching potential issues. -
Q: Can a pre-layout PCB checklist replace the need for design reviews?
A: No, a pre-layout PCB checklist is not a replacement for design reviews. While the checklist helps ensure that critical aspects are considered, design reviews provide an opportunity for in-depth analysis, discussion, and verification with the team and stakeholders. The checklist and design reviews complement each other in ensuring a successful PCB design.
Conclusion
In the complex world of PCB design, a pre-layout checklist is an indispensable tool for navigating the many challenges and ensuring a successful outcome. By systematically verifying critical design aspects before starting layout, you can avoid costly mistakes, improve design quality, and streamline your overall process.
Remember, a checklist is only effective if it’s used consistently and updated regularly. Make it a habit to reference your pre-layout checklist at the beginning of every project, and encourage collaboration and feedback from your team to continuously improve it.
By embracing the power of a comprehensive PCB checklist, you’ll be well on your way to creating reliable, high-quality PCBs that meet your project requirements and exceed customer expectations. Don’t let your PCB design crash – start using a pre-layout checklist today!
[Word count: 1430 words]

No responses yet