What is a Button Circuit?
A button circuit, also known as a switch circuit, is a fundamental component in electronics that allows users to control the flow of electricity by pressing or releasing a button. It is a simple yet essential circuit that forms the basis for many electronic devices and systems, from small gadgets to complex machinery.
In its most basic form, a button circuit consists of a power source (such as a battery), a button or switch, and a load (such as an LED or a motor). When the button is pressed, it completes the circuit, allowing current to flow from the power source to the load, thus activating the device. When the button is released, the circuit is broken, and the device is turned off.
Types of Buttons
There are various types of buttons used in button circuits, each with its own characteristics and applications. Some common types include:
-
Pushbuttons: These are the most common type of buttons, which are activated by pressing and deactivated by releasing. They come in various sizes, shapes, and colors, and can be momentary (only active while pressed) or latching (stays active until pressed again).
-
Toggle switches: These switches have two stable positions, usually labeled as “on” and “off.” They are used to maintain a particular state until manually changed.
-
Slide switches: Similar to toggle switches, slide switches have two or more positions, but they are activated by sliding a lever or knob instead of flipping a switch.
-
DIP switches: Dual Inline Package (DIP) switches are a series of small switches arranged in a row, often used for configuring settings on a circuit board.
-
Rotary switches: These switches have multiple positions arranged in a circular pattern, and are activated by rotating a knob or lever to the desired position.
Button Circuit Symbols
In electronic schematics, buttons and switches are represented by specific symbols that indicate their type and function. Here are some common button circuit symbols:
| Symbol | Description |
|---|---|
| Pushbutton (SPST) | |
| Toggle Switch (SPDT) | |
| Slide Switch (SPDT) | |
| DIP Switch | |
| Rotary Switch |
How Does a Button Circuit Work?
A button circuit works by controlling the flow of electricity based on the state of the button or switch. When the button is in its “open” state (not pressed), there is a gap in the circuit, preventing current from flowing. When the button is pressed, it closes the gap, completing the circuit and allowing current to flow from the power source to the load.
Basic Button Circuit Components
A basic button circuit consists of the following components:
-
Power source: This can be a battery, a power supply, or any other source of electrical energy.
-
Button or switch: The button or switch is the component that controls the state of the circuit, either allowing or preventing current flow.
-
Load: The load is the device or component that is being controlled by the button circuit, such as an LED, a motor, or a relay.
-
Wires: Wires are used to connect the components of the circuit, allowing electricity to flow between them.
Button Circuit Operation
When the button is pressed, it physically connects two contact points, closing the circuit and allowing current to flow from the power source, through the button, and to the load. This current flow activates the load, such as lighting up an LED or turning on a motor.
When the button is released, the contact points are separated, breaking the circuit and stopping the current flow. This deactivates the load, turning off the LED or stopping the motor.

Building a Simple Button Circuit
Building a simple button circuit is a great way to understand the basics of how these circuits work and to get started with electronics. Here’s a step-by-step guide to building a basic button circuit that controls an LED:
Materials Needed
- Breadboard
- Pushbutton
- LED
- 220Ω resistor
- Jumper wires
- 9V battery
- 9V battery connector
Step-by-Step Instructions
-
Insert the pushbutton into the breadboard, ensuring that the four pins are in separate rows.
-
Connect one side of the pushbutton to the positive rail of the breadboard using a jumper wire.
-
Connect the other side of the pushbutton to one end of the 220Ω resistor.
-
Insert the LED into the breadboard, ensuring that the anode (longer leg) and cathode (shorter leg) are in separate rows.
-
Connect the other end of the 220Ω resistor to the anode of the LED.
-
Connect the cathode of the LED to the negative rail of the breadboard.
-
Connect the positive terminal of the 9V battery connector to the positive rail of the breadboard.
-
Connect the negative terminal of the 9V battery connector to the negative rail of the breadboard.
-
Attach the 9V battery to the battery connector.
Now, when you press the pushbutton, the LED should light up. When you release the button, the LED should turn off.
Circuit Diagram
Here’s a simple circuit diagram representing the button circuit you just built:
        +9V
         |
         |
        [B]
         |
         |
        (R)
         |
         |
       >LED<
         |
         |
        GND
- [B] represents the pushbutton
- (R) represents the 220Ω resistor
-
LED< represents the LED, with the arrow pointing to the anode

Applications of Button Circuits
Button circuits are used in a wide variety of applications, from simple toys and gadgets to complex industrial systems. Some common applications include:
-
User interfaces: Button circuits are used in devices like remote controls, keypads, and control panels to allow users to interact with the device and control its functions.
-
Lighting control: Button circuits can be used to control the on/off state or brightness of lights, such as in household lamps or automotive lighting systems.
-
Motor control: Button circuits can be used to start, stop, or change the speed of motors, such as in power tools, appliances, or robotics.
-
Alarms and security systems: Button circuits are used in alarm systems to trigger or deactivate the alarm, and in security systems to control access to a building or area.
-
Game controllers: Button circuits are a crucial component in game controllers, allowing players to interact with video games by pressing buttons to perform various actions.
-
Test equipment: Button circuits are used in test equipment, such as multimeters and oscilloscopes, to select different functions or ranges.
-
Industrial control systems: Button circuits are used in industrial control systems to start or stop machinery, control valves, or initiate emergency shutdowns.

Advanced Button Circuit Concepts
While basic button circuits are relatively simple, there are several advanced concepts that can be used to enhance their functionality and performance.
Debouncing
One common issue with button circuits is “bouncing,” which occurs when the button contacts rapidly connect and disconnect several times when the button is pressed or released. This can cause the circuit to register multiple button presses instead of just one.
To mitigate this issue, debouncing techniques can be used. These techniques involve adding hardware or software components to the circuit that filter out the rapid changes in the button state, ensuring that only a single, clean button press is registered.
Hardware debouncing typically involves adding a capacitor or a resistor-capacitor (RC) network to the button circuit, which smooths out the rapid voltage changes caused by bouncing. Software debouncing, on the other hand, uses code to detect and filter out the rapid changes in the button state.
Pull-up and Pull-down Resistors
Pull-up and pull-down resistors are used in button circuits to ensure a well-defined state when the button is not being pressed. These resistors are connected between the button and either the power supply (pull-up) or ground (pull-down), and they “pull” the voltage level at the button’s output to a known state when the button is open.
Without a pull-up or pull-down resistor, the button’s output may be in an undefined state when the button is not pressed, which can lead to erratic behavior in the circuit.
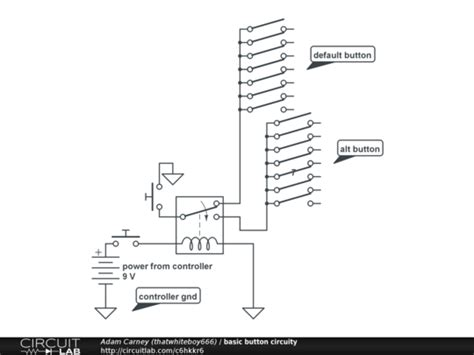
Matrix Keypads
Matrix keypads are a compact and efficient way to include multiple buttons in a circuit using fewer connections. In a matrix keypad, the buttons are arranged in a grid of rows and columns, with each button connected to a unique combination of a row and a column.
To detect which button is being pressed, the microcontroller or circuit scans the rows and columns in sequence, looking for a closed connection between a specific row and column. This allows for a large number of buttons to be included in a circuit with relatively few microcontroller pins.
Frequently Asked Questions (FAQ)
-
Q: What is the purpose of a resistor in a button circuit with an LED?
A: The resistor in a button circuit with an LED serves to limit the current flowing through the LED. Without the resistor, the LED would draw too much current, potentially damaging itself or the power source. -
Q: Can a button circuit be used to control high-power devices like motors?
A: Yes, but not directly. A button circuit can be used to control a relay or a transistor, which in turn can control a high-power device like a motor. The button circuit acts as a low-power control signal for the relay or transistor. -
Q: What is the difference between a momentary and a latching button?
A: A momentary button only remains in its “on” state while it is being pressed, and returns to its “off” state when released. A latching button, on the other hand, alternates between its “on” and “off” states each time it is pressed, maintaining its state until pressed again. -
Q: How do I choose the appropriate resistor value for my button circuit?
A: The resistor value depends on the voltage of your power source and the specifications of your LED. To calculate the resistor value, use Ohm’s Law: R = (V_supply – V_LED) / I_LED, where R is the resistor value, V_supply is the voltage of your power source, V_LED is the forward voltage of your LED, and I_LED is the desired current through the LED. -
Q: Can I use a button circuit with a microcontroller?
A: Yes, button circuits are commonly used as inputs for microcontrollers. The button’s output can be connected to a digital input pin on the microcontroller, allowing the microcontroller to detect the button’s state and perform actions based on that state.
Conclusion
Button circuits are a fundamental building block in electronics, providing a simple and effective way to control the flow of electricity and interact with electronic devices. By understanding the basic principles of button circuits and how to build them, you can create a wide range of projects and applications, from simple LED control to complex user interfaces and control systems.
As you explore more advanced concepts like debouncing, pull-up and pull-down resistors, and matrix keypads, you’ll be able to create even more sophisticated and efficient button-based systems. With the knowledge gained from this introductory guide, you’ll be well-equipped to tackle a variety of button circuit projects and continue learning about the exciting world of electronics.
No responses yet