What is an Arduino WiFi Module?
An Arduino WiFi module is a small, self-contained device that enables Arduino boards to connect to a WiFi network and communicate with other devices over the internet. These modules typically use the 802.11 b/g/n wireless standard and can operate in both client and server modes.
Arduino WiFi modules come in various form factors and with different features, but they all share the same basic functionality – they allow Arduino boards to send and receive data wirelessly over a WiFi network.
Types of Arduino WiFi Modules
There are several types of Arduino WiFi modules available on the market, each with its own unique features and capabilities. Here are some of the most popular types:
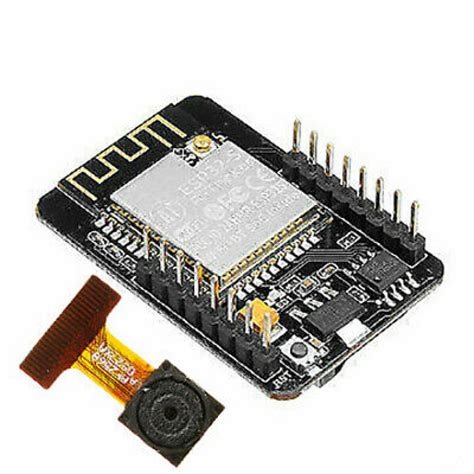
ESP8266
The ESP8266 is one of the most popular Arduino WiFi modules available today. It is a low-cost, highly integrated WiFi chip that can be used as a standalone microcontroller or as a WiFi module for other microcontrollers like Arduino.
The ESP8266 comes in several different versions, including the ESP-01, ESP-12E, and ESP-12F. These modules differ in terms of their form factor, number of GPIO pins, and flash memory size.
Some key features of the ESP8266 include:
- 802.11 b/g/n WiFi support
- Integrated TCP/IP protocol stack
- Can operate as both a client and server
- Low power consumption
- Supports UART, SPI, and I2C interfaces
- Can be programmed using the Arduino IDE
ESP32
The ESP32 is a newer and more powerful version of the ESP8266. It is a dual-core microcontroller with integrated WiFi and Bluetooth support, making it a versatile choice for IoT projects.
Like the ESP8266, the ESP32 comes in several different versions, including the ESP32-WROOM-32 and ESP32-WROVER. These modules differ in terms of their form factor, flash memory size, and number of GPIO pins.
Some key features of the ESP32 include:
- Dual-core Xtensa LX6 microprocessor
- 802.11 b/g/n WiFi support
- Bluetooth v4.2 BR/EDR and BLE support
- Can operate as both a client and server
- Supports UART, SPI, I2C, and I2S interfaces
- Can be programmed using the Arduino IDE
MKR1000
The MKR1000 is an official Arduino WiFi module that is designed to work seamlessly with the Arduino MKR family of boards. It is a compact, low-power module that is ideal for battery-powered IoT projects.
Some key features of the MKR1000 include:
- 802.11 b/g/n WiFi support
- Integrated TCP/IP protocol stack
- Can operate as both a client and server
- Low power consumption
- Supports UART, SPI, and I2C interfaces
- Can be programmed using the Arduino IDE

Choosing the Right Arduino WiFi Module
When choosing an Arduino WiFi module for your project, there are several factors to consider:
-
Form factor: Arduino WiFi modules come in various sizes and shapes. Consider the physical constraints of your project and choose a module that fits your needs.
-
Features: Different modules offer different features, such as Bluetooth support, GPIO pins, and flash memory size. Choose a module that has the features you need for your project.
-
Power consumption: If your project is battery-powered, choose a module with low power consumption to maximize battery life.
-
Ease of use: Some modules are easier to use than others. If you’re new to Arduino and WiFi, choose a module that is well-documented and has a large community of users who can provide support.
Here’s a table comparing some popular Arduino WiFi modules:
| Module | WiFi Standard | Bluetooth | GPIO Pins | Flash Memory | Power Consumption |
|---|---|---|---|---|---|
| ESP8266 | 802.11 b/g/n | No | 16 | 4MB | Low |
| ESP32 | 802.11 b/g/n | Yes | 32 | 4MB | Low |
| MKR1000 | 802.11 b/g/n | No | 14 | 256KB | Low |

Setting Up an Arduino WiFi Module
Setting up an Arduino WiFi module involves several steps:
-
Connect the module to your Arduino board: Most Arduino WiFi modules connect to the Arduino board using the UART interface. Consult the module’s documentation for specific instructions on how to connect it to your board.
-
Install the necessary libraries: To use an Arduino WiFi module, you’ll need to install the appropriate libraries in the Arduino IDE. For example, to use the ESP8266 module, you’ll need to install the ESP8266 library.
-
Configure the module: Before you can use the module, you’ll need to configure it with your WiFi network’s SSID and password. This can be done using AT commands or by using a library function.
-
Write your code: Once the module is set up and configured, you can write your Arduino code to send and receive data over the WiFi network.
Here’s an example of how to set up an ESP8266 module with an Arduino board:
#include <ESP8266WiFi.h>

const char* ssid = "your_SSID";
const char* password = "your_PASSWORD";

void setup() {
  Serial.begin(115200);
  WiFi.begin(ssid, password);

  while (WiFi.status() != WL_CONNECTED) {
    delay(1000);
    Serial.println("Connecting to WiFi...");
  }

  Serial.println("Connected to WiFi");
}

void loop() {
  // Your code here
}

Applications of Arduino WiFi Modules
Arduino WiFi modules have a wide range of applications, from home automation to industrial monitoring. Here are some examples:
-
Smart home devices: Arduino WiFi modules can be used to create smart home devices like thermostats, security cameras, and smart locks.
-
Weather stations: WiFi-enabled Arduino boards can be used to create weather stations that can send real-time weather data to a cloud service or mobile app.
-
Remote monitoring: Arduino WiFi modules can be used to remotely monitor industrial equipment, agricultural sensors, or environmental conditions.
-
Robotics: WiFi-enabled Arduino boards can be used to control robots remotely or to allow robots to communicate with each other.
-
Art installations: Arduino WiFi modules can be used to create interactive art installations that respond to user input or environmental conditions.
FAQ
Can I use an Arduino WiFi module with any Arduino board?
Most Arduino WiFi modules are designed to work with specific Arduino boards. For example, the MKR1000 is designed to work with the Arduino MKR family of boards, while the ESP8266 can be used with any Arduino board that has a UART interface.
How far can an Arduino WiFi module transmit data?
The range of an Arduino WiFi module depends on several factors, including the module’s transmit power, the environment, and the type of antenna used. In general, most Arduino WiFi modules have a range of around 100 meters in open areas.
Can I use an Arduino WiFi module to create a web server?
Yes, many Arduino WiFi modules, including the ESP8266 and ESP32, can be used to create a web server. This allows you to create web-based interfaces for your Arduino projects and control them remotely using a web browser.
How much power does an Arduino WiFi module consume?
The power consumption of an Arduino WiFi module depends on the specific module and how it is being used. In general, WiFi modules consume more power than other Arduino components, so it’s important to consider power consumption when designing battery-powered projects.
Can I use an Arduino WiFi module with a mobile app?
Yes, you can use an Arduino WiFi module to communicate with a mobile app. This can be done using a variety of protocols, including HTTP, MQTT, and WebSocket. Many Arduino libraries, such as the Blynk library, make it easy to create mobile apps that can control Arduino projects remotely.
Conclusion
Arduino WiFi modules are a powerful tool for adding wireless connectivity to your Arduino projects. Whether you’re building a smart home device, a remote monitoring system, or an interactive art installation, an Arduino WiFi module can help you create projects that are more connected, more interactive, and more powerful.
By understanding the different types of Arduino WiFi modules available, how to choose the right module for your project, and how to set up and use these modules, you can unlock the full potential of wireless connectivity in your Arduino projects. So why not give it a try and see what you can create?
No responses yet