What are Arduino Shields?
Arduino shields are printed circuit boards (PCBs) that are designed to be compatible with the Arduino board’s form factor and pin layout. They can be stacked on top of the Arduino board, connecting to its pins and power supply. Shields come in various types, each offering specific functionalities such as motor control, wireless communication, sensor integration, display interfaces, and more.
Types of Arduino Shields
There are numerous types of Arduino shields available, catering to different project requirements. Some popular Arduino shields include:
-
Motor Control Shields: These shields allow the Arduino board to control DC motors, stepper motors, and servo motors. They typically include motor drivers, such as the L293D or TB6612FNG, which handle the power requirements and provide direction and speed control for the motors.
-
Ethernet Shields: Ethernet shields enable the Arduino board to connect to a wired network and communicate over the internet. They feature an Ethernet controller chip, such as the W5100 or ENC28J60, and provide an RJ45 Ethernet jack for connecting to a network cable.
-
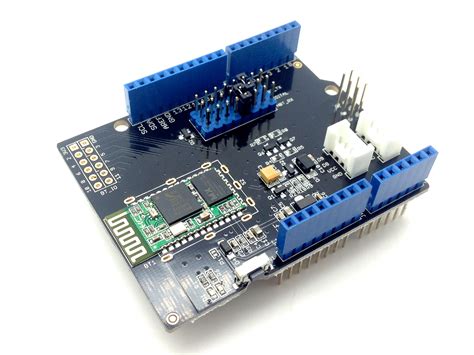
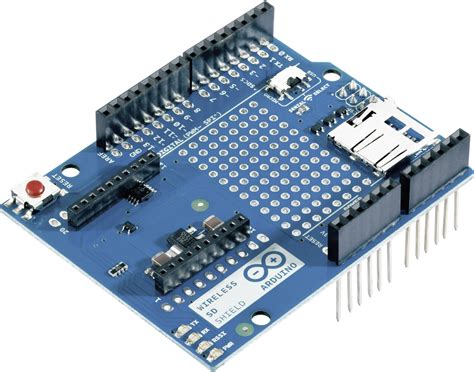
Wi-Fi Shields: Wi-Fi shields allow the Arduino board to connect to a wireless network and communicate over Wi-Fi. They often include a Wi-Fi module, such as the ESP8266 or ESP32, which handles the wireless communication and provides an easy-to-use library for establishing connections and exchanging data.
-
LCD and TFT Display Shields: Display shields enable the Arduino board to interface with LCD or TFT displays, providing a visual output for information, graphics, or user interfaces. These shields typically include the necessary connectors and drivers for the display and may also feature touch-sensitive surfaces for input.
-
Sensor Shields: Sensor shields integrate various sensors onto a single board, making it convenient to connect and use multiple sensors with the Arduino. Common sensors found on these shields include temperature, humidity, pressure, light, and motion sensors.
-
Prototyping Shields: Prototyping shields provide a breadboard-like surface on top of the Arduino board, allowing users to easily connect additional components, sensors, or modules using jumper wires. These shields are useful for quick prototyping and experimenting with different circuits.
Advantages of Using Arduino Shields
Using Arduino shields offers several advantages for Arduino projects:
-
Simplified Wiring: Arduino shields eliminate the need for complex wiring and connections between the Arduino board and external components. The shields are designed to directly plug into the Arduino’s pins, making the connections straightforward and reducing the chances of wiring errors.
-
Compact and Modular design: Shields are designed to fit perfectly on top of the Arduino board, creating a compact and organized setup. Multiple shields can be stacked on top of each other, allowing for the combination of different functionalities in a modular manner.
-
Compatibility and Standardization: Arduino shields follow a standardized pin layout and form factor, ensuring compatibility with different Arduino board models. This standardization allows shields from different manufacturers to work seamlessly with Arduino boards, promoting interoperability and expandability.
-
Time and Effort Savings: Using Arduino shields saves time and effort in project development. Instead of designing and fabricating custom PCBs or breadboarding complex circuits, users can leverage readily available shields that are pre-designed and tested, accelerating the prototyping and development process.
-
Access to Libraries and Resources: Many Arduino shields come with dedicated libraries, examples, and documentation, making it easier for users to integrate and utilize the shield’s functionalities. These resources provide a starting point and guidance for using the shields effectively in projects.
Popular Arduino Shields and Their Applications
Let’s explore some popular Arduino shields and their applications in various projects.
Motor Control Shields
Motor control shields are commonly used in robotics, automation, and mechatronics projects. They allow the Arduino board to control the speed and direction of DC motors, stepper motors, and servo motors. Some popular motor control shields include:
-
Adafruit Motor Shield V2: This shield is based on the PCA9685 PWM driver and can control up to 4 DC motors or 2 stepper motors. It supports motor voltages from 4.5V to 36V and provides a simple library for motor control.
-
Arduino Motor Shield Rev3: This official Arduino shield can drive up to 2 DC motors or 1 stepper motor. It features the L298P dual full-bridge driver and supports motor voltages up to 12V.
-
Sparkfun Monster Moto Shield: This shield is designed for high-power motor control applications. It can handle motor voltages up to 30V and currents up to 30A, making it suitable for driving large DC motors or high-torque stepper motors.
Applications of motor control shields include:
– Building robotic platforms and vehicles
– Controlling actuators and mechanisms in automation systems
– Developing CNC machines and 3D printers
– Creating motorized projects like robotic arms, conveyor belts, or pan-tilt cameras
Ethernet and Wi-Fi Shields
Ethernet and Wi-Fi shields enable the Arduino board to connect to networks and communicate over the internet. They are essential for IoT (Internet of Things) applications, remote monitoring, and web-based projects. Some popular Ethernet and Wi-Fi shields include:
-
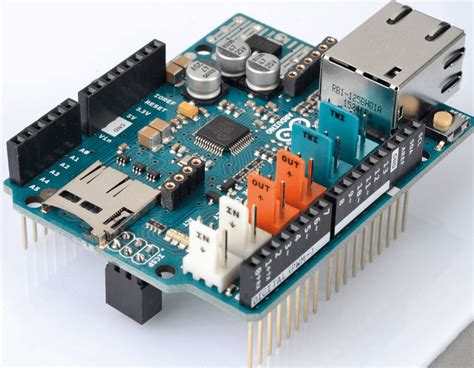
Arduino Ethernet Shield 2: This official Arduino shield features the W5500 Ethernet controller and provides an RJ45 Ethernet jack for wired network connectivity. It supports TCP and UDP protocols and includes an SD card slot for storage.
-
Adafruit HUZZAH ESP8266 Shield: This shield integrates the ESP8266 Wi-Fi module, allowing the Arduino board to connect to Wi-Fi networks. It provides a simple library for establishing connections, sending HTTP requests, and handling data exchange.
-
Sparkfun ESP32 Thing Shield: This shield is based on the powerful ESP32 microcontroller, which combines Wi-Fi and Bluetooth connectivity. It offers a wide range of features, including dual-core processing, touch sensing, and cryptographic acceleration.
Applications of Ethernet and Wi-Fi shields include:
– Building web servers and clients with the Arduino board
– Developing IoT devices for remote sensing and control
– Integrating Arduino projects with cloud platforms like ThingSpeak or AWS IoT
– Creating wireless communication between Arduino boards or with other devices
Display Shields
Display shields allow the Arduino board to interface with LCD or TFT displays, providing a visual output for information, graphics, or user interfaces. They are commonly used in projects that require data visualization or user interaction. Some popular display shields include:
-
Adafruit 2.8″ TFT Touch Shield: This shield features a 2.8-inch TFT color display with resistive touch sensing. It provides a high-resolution display (320×240 pixels) and includes an SD card slot for storing images or data.
-
Sparkfun Color LCD Shield: This shield incorporates a 16×2 character LCD display with RGB backlight. It allows for displaying text and simple graphics in different colors and includes five navigation buttons for user input.
-
4D Systems LCD Touch Shield: This shield offers a 2.4-inch TFT display with capacitive touch sensing. It provides a high-quality display (240×320 pixels) and includes a microSD card slot for storage.
Applications of display shields include:
– Creating user interfaces for Arduino projects
– Displaying sensor data, status information, or menu options
– Building interactive devices like touchscreen control panels
– Developing graphical applications or games on the Arduino platform
Sensor Shields
Sensor shields integrate various sensors onto a single board, making it convenient to connect and use multiple sensors with the Arduino. They simplify the wiring and provide a compact solution for sensor-based projects. Some popular sensor shields include:
-
Seeed Studio Multi-Sensor Shield V2.0: This shield combines a variety of sensors, including temperature, humidity, barometric pressure, light, and motion sensors. It also includes a microSD card slot for data logging.
-
DFRobot Sensor Shield V5.0: This shield provides an easy way to connect analog and digital sensors to the Arduino board. It features a prototyping area for custom sensor connections and includes a built-in buzzer for audio feedback.
-
Adafruit BNO055 Absolute Orientation Sensor Shield: This shield integrates the BNO055 9-DOF (degrees of freedom) sensor, which combines an accelerometer, gyroscope, and magnetometer. It provides accurate orientation and motion tracking data.
Applications of sensor shields include:
– Environmental monitoring and data logging
– Developing weather stations or indoor air quality monitors
– Creating motion-sensing and gesture-controlled projects
– Building wearable devices for health and fitness tracking
Prototyping Shields
Prototyping shields provide a breadboard-like surface on top of the Arduino board, allowing users to easily connect additional components, sensors, or modules using jumper wires. They offer flexibility and convenience for quick prototyping and experimenting with different circuits. Some popular prototyping shields include:
-
Adafruit Prototyping Shield: This shield provides a large prototyping area with a grid of holes for inserting components and jumper wires. It also includes a dedicated space for mounting an Arduino-compatible mini breadboard.
-
Sparkfun ProtoShield Kit: This kit includes a prototyping shield with a grid of plated through-holes for soldering components. It also provides additional space for mounting headers or connectors.
-
DFRobot Proto Shield: This shield offers a prototyping area with a grid of holes and includes a power bus for distributing power to multiple components. It also features a dedicated space for mounting a mini breadboard.
Applications of prototyping shields include:
– Quickly testing and prototyping new circuit designs
– Connecting custom sensors or modules to the Arduino board
– Experimenting with different component combinations and configurations
– Developing proof-of-concept projects before creating custom PCBs
Choosing the Right Arduino Shield
When selecting an Arduino shield for a project, consider the following factors:
-
Functionality: Determine the specific functionalities required for your project and choose a shield that provides those capabilities. Consider the type of sensors, communication interfaces, or output devices needed.
-
Compatibility: Ensure that the shield is compatible with the Arduino board model you are using. Check the shield’s specifications and pinout to confirm that it aligns with your Arduino board’s form factor and pin layout.
-
Power Requirements: Consider the power requirements of the shield and the components it will be driving. Verify that the Arduino board can provide sufficient power or if an external power supply is needed.
-
Library and Resource Availability: Check if the shield comes with well-documented libraries, examples, and resources. Having access to comprehensive documentation and community support can greatly assist in integrating and using the shield effectively.
-
Stackability: If your project requires multiple shields, consider the stackability of the shields. Some shields may have conflicting pin usage or physical dimensions that prevent them from being stacked together.
-
Cost and Quality: Evaluate the cost and quality of the shield. While cheaper options may be tempting, ensure that the shield is reliable, well-constructed, and backed by a reputable manufacturer or supplier.

Frequently Asked Questions (FAQ)
-
Can I use multiple shields simultaneously on an Arduino board?
Yes, you can stack multiple shields on top of an Arduino board, provided that they are compatible and do not have conflicting pin usage. However, be mindful of the total power consumption and ensure that the Arduino board can handle the combined current draw of all the shields. -
Are Arduino shields compatible with all Arduino board models?
Most Arduino shields are designed to be compatible with the standard Arduino board form factor, such as the Arduino Uno or Arduino Mega. However, some shields may have specific requirements or limitations. Always check the shield’s specifications and compatibility information before purchasing or using it with a particular Arduino board model. -
Do I need to modify the Arduino code when using a shield?
In most cases, Arduino shields come with dedicated libraries that provide functions and classes to interact with the shield’s features. These libraries abstract the low-level details and offer a higher-level interface for using the shield. You will need to include the appropriate library in your Arduino sketch and use its functions to control and communicate with the shield. -
Can I design and create my own Arduino shields?
Yes, you can design and create custom Arduino shields based on your project requirements. This involves designing the PCB, selecting the appropriate components, and ensuring compatibility with the Arduino board. There are online resources, tutorials, and communities that provide guidance on designing and fabricating custom Arduino shields. -
Are there any limitations or drawbacks to using Arduino shields?
While Arduino shields offer convenience and flexibility, there are a few limitations to consider. Shields can add extra cost to the project, and stacking multiple shields may increase the overall size and complexity of the setup. Additionally, some shields may have power consumption or pin usage conflicts that need to be resolved through careful planning and design.
Conclusion
Arduino shields are powerful tools that extend the capabilities of Arduino boards and simplify the integration of various functionalities into projects. From motor control and wireless communication to sensor integration and display interfaces, shields provide a modular and convenient way to enhance the functionality of Arduino boards.
By understanding the different types of Arduino shields available and their applications, users can select the appropriate shields for their projects and leverage the extensive libraries and resources provided by the Arduino community. Whether you are a beginner or an experienced developer, Arduino shields offer a pathway to create innovative and powerful projects with ease.
When choosing an Arduino shield, consider factors such as functionality, compatibility, power requirements, and resource availability to ensure a successful integration. With the wide range of shields available and the ability to design custom shields, the possibilities for Arduino projects are nearly endless.
Embrace the power of Arduino shields and unlock the full potential of your Arduino board. Start exploring the world of Arduino shields and bring your ideas to life with enhanced functionalities and streamlined development processes.
No responses yet