What are Arduino Shields?
Arduino shields are printed circuit boards (PCBs) that are designed to be compatible with the Arduino board. They have the same form factor as the Arduino board, with matching pin headers that allow them to be stacked on top of the Arduino. Shields can add various functionalities to the Arduino, such as motor control, wireless communication, sensing capabilities, and more.
Shields are designed to be easy to use and integrate with the Arduino ecosystem. They often come with libraries and example code that make it simple to incorporate them into your projects. This plug-and-play nature of shields is one of the reasons why Arduino has become so popular among hobbyists, students, and professionals alike.
Types of Arduino Shields
There are numerous types of Arduino shields available, each designed for specific purposes. Here are some of the most common categories of Arduino shields:
1. Motor Control Shields
Motor control shields allow you to easily control various types of motors using your Arduino board. These shields typically support DC motors, stepper motors, and servo motors. They provide an easy way to control the speed and direction of the motors, making them ideal for robotics projects, CNC machines, and other applications that involve motion control.
Some popular motor control shields include:
– Adafruit Motor Shield
– Arduino Motor Shield
– DFRobot L298P Motor Shield
2. Wireless Communication Shields
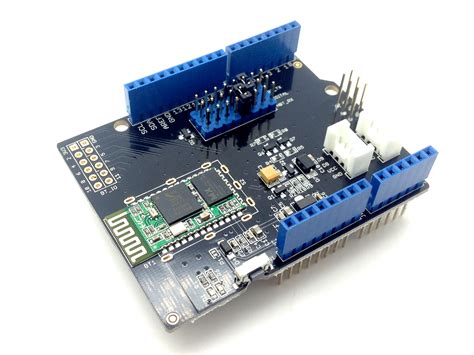
Wireless communication shields enable your Arduino to communicate wirelessly with other devices or the internet. They support various wireless protocols such as Wi-Fi, Bluetooth, Zigbee, and LoRa. These shields are essential for IoT (Internet of Things) projects, remote monitoring, and wireless data transmission.
Some commonly used wireless communication shields are:
– ESP8266 Wi-Fi Shield
– Adafruit Bluefruit LE Shield
– Xbee Shield
3. Sensor Shields
Sensor shields allow you to easily interface various sensors with your Arduino board. These shields provide convenient connections for sensors such as temperature sensors, accelerometers, gyroscopes, pressure sensors, and more. Sensor shields make it easy to collect data from the environment and use it in your Arduino projects.
Examples of sensor shields include:
– Adafruit 10-DOF IMU Shield
– DHT11 Temperature and Humidity Sensor Shield
– MaxSonar Ultrasonic Range Finder Shield
4. Display Shields
Display shields enable you to add visual output capabilities to your Arduino projects. They allow you to connect various types of displays, such as LCD screens, OLED displays, and TFT screens, to your Arduino board. Display shields are useful for creating user interfaces, displaying sensor data, or showing visual feedback in your projects.
Some popular display shields are:
– Adafruit 1.8″ TFT Shield
– Nokia 5110 LCD Shield
– 4D Systems LCD Shield
5. Prototyping Shields
Prototyping shields provide a convenient way to create custom circuits and prototypes using your Arduino board. They offer a breadboard-like surface where you can easily connect components, sensors, and actuators without the need for soldering. Prototyping shields are ideal for quickly testing ideas and building proof-of-concept projects.
Examples of prototyping shields include:
– Arduino Protoshield
– Adafruit Perma-Proto Shield
– Sparkfun ProtoShield

Using Arduino Shields
Using Arduino shields is relatively straightforward. Here are the basic steps to get started with an Arduino shield:
- Choose the appropriate shield for your project based on the desired functionality.
- Carefully align the shield’s pin headers with the Arduino board’s headers and gently press them together.
- Install any necessary libraries or drivers for the shield, following the manufacturer’s instructions.
- Use the provided example code or write your own code to interact with the shield’s features.
- Upload the code to your Arduino board and observe the results.
It’s important to note that some shields may have specific requirements or limitations. Always refer to the shield’s documentation and compatibility information to ensure proper usage and avoid potential conflicts with other shields or components.

Examples of Arduino Shield Projects
To give you an idea of what you can accomplish with Arduino shields, here are a few example projects:
1. Wireless Weather Station
Using a combination of sensors and wireless communication shields, you can create a wireless weather station that measures temperature, humidity, pressure, and other environmental parameters. The data can be transmitted wirelessly to a remote monitoring station or displayed on a local display shield.
2. Robotics Arm
With a motor control shield and a few servos, you can build a robotic arm that can be controlled using your Arduino board. The shield allows you to precisely control the position and movement of each servo, enabling you to create complex robotic movements.
3. Smart Home Automation
By leveraging wireless communication shields and various sensors, you can create a smart home automation system using Arduino. You can control lights, appliances, and other devices remotely, monitor environmental conditions, and automate tasks based on sensor data or user input.
4. Wearable Electronics
Sensor shields and display shields can be used to create wearable electronics projects. You can monitor vital signs, track physical activity, or display information on a wearable display. These projects can be powered by a small battery and controlled by an Arduino board.

Frequently Asked Questions (FAQ)
-
Can I use multiple shields simultaneously on my Arduino board?
Yes, you can stack multiple shields on top of each other on your Arduino board. However, it’s important to ensure that the shields are compatible with each other and that there are no pin conflicts. Some shields may also require additional power or have specific stacking requirements. -
Do I need to solder anything to use Arduino shields?
In most cases, no. Arduino shields are designed to be plug-and-play, meaning you can simply align the pin headers and press the shield onto the Arduino board. However, some shields may require additional soldering for certain components or for custom modifications. -
Are Arduino shields compatible with all Arduino boards?
Most Arduino shields are designed to be compatible with the standard Arduino form factor, such as the Arduino Uno. However, there may be some variations in pin configurations or dimensions for different Arduino models. Always check the shield’s compatibility information to ensure it will work with your specific Arduino board. -
Can I create my own custom Arduino shields?
Yes, you can design and create your own custom Arduino shields. This requires knowledge of PCB design and fabrication. You can use software tools like Eagle or KiCad to design your shield’s schematic and layout, and then have the PCB manufactured by a PCB fabrication service. -
Where can I find more information and resources about Arduino shields?
There are numerous online resources available for learning about Arduino shields. The official Arduino website (arduino.cc) provides documentation, tutorials, and forums where you can find information and ask questions. Other popular resources include Adafruit, Sparkfun, and Instructables, which offer tutorials, project ideas, and shield-specific guides.
Conclusion
Arduino shields are a powerful way to expand the capabilities of your Arduino board and unlock a wide range of possibilities for your projects. From motor control and wireless communication to sensing and display, shields provide an easy and modular approach to adding functionality to your Arduino.
By understanding the different types of shields available and how to use them, you can create complex and interactive projects that go beyond the basic capabilities of the Arduino board itself. Whether you’re a beginner or an experienced maker, Arduino shields offer endless opportunities for innovation and creativity.
So, start exploring the world of Arduino shields, experiment with different functionalities, and bring your ideas to life with the power of Arduino!
No responses yet