What is an Arduino Microcontroller?
An Arduino microcontroller is a small, programmable device that can be used to control various electronic components and create interactive projects. It is an open-source platform that consists of both hardware and software components, making it accessible to a wide range of users, from beginners to experienced engineers.
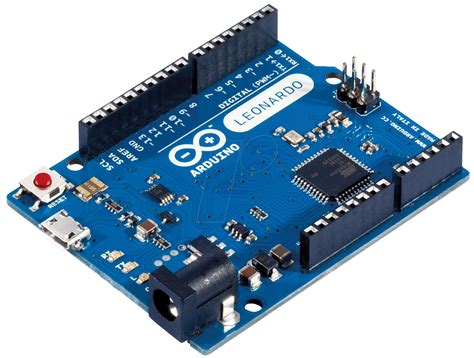
The Arduino board is based on the Atmel AVR microcontroller family and features a set of digital and analog input/output (I/O) pins that allow it to interface with various sensors, actuators, and other electronic components. The board also includes a USB connector for programming and power, a power jack, and a reset button.
Key Features of Arduino Microcontrollers
| Feature | Description |
|---|---|
| Open-source | Arduino hardware and software are open-source, allowing for extensive customization and modification. |
| Easy to use | The Arduino programming language is based on C/C++ and provides a simple, intuitive interface for users of all skill levels. |
| Versatile | Arduino boards can be used in a wide range of projects, from simple LED displays to complex robotics and automation systems. |
| Affordable | Arduino boards are relatively inexpensive compared to other microcontroller platforms, making them accessible to hobbyists and students. |
| Large community | The Arduino community is vast, with numerous online resources, tutorials, and forums available for support and inspiration. |
Getting Started with Arduino
To begin working with an Arduino microcontroller, you will need the following:
- An Arduino board (e.g., Arduino Uno, Arduino Nano, Arduino Mega)
- A USB cable for programming and power
- A computer with the Arduino IDE (Integrated Development Environment) installed
Setting Up the Arduino IDE
- Download the Arduino IDE from the official website (https://www.arduino.cc/en/software) and install it on your computer.
- Connect your Arduino board to your computer using the USB cable.
- Open the Arduino IDE and select your board type and serial port from the “Tools” menu.
- You are now ready to start programming your Arduino microcontroller!

Basic Arduino Programming Concepts
The Arduino programming language is based on C/C++ and includes a set of built-in functions and libraries that simplify the process of writing code for the microcontroller.
Basic Structure of an Arduino Sketch
An Arduino sketch (program) consists of two main functions:
setup(): This function is called once at the beginning of the program and is used for initializing variables, setting pin modes, and other one-time setup tasks.loop(): This function is called repeatedly after thesetup()function and contains the main logic of the program.
Here’s a simple example of an Arduino sketch that blinks an LED:
void setup() {
  pinMode(13, OUTPUT);
}

void loop() {
  digitalWrite(13, HIGH);
  delay(1000);
  digitalWrite(13, LOW);
  delay(1000);
}
Variables and Data Types
Arduino supports various data types for storing and manipulating data, including:
int: Integer values (e.g., -32768 to 32767)float: Floating-point values (e.g., -3.4028235E+38 to 3.4028235E+38)char: Single characters (e.g., ‘A’, ‘5’, ‘$’)String: Text strings (e.g., “Hello, World!”)bool: Boolean values (e.g., true or false)
Variables are declared using the data type followed by a unique name, like this:
int ledPin = 13;
float temperature = 25.5;
char myChar = 'A';
String message = "Hello, Arduino!";
bool isActive = true;
Control Structures
Arduino programming includes various control structures for managing the flow of your program, such as:
if...elsestatementsforloopswhileloopsswitch...casestatements
Here’s an example using an if...else statement:
int sensorValue = analogRead(A0);

if (sensorValue > 500) {
  digitalWrite(13, HIGH);
} else {
  digitalWrite(13, LOW);
}
Functions
Functions are reusable blocks of code that perform a specific task. Arduino includes many built-in functions, such as pinMode(), digitalWrite(), and delay(), but you can also create your own custom functions.
Here’s an example of a custom function that blinks an LED a specified number of times:
void blinkLED(int pin, int times, int duration) {
  for (int i = 0; i < times; i++) {
    digitalWrite(pin, HIGH);
    delay(duration);
    digitalWrite(pin, LOW);
    delay(duration);
  }
}

Arduino Sensors and Modules
One of the key advantages of using an Arduino microcontroller is its ability to interface with a wide range of sensors and modules, allowing you to create interactive projects that respond to various inputs and control different outputs.
Common Arduino Sensors
| Sensor | Description |
|---|---|
| Temperature Sensor (e.g., LM35, DHT11) | Measures ambient temperature and/or humidity |
| Light Sensor (e.g., LDR, TSL2561) | Detects light intensity |
| Ultrasonic Sensor (e.g., HC-SR04) | Measures distance using ultrasonic waves |
| Accelerometer (e.g., ADXL345, MPU6050) | Detects acceleration, tilt, and motion |
| Gyroscope (e.g., L3G4200D, MPU6050) | Measures angular velocity and orientation |
Popular Arduino Modules
| Module | Description |
|---|---|
| LCD Display (e.g., 16×2 LCD) | Displays text and simple graphics |
| Servo Motor | Allows precise control of angular position |
| Stepper Motor | Enables precise control of rotational position and speed |
| Relay Module | Allows control of high-voltage/high-current devices |
| Bluetooth Module (e.g., HC-05, HC-06) | Enables wireless communication between Arduino and other devices |
| Ethernet Shield | Allows Arduino to connect to the internet and communicate over a network |

Example Arduino Projects
Now that you have a basic understanding of Arduino microcontrollers and programming concepts, let’s explore some example projects that demonstrate the versatility of this platform.
1. Temperature and Humidity Monitor
This project uses a DHT11 temperature and humidity sensor to measure ambient conditions and display the readings on an LCD screen.
Components needed:
– Arduino Uno
– DHT11 sensor
– 16×2 LCD display
– 10k ohm potentiometer
– Breadboard and jumper wires
2. Ultrasonic Distance Sensor
This project uses an HC-SR04 ultrasonic sensor to measure the distance to an object and display the reading on the Arduino Serial Monitor.
Components needed:
– Arduino Uno
– HC-SR04 ultrasonic sensor
– Breadboard and jumper wires
3. Bluetooth-Controlled LED
This project uses an HC-05 Bluetooth module to control an LED wirelessly from a smartphone or tablet.
Components needed:
– Arduino Uno
– HC-05 Bluetooth module
– LED
– 220 ohm resistor
– Breadboard and jumper wires
Troubleshooting and Debugging Arduino Projects
When working on Arduino projects, you may encounter various issues or errors. Here are some tips for troubleshooting and debugging your projects:
- Double-check your wiring: Ensure that all components are connected correctly and securely.
- Verify your code: Check for syntax errors, missing semicolons, or incorrect variable names.
- Use the serial monitor: Print debugging messages to the serial monitor to track the flow of your program and identify issues.
- Break down your code: Isolate specific parts of your code to pinpoint the source of the problem.
- Consult online resources: Arduino has a large and active community with numerous forums, tutorials, and project examples that can help you resolve issues.
Frequently Asked Questions (FAQ)
- What is the difference between Arduino Uno and Arduino Nano?
-
The main differences between Arduino Uno and Arduino Nano are their size and form factor. Arduino Uno is larger and has a standard USB Type-B connector, while Arduino Nano is smaller and features a Mini-USB connector. Both boards have similar functionalities and are suitable for most projects.
-
Can I use Arduino for commercial products?
-
Yes, you can use Arduino for commercial products. However, if you plan to mass-produce your product, you may need to consider licensing and certification requirements, as well as the potential need for custom PCB designs.
-
How do I install additional libraries in the Arduino IDE?
-
To install additional libraries in the Arduino IDE, navigate to “Sketch” > “Include Library” > “Manage Libraries.” This will open the Library Manager, where you can search for and install the desired library.
-
Can I power my Arduino project using batteries?
-
Yes, you can power your Arduino project using batteries. The recommended input voltage range for most Arduino boards is 7-12V. You can use a battery pack or a single battery with a voltage regulator to provide a stable power supply.
-
What is the maximum current an Arduino pin can provide?
- The maximum current an Arduino pin can provide is 40mA. If you need to control devices that require more current, you should use an external driver or transistor to amplify the current.
Conclusion
Arduino microcontrollers offer a versatile and accessible platform for creating DIY electronic projects. With a wide range of sensors, modules, and programming options, Arduino enables users of all skill levels to bring their ideas to life. By understanding the basic concepts of Arduino programming and hardware, you can start exploring the exciting world of microcontroller-based projects and develop your skills in electronics and programming.
As you continue your Arduino journey, remember to take advantage of the vast online resources, communities, and project examples available. With persistence and creativity, you can create unique and innovative projects that solve real-world problems or simply bring joy to yourself and others.
So, grab your Arduino board, start tinkering, and let your imagination guide you in creating amazing DIY microcontroller devices!
No responses yet