
What is Conductive Paint?
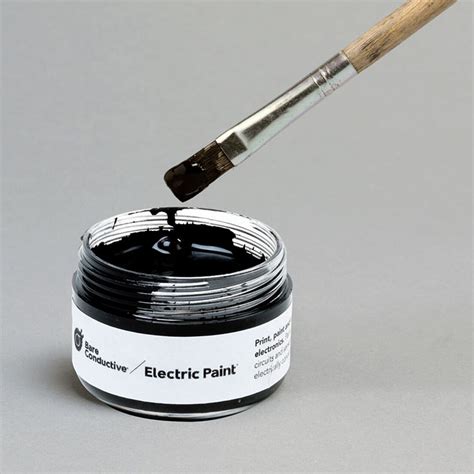
Conductive paint, also known as electric paint, is a specialized type of paint that conducts electricity. It is made by mixing conductive materials, such as graphite or silver particles, with a binding agent and a solvent. When the paint dries, it forms a conductive layer that allows electric current to flow through it.
Conductive paint has gained popularity in recent years due to its versatility and ease of use. It can be applied to various surfaces, including paper, plastic, fabric, and even skin, making it an ideal material for creating flexible circuits and wearable electronics.
Types of Conductive Paint
There are two main types of conductive paint: water-based and solvent-based.
| Type | Composition | Conductivity | Drying Time | Application |
|---|---|---|---|---|
| Water-based | Graphite or carbon particles suspended in water | Lower | Faster | Easier to use, safer, suitable for paper and fabric |
| Solvent-based | Silver particles suspended in a solvent | Higher | Slower | More durable, suitable for plastic and metal surfaces |
Water-based conductive paint is generally easier to work with and safer, as it does not contain harmful solvents. However, it has lower conductivity compared to solvent-based paint and may not be as durable.
Solvent-based conductive paint, on the other hand, offers higher conductivity and durability, making it suitable for applications that require a more robust conductive layer. However, it takes longer to dry and may require additional safety precautions due to the presence of solvents.
Applications of Conductive Paint
Creating Flexible Circuits
One of the most popular applications of conductive paint is creating flexible circuits. By painting conductive traces on a flexible substrate, such as paper or plastic, you can create custom circuits that can bend and fold without breaking.
To create a flexible circuit using conductive paint, follow these steps:
- Design your circuit layout using a software tool or by hand.
- Print or trace the circuit layout onto a flexible substrate.
- Apply conductive paint over the traced lines using a brush or a stencil.
- Allow the paint to dry completely.
- Connect electronic components to the conductive traces using conductive adhesive or by soldering.
Flexible circuits created with conductive paint can be used in various projects, such as:
- Paper electronics
- Wearable devices
- Flexible sensors
- Interactive art installations
Repairing Broken Traces on PCBs
Conductive paint can also be used to repair broken traces on printed circuit boards (PCBs). If a trace on a PCB is damaged or corroded, you can use conductive paint to bridge the gap and restore conductivity.
To repair a broken trace with conductive paint:
- Clean the area around the damaged trace with isopropyl alcohol to remove any dirt or debris.
- Apply a thin layer of conductive paint over the broken trace, ensuring that it connects the two ends of the trace.
- Allow the paint to dry completely.
- Test the conductivity of the repaired trace using a multimeter.
This method can be a quick and easy fix for minor PCB repairs, but it may not be suitable for high-current or high-frequency applications.
Shielding Electronic Devices
Conductive paint can be used to create electromagnetic shielding for electronic devices. By painting a layer of conductive paint on the inside of an enclosure, you can reduce the amount of electromagnetic interference (EMI) that enters or escapes the device.
To use conductive paint for shielding:
- Clean the inside surface of the enclosure to remove any dirt or grease.
- Apply a thin, even layer of conductive paint on the inside of the enclosure, covering all surfaces.
- Allow the paint to dry completely.
- Ensure that the painted layer is electrically connected to the ground of the electronic device.
Shielding with conductive paint can be an effective way to reduce EMI in low-frequency applications, but it may not provide sufficient shielding for high-frequency devices.
Making Your Own Conductive Paint
While commercial conductive paints are readily available, you can also make your own conductive paint at home using simple materials.
Graphite-Based Conductive Paint
To make a graphite-based conductive paint, you will need:
- Graphite powder
- Acrylic paint or water-based glue
- Water
- A mixing container
- A stirring stick
Instructions:
- In a mixing container, combine equal parts of graphite powder and acrylic paint or water-based glue.
- Gradually add water to the mixture, stirring constantly, until you achieve a smooth, paint-like consistency.
- Test the conductivity of the paint using a multimeter. If the conductivity is too low, add more graphite powder; if it is too high, add more paint or glue.
Graphite-based conductive paint is easy to make and relatively safe to use, but it has lower conductivity compared to silver-based paints.
Silver-Based Conductive Paint
To make a silver-based conductive paint, you will need:
- Silver particles or silver powder
- Conductive polymer or binder
- Solvent (e.g., ethanol or acetone)
- A mixing container
- A stirring stick
Instructions:
- In a mixing container, combine silver particles or powder with the conductive polymer or binder.
- Gradually add the solvent to the mixture, stirring constantly, until you achieve a smooth, paint-like consistency.
- Test the conductivity of the paint using a multimeter. If the conductivity is too low, add more silver; if it is too high, add more binder or solvent.
Silver-based conductive paint offers higher conductivity than graphite-based paint, but it is more expensive and may require additional safety precautions due to the use of solvents.

Alternatives to Conductive Paint
While conductive paint is a versatile and easy-to-use material for creating conductive traces and circuits, there are other alternatives available, depending on your project requirements.
Conductive Ink Pens
Conductive ink pens are similar to regular ink pens but contain conductive ink that dries to form a conductive trace. They are useful for drawing custom circuits and traces by hand.
| Advantage | Disadvantage |
|---|---|
| Easy to use and control | Limited to small-scale projects |
| Portable and convenient | Lower conductivity compared to paint |
| Ideal for prototyping | May require multiple layers for adequate conductivity |
Copper Tape
Copper tape is a thin, adhesive tape made of copper foil. It can be easily cut and applied to various surfaces to create conductive traces and connections.
| Advantage | Disadvantage |
|---|---|
| High conductivity | Limited flexibility |
| Easy to apply and remove | May not adhere well to some surfaces |
| Suitable for larger traces | Can be difficult to create intricate patterns |
Wire and Conductive Thread
For wearable electronics and e-textiles projects, wire and conductive thread can be used to create conductive pathways and connections.
| Material | Advantage | Disadvantage |
|---|---|---|
| Wire | High conductivity, durable | Limited flexibility, may be uncomfortable to wear |
| Conductive Thread | Flexible, integrates well with fabrics | Lower conductivity, may fray or break over time |
FAQ
1. Is conductive paint safe to use?
Water-based conductive paints are generally safe to use, as they do not contain harmful solvents. However, solvent-based paints may require additional safety precautions, such as wearing gloves and working in a well-ventilated area. Always follow the manufacturer’s instructions and safety guidelines when using any type of conductive paint.
2. Can conductive paint be used on any surface?
Conductive paint can be applied to various surfaces, including paper, plastic, fabric, and wood. However, the type of paint and the surface material may affect the adhesion and durability of the conductive layer. It is essential to choose the appropriate type of conductive paint for your project and to properly prepare the surface before application.
3. How long does conductive paint take to dry?
The drying time of conductive paint depends on the type of paint and the ambient conditions, such as temperature and humidity. Water-based paints typically dry faster than solvent-based paints. On average, conductive paint can take anywhere from 10 minutes to several hours to dry completely. Refer to the manufacturer’s instructions for specific drying times.
4. Can conductive paint be used for high-current applications?
Conductive paint is generally suitable for low-current applications, such as creating Touch Sensors or low-power circuits. For high-current applications, conductive paint may not provide sufficient conductivity or current-carrying capacity. In such cases, it is better to use more robust conductive materials, such as copper tape or wires.
5. How can I improve the conductivity of homemade conductive paint?
To improve the conductivity of homemade conductive paint, you can increase the proportion of conductive particles (e.g., graphite or silver) in the mixture. However, keep in mind that adding too much conductive material may affect the paint’s consistency and adhesion properties. Alternatively, you can apply multiple layers of conductive paint, allowing each layer to dry completely before applying the next one, to achieve better conductivity.
Conclusion
Conductive paint, or electric paint, is a versatile and user-friendly material for creating flexible circuits, repairing broken traces on PCBs, and shielding electronic devices. It can be applied to various surfaces and is available in both water-based and solvent-based formulations.
While commercial conductive paints are readily available, you can also make your own conductive paint at home using materials such as graphite powder or silver particles. However, it is essential to consider the specific requirements of your project and choose the appropriate type of conductive paint or alternative materials, such as conductive ink pens, copper tape, or wire.
As the field of flexible electronics and Wearable Technology continues to grow, conductive paint will likely play an increasingly important role in enabling the creation of innovative and customizable electronic devices.
No responses yet