Introduction to Servo Motors
A servo motor is a type of motor that allows for precise control of angular or linear position, velocity, and acceleration. It consists of a motor coupled to a sensor for position feedback. Servo motors are widely used in robotics, CNC machinery, and automation where precise positioning is required.
Types of Servo Motors
There are two main types of servo motors:
-
AC Servo Motors: These use AC current and are typically used in industrial applications that require high power and precision.
-
DC Servo Motors: These use DC current and are more commonly used in smaller applications such as robotics and radio-controlled vehicles. The MG995 is a type of DC servo motor.
What is the Mg995 Servo Motor?
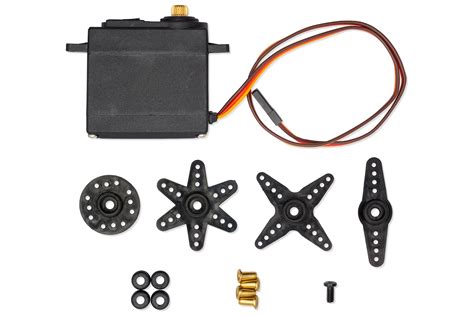
The MG995 is a high-torque digital servo motor widely used in robotic projects, radio-controlled vehicles, and other applications requiring precise rotational positioning. It is an upgraded version of the popular MG945 servo, offering improved torque and performance.
Key Features of the MG995 Servo
| Feature | Specification |
|---|---|
| Operating Voltage | 4.8V – 7.2V |
| Stall Torque | 8.5 kg/cm (4.8V) |
| 10 kg/cm (6V) | |
| Operating Speed | 0.2 sec/60° (4.8V) |
| 0.16 sec/60° (6V) | |
| Gear Type | Metal |
| Rotation | 0°-180° |
| Pulse Cycle | 20 ms |
| Pulse Width Range | 500-2500 μs |
| Dimensions | 40.7 x 19.7 x 42.9 mm |
| Weight | 55 g |
| Connector Wire Length | 30 cm |
Advantages of the MG995 Servo
- High stall torque, allowing it to handle heavier loads
- Metal gears for durability and longevity
- Wide operating voltage range
- Precise control with 180° rotation
- Affordable price compared to other high-torque servos

How Does the MG995 Servo Work?
The MG995 servo consists of a DC motor, gearbox, control circuit, and a potentiometer for position feedback. The control circuit compares the desired position (input signal) with the actual position (potentiometer feedback) and adjusts the motor accordingly.
Pulse Width Modulation (PWM) Control
Servo motors like the MG995 are controlled using Pulse Width Modulation (PWM). The servo expects a pulse every 20 ms, and the width of the pulse determines the angular position of the servo.
| Pulse Width | Servo Position |
|---|---|
| 1.5 ms | Neutral (90°) |
| 1 ms | 0° |
| 2 ms | 180° |
By varying the pulse width between 1 ms and 2 ms, you can control the servo’s position anywhere within its 180° range.
Connecting the MG995 Servo
The MG995 servo has a standard 3-pin connector:
- Brown or Black: Ground
- Red: Positive (4.8V – 7.2V)
- Orange or Yellow: PWM Signal
To control the servo, connect it to a microcontroller or servo controller that can generate the appropriate PWM signal.

Controlling the MG995 Servo with Arduino
Arduino is a popular microcontroller platform that can easily control servo motors like the MG995. Here’s a step-by-step guide to controlling the MG995 with Arduino:
Step 1: Connect the Servo to Arduino
- Connect the Ground (brown or black) wire to Arduino GND.
- Connect the Positive (red) wire to Arduino 5V.
- Connect the PWM Signal (orange or yellow) wire to an Arduino PWM pin (e.g., pin 9).
Step 2: Install the Servo Library
In the Arduino IDE, go to Sketch > Include Library > Manage Libraries. Search for “Servo” and install the official Arduino Servo library.
Step 3: Write the Arduino Code
#include <Servo.h>

Servo myservo;

void setup() {
  myservo.attach(9);  // Attaches the servo on pin 9 to the servo object
}

void loop() {
  myservo.write(0);   // Moves the servo to 0 degrees
  delay(1000);        // Waits for 1 second
  myservo.write(90);  // Moves the servo to 90 degrees
  delay(1000);        // Waits for 1 second
  myservo.write(180); // Moves the servo to 180 degrees
  delay(1000);        // Waits for 1 second
}
This code moves the servo to 0°, 90°, and 180° positions with 1-second delays in between.
Step 4: Upload the Code and Test
Upload the code to your Arduino board and observe the servo’s movement. If everything is connected and coded correctly, the servo should move as programmed.

Applications of the MG995 Servo
The MG995 servo is versatile and can be used in a wide range of projects, including:
- Robotics: Robotic arms, grippers, and legs
- Radio-controlled vehicles: Steering, throttle control, and actuators
- Animatronics and puppetry
- Camera gimbals and pan-tilt mechanisms
- Automated doors and locks
- CNC machines and 3D printers
Tips for Using the MG995 Servo
- Ensure the power supply can provide enough current for the servo under load to prevent damage.
- Use a separate power source for servos if using multiple or high-torque servos to avoid overloading the microcontroller.
- Be mindful of the servo’s rotation limits to prevent damage from forcing it beyond its range.
- Use a capacitor (100µF or more) across the servo’s power and ground to smooth out voltage spikes and protect the servo and microcontroller.
- Mount the servo securely to prevent vibration and ensure accurate positioning.
Troubleshooting Common MG995 Servo Issues
Jittery or Unresponsive Servo
- Check the power supply voltage and ensure it’s within the servo’s operating range (4.8V – 7.2V).
- Ensure the connections are secure and the wiring is correct.
- Verify the PWM signal is correct and the pulse width is within the servo’s range (500-2500 μs).
Humming or Buzzing Sound
- This is usually normal when the servo is holding a position.
- Ensure the servo is not being forced beyond its rotation limits.
- Check if the servo is overloaded and reduce the load if necessary.
Servo Not Centering Properly
- Ensure the PWM signal is correct for the desired neutral position (usually 1.5 ms).
- Calibrate the servo by adjusting the trim potentiometer on the servo horn.
- Replace the servo if the gears are worn out or the potentiometer is damaged.
Frequently Asked Questions (FAQ)
1. What is the difference between the MG995 and MG996R servos?
The MG995 and MG996R are very similar in terms of specifications and performance. The main difference is that the MG996R has a slightly higher stall torque and operating speed. Both servos are compatible with the same control methods and can be used interchangeably in most projects.
2. Can I use the MG995 servo with a Raspberry Pi?
Yes, you can control the MG995 servo with a Raspberry Pi using Python and the RPi.GPIO library. The process is similar to using an Arduino, with the Raspberry Pi generating the PWM signal to control the servo’s position.
3. How do I prevent my MG995 servo from overheating?
To prevent overheating, ensure the servo is not overloaded and is operating within its specified torque range. Use a separate power supply for the servo if it’s drawing significant current, and consider adding a heat sink or cooling fan if the servo is running continuously or in a high-temperature environment.
4. Can I modify the MG995 servo for continuous rotation?
Yes, it is possible to modify the MG995 servo for continuous rotation by removing the potentiometer and gear stops. However, this process is irreversible and will void the servo’s warranty. It’s recommended to purchase a continuous rotation servo if that functionality is required.
5. What is the lifespan of the MG995 servo?
The lifespan of the MG995 servo depends on factors such as operating conditions, load, and usage. With proper use and maintenance, the servo can last for several years or more. The metal gears in the MG995 contribute to its durability compared to plastic-geared servos.
Conclusion
The MG995 servo is a reliable, high-torque servo motor suitable for a wide range of robotics and automation projects. Its metal gears, wide operating voltage range, and precise control make it a popular choice among hobbyists and professionals alike.
By understanding the MG995’s specifications, control methods, and applications, you can effectively incorporate this servo into your projects. Whether you’re building a robotic arm, a pan-tilt camera mount, or an RC vehicle, the MG995 servo is a versatile and affordable solution for precise rotational positioning.
Remember to follow best practices when using the MG995 servo, such as ensuring a proper power supply, avoiding overloading, and regular maintenance. With the knowledge gained from this article, you’re well-equipped to start exploring the exciting possibilities of the MG995 servo in your own projects.
No responses yet