Introduction to Raspberry Pi and Microphones
What is a Raspberry Pi?
A Raspberry Pi is a credit card-sized computer that runs on the Linux operating system. It was developed by the Raspberry Pi Foundation to promote the teaching of basic computer science in schools and developing countries. The Raspberry Pi has evolved over the years, with the latest model, the Raspberry Pi 4, offering impressive specifications such as a quad-core processor, up to 8GB of RAM, and support for dual 4K displays.
Why Use a Microphone with Raspberry Pi?
Integrating a microphone with your Raspberry Pi opens up a wide range of possibilities for audio-based projects. Some popular applications include:
- Voice-controlled assistants
- Audio recording and processing
- Speech recognition
- Music and sound effects
- Home automation
- Security systems
By adding a microphone to your Raspberry Pi, you can create interactive projects that respond to voice commands, analyze audio input, or even develop your own smart home solutions.
Choosing the Right Microphone for Your Raspberry Pi
Types of Microphones
When selecting a microphone for your Raspberry Pi, you have several options to choose from:
-
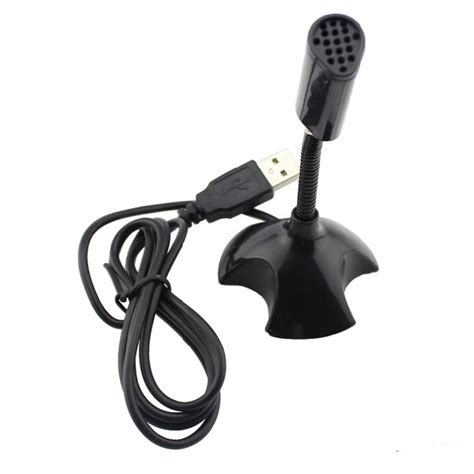
USB Microphones: USB microphones are the easiest to set up and use with your Raspberry Pi. They connect directly to the USB port and are plug-and-play, requiring minimal configuration.
-
I2S Microphones: I2S (Inter-IC Sound) microphones communicate with the Raspberry Pi using the I2S protocol. They offer high-quality audio capture but require additional configuration and wiring.
-
Analog Microphones: Analog microphones can be connected to the Raspberry Pi’s GPIO pins using an analog-to-digital converter (ADC). They provide flexibility in terms of microphone selection but require more complex wiring and configuration.
Factors to Consider When Choosing a Microphone
When deciding on a microphone for your Raspberry Pi project, consider the following factors:
-
Compatibility: Ensure that the microphone you choose is compatible with your Raspberry Pi model and the operating system you’re using.
-
Audio Quality: Determine the audio quality requirements for your project. If you need high-fidelity audio capture, opt for a microphone with a higher sampling rate and bit depth.
-
Directional Pattern: Consider the microphone’s directional pattern based on your project’s needs. Omnidirectional microphones capture sound from all directions, while unidirectional microphones are more focused on a specific direction.
-
Connectivity: Choose a microphone with the appropriate connectivity option for your Raspberry Pi, such as USB, I2S, or analog.
-
Price: Microphones come in a wide range of prices. Determine your budget and select a microphone that offers the best value for your needs.

Setting Up a USB Microphone on Raspberry Pi
USB microphones are the most straightforward option for integrating a microphone with your Raspberry Pi. Let’s walk through the steps to set up a USB microphone.
Step 1: Connect the USB Microphone
- Power off your Raspberry Pi.
- Connect the USB microphone to one of the available USB ports on your Raspberry Pi.
- Power on your Raspberry Pi.
Step 2: Install Required Packages
Open a terminal on your Raspberry Pi and run the following command to install the necessary packages:
sudo apt-get update
sudo apt-get install alsa-utils
Step 3: Configure Audio Settings
- Open the audio configuration file using the following command:
sudo nano /usr/share/alsa/alsa.conf
-
Find the line that starts with
defaults.ctl.cardanddefaults.pcm.card. Change the value to match the card number of your USB microphone. You can find the card number by runningarecord -lin the terminal. -
Save the changes and exit the editor.
Step 4: Test the Microphone
To test if your USB microphone is working correctly, run the following command in the terminal:
arecord --format=S16_LE --duration=5 --rate=16000 --file-type=raw test.wav
This command will record a 5-second audio clip using the USB microphone and save it as test.wav. You can play back the recorded audio using the following command:
aplay test.wav
If you hear the recorded audio, your USB microphone is set up and ready to use with your Raspberry Pi.

Configuring an I2S Microphone on Raspberry Pi
I2S microphones provide high-quality audio capture but require additional configuration and wiring compared to USB microphones. Let’s explore the steps to set up an I2S microphone on your Raspberry Pi.
Step 1: Connect the I2S Microphone
- Power off your Raspberry Pi.
- Connect the I2S microphone to the appropriate GPIO pins on your Raspberry Pi. Refer to the microphone’s documentation for the specific pin connections.
- Power on your Raspberry Pi.
Step 2: Enable I2S Interface
- Open the Raspberry Pi configuration file using the following command:
sudo nano /boot/config.txt
- Add the following line at the end of the file to enable the I2S interface:
dtparam=i2s=on
- Save the changes and exit the editor.
Step 3: Install Required Packages
Open a terminal on your Raspberry Pi and run the following command to install the necessary packages:
sudo apt-get update
sudo apt-get install libasound2-dev
Step 4: Configure Audio Settings
- Create a new ALSA configuration file using the following command:
sudo nano /etc/asound.conf
- Add the following content to the file:
“`
pcm.!default {
type hw
card 1
}
ctl.!default {
type hw
card 1
}
“`
This configuration sets the default audio device to the I2S microphone.
- Save the changes and exit the editor.
Step 5: Test the Microphone
Reboot your Raspberry Pi for the changes to take effect. Then, follow the same steps as mentioned in the USB microphone section to test the I2S microphone using the arecord and aplay commands.

Connecting an Analog Microphone to Raspberry Pi
Analog microphones require an analog-to-digital converter (ADC) to interface with the Raspberry Pi’s GPIO pins. One popular ADC is the MCP3008, which we’ll use in this example.
Step 1: Connect the Analog Microphone and ADC
- Power off your Raspberry Pi.
- Connect the analog microphone to the input channel of the MCP3008 ADC.
- Connect the MCP3008 ADC to the Raspberry Pi’s GPIO pins following the datasheet’s instructions.
- Power on your Raspberry Pi.
Step 2: Install Required Packages
Open a terminal on your Raspberry Pi and run the following command to install the necessary packages:
sudo apt-get update
sudo apt-get install python3-dev python3-pip
sudo pip3 install adafruit-mcp3008
Step 3: Configure the ADC
Create a new Python script using the following command:
nano mic_adc.py
Add the following code to the script:
import time
import board
import busio
import digitalio
import adafruit_mcp3xxx.mcp3008 as MCP
from adafruit_mcp3xxx.analog_in import AnalogIn

spi = busio.SPI(clock=board.SCK, MISO=board.MISO, MOSI=board.MOSI)
cs = digitalio.DigitalInOut(board.D5)
mcp = MCP.MCP3008(spi, cs)

mic_channel = AnalogIn(mcp, MCP.P0)

while True:
    print("ADC Voltage: " + str(mic_channel.value))
    time.sleep(0.5)
This script initializes the MCP3008 ADC and continuously reads the analog voltage from the microphone connected to channel 0 of the ADC.
Step 4: Test the Microphone
Run the Python script using the following command:
python3 mic_adc.py
You should see the ADC voltage values printed on the console. Speak into the microphone and observe the changes in the voltage values. If you see the values changing based on the audio input, your analog microphone is successfully connected and working with your Raspberry Pi.
Raspberry Pi Microphone Use Cases and Projects
Now that you have successfully integrated a microphone with your Raspberry Pi, let’s explore some exciting use cases and projects you can undertake.
Voice-Controlled Assistant
Create your own voice-controlled assistant using the Raspberry Pi and a microphone. You can use open-source libraries like Pocketsphinx or Google Assistant SDK to implement speech recognition and natural language processing. Your assistant can respond to voice commands, answer questions, control smart home devices, and more.
Audio Recording and Processing
Use your Raspberry Pi and microphone to record and process audio. You can create a portable audio recorder, a voice memo application, or even a podcast recording setup. With the power of the Raspberry Pi, you can apply various audio effects, filters, and transformations to the recorded audio using libraries like PyDub or PySox.
Speech Recognition and Transcription
Develop speech recognition and transcription applications using your Raspberry Pi and microphone. You can use libraries like SpeechRecognition or DeepSpeech to convert spoken words into text. This can be useful for transcribing meetings, lectures, or interviews, or for creating voice-controlled applications that respond to specific commands.
Music and Sound Effects
Create interactive music and sound effect projects using your Raspberry Pi and microphone. You can build a voice-controlled music player, a real-time audio visualizer, or even a musical instrument that responds to voice input. Libraries like PyAudio and Pygame can help you capture and process audio in real-time.
Home Automation and Security
Integrate your Raspberry Pi microphone into your home automation and security systems. You can create voice-controlled smart home devices, such as lights, thermostats, or appliances. Additionally, you can use the microphone as part of a security system to detect and analyze unusual sounds or trigger alerts based on specific audio events.
Frequently Asked Questions (FAQ)
-
Can I use any USB microphone with my Raspberry Pi?
Most USB microphones should work with the Raspberry Pi, as long as they are compatible with the USB audio class standard. However, it’s always a good idea to check the microphone’s specifications and compatibility with the Raspberry Pi before making a purchase. -
How can I improve the audio quality of my Raspberry Pi microphone?
To improve the audio quality, you can consider the following: - Use a high-quality microphone with a higher sampling rate and bit depth.
- Ensure proper microphone placement to minimize background noise and echo.
- Use a pop filter or windscreen to reduce plosives and wind noise.
-
Apply audio processing techniques like noise reduction, equalization, or compression.
-
Can I connect multiple microphones to my Raspberry Pi?
Yes, you can connect multiple microphones to your Raspberry Pi, depending on the available USB ports or GPIO pins. However, you may need to configure the audio settings to handle multiple input devices and ensure proper synchronization. -
How do I troubleshoot microphone issues on my Raspberry Pi?
If you encounter issues with your microphone on the Raspberry Pi, try the following: - Check the microphone connections and ensure they are properly plugged in.
- Verify that the microphone is recognized by the Raspberry Pi by running
arecord -lin the terminal. - Ensure that the audio settings are correctly configured in the ALSA configuration file.
-
Test the microphone with different applications or command-line tools to isolate the problem.
-
Can I use my Raspberry Pi microphone project in a commercial setting?
Yes, you can use your Raspberry Pi microphone project in a commercial setting, subject to the terms and conditions of the Raspberry Pi Foundation and any other licenses or permissions required for the libraries, tools, or components you use in your project. Make sure to review and comply with the relevant licenses and regulations.
Conclusion
Integrating a microphone with your Raspberry Pi opens up a world of possibilities for audio-based projects and applications. Whether you choose a USB microphone, an I2S microphone, or an analog microphone with an ADC, the Raspberry Pi provides a flexible and powerful platform to capture and process audio.
By following the steps outlined in this guide, you can successfully set up your Raspberry Pi microphone and start exploring various use cases, from voice-controlled assistants and audio recording to speech recognition and home automation.
Remember to choose the right microphone for your needs, consider factors like audio quality and connectivity, and properly configure the audio settings on your Raspberry Pi. With the right setup and some creativity, you can create unique and impressive projects that leverage the power of audio input.
So, grab your Raspberry Pi, pick a microphone, and start experimenting with the exciting world of audio-based projects. The possibilities are endless, and the only limit is your imagination!
No responses yet