Introduction to Protoshield Assembly
Arduino is a popular open-source platform for electronic prototyping, allowing users to create interactive electronic projects. One essential component for Arduino enthusiasts is the Protoshield, which provides a convenient way to connect various sensors, actuators, and other components to the Arduino board. In this comprehensive guide, we will walk you through the process of assembling an Arduino Protoshield, providing step-by-step instructions and helpful tips along the way.
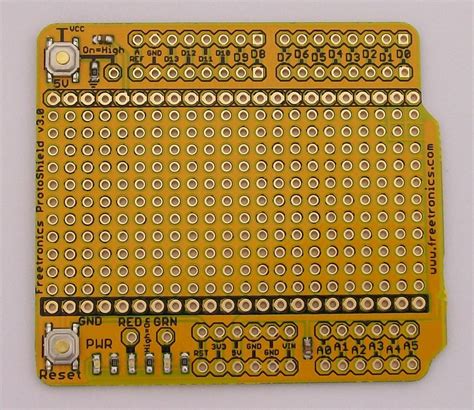
What is a Protoshield?
A Protoshield is a printed circuit board (PCB) that sits on top of an Arduino board, providing a prototyping area for connecting additional components. It allows users to create custom circuits without the need for soldering or breadboarding, making it an ideal solution for rapid prototyping and testing.
Benefits of Using a Protoshield
- Convenience: Protoshields provide a simple and organized way to connect components to your Arduino board.
- Flexibility: With a Protoshield, you can easily add or remove components as needed, allowing for quick modifications to your project.
- Time-saving: Protoshields eliminate the need for soldering or breadboarding, saving you time and effort during the prototyping phase.
Gathering the Necessary Components
Before we begin the assembly process, let’s ensure that you have all the required components:
- Arduino board (e.g., Arduino Uno)
- Protoshield PCB
- Male and female headers
- Soldering iron and solder
- Wire cutters
- Pliers
- Multimeter (optional, for testing connections)

Step-by-Step Assembly Instructions
Step 1: Preparing the Protoshield PCB
- Inspect the Protoshield PCB for any visible defects or damage. If everything looks good, proceed to the next step.
- Place the Protoshield PCB on a flat, stable surface with the component side facing up.
Step 2: Soldering the Female Headers
- Identify the female headers and their corresponding locations on the Protoshield PCB.
- Place the female headers into the designated holes on the PCB, ensuring that they are properly aligned.
- Flip the PCB over, keeping the headers in place.
- Solder each pin of the female headers to the PCB. Apply just enough solder to create a strong connection without causing any bridges between the pins.
Step 3: Soldering the Male Headers
- Identify the male headers and their corresponding locations on the Protoshield PCB.
- Insert the male headers into the designated holes on the PCB, making sure they are properly aligned.
- Flip the PCB over, keeping the headers in place.
- Solder each pin of the male headers to the PCB, following the same technique used for the female headers.
Step 4: Trimming the Excess Leads
- Using wire cutters, carefully trim the excess leads of the male and female headers on the bottom side of the PCB.
- Ensure that the trimmed leads are flush with the PCB surface to prevent any short circuits.
Step 5: Connecting the Protoshield to the Arduino Board
- Carefully align the assembled Protoshield with the Arduino board, ensuring that the headers match the corresponding pins on the Arduino.
- Gently press the Protoshield onto the Arduino board until it is securely seated.

Testing the Assembled Protoshield
To ensure that your Protoshield is properly assembled and functioning, it’s essential to perform a few basic tests:
-
Visual inspection: Carefully examine the soldered connections on both sides of the PCB. Look for any bridged pins, cold solder joints, or incomplete connections. If you notice any issues, reheat the solder and make the necessary corrections.
-
Continuity test: Using a multimeter set to the continuity mode, test the continuity between the corresponding pins on the Arduino board and the Protoshield. Place one probe on a pin of the Arduino and the other probe on the corresponding pin of the Protoshield. The multimeter should beep or display a low resistance value, indicating a proper connection.
-
Power test: Connect your Arduino board to a power source (e.g., via USB) and ensure that the power LED on the Protoshield is illuminated. This indicates that the Protoshield is receiving power from the Arduino board.

Common Mistakes and Troubleshooting
-
Soldering bridges: If you accidentally create a solder bridge between two pins, use a solder wick or a desoldering pump to remove the excess solder. Be careful not to overheat the components while doing so.
-
Cold solder joints: If a soldered connection appears dull or forms a ball shape instead of a smooth, shiny finish, it may be a cold solder joint. To fix this, reheat the joint and apply a small amount of additional solder until it flows evenly.
-
Misaligned headers: Double-check the alignment of the headers before soldering. If you notice a misaligned header after soldering, carefully desolder it using a desoldering pump or solder wick, and then reposition it correctly before resoldering.
-
Damaged components: Always handle the components with care to avoid damage. If a component is damaged during the assembly process, replace it with a new one before proceeding.
Frequently Asked Questions (FAQ)
- Can I use a Protoshield with any Arduino board?
-
Protoshields are designed to be compatible with most Arduino boards, such as the Arduino Uno, Leonardo, and Mega. However, it’s always a good idea to check the specifications of your specific Protoshield to ensure compatibility with your Arduino board.
-
Do I need any special tools for assembling a Protoshield?
-
The essential tools for assembling a Protoshield include a soldering iron, solder, wire cutters, and pliers. A multimeter is also useful for testing connections but is not strictly necessary.
-
How do I know if my Protoshield is properly assembled?
-
You can visually inspect the soldered connections, perform a continuity test using a multimeter, and check if the power LED on the Protoshield illuminates when the Arduino board is powered on. These tests will help you determine if your Protoshield is properly assembled and functioning.
-
Can I reuse a Protoshield for multiple projects?
-
Yes, you can reuse a Protoshield for multiple projects. Simply desolder the components from the Protoshield when you’re finished with one project, and then you can use it for another project by soldering new components in place.
-
What should I do if I encounter issues while assembling the Protoshield?
- If you encounter any issues during the assembly process, first refer to the troubleshooting section in this guide. If the problem persists, seek assistance from the Arduino community forums or consult with an experienced electronics enthusiast for further guidance.
Conclusion
Assembling an Arduino Protoshield is a straightforward process that can greatly enhance your prototyping experience. By following the step-by-step instructions and tips provided in this comprehensive guide, you should be able to successfully assemble your Protoshield and start building exciting projects in no time.
Remember to take your time, pay attention to detail, and always prioritize safety when working with electronic components. With practice and patience, you’ll soon become proficient in assembling Protoshields and other Arduino-related components.
Happy prototyping!
No responses yet