What is Solder Removal?
Solder removal is the process of removing solder from a circuit board or component. This may be necessary for a variety of reasons, such as:
- Replacing a faulty component
- Modifying a circuit board
- Cleaning up excess solder
- Repairing a damaged connection
Solder removal can be a delicate process, as it involves working with small components and high temperatures. It’s important to use the right techniques and tools to avoid damaging the circuit board or components.
Why is Solder Removal Important?
Solder removal is an important skill for anyone working with electronics. Here are a few reasons why:
-
Repairs: If a component on a circuit board fails, it may need to be removed and replaced. Solder removal is necessary to remove the faulty component and prepare the board for a new one.
-
Modifications: Sometimes, a circuit board may need to be modified to add or remove features. Solder removal is necessary to remove the existing components and make room for new ones.
-
Cleaning: Excess solder can cause short circuits or other problems on a circuit board. Solder removal can help clean up the board and ensure proper function.
-
Salvage: If a device is no longer functional, solder removal can be used to salvage usable components for use in other projects.

Top 8 Best Techniques to Remove Solder
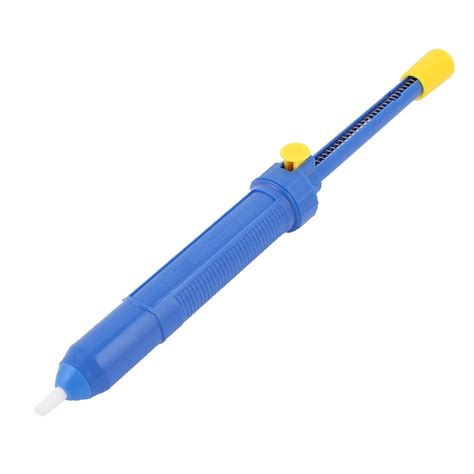
1. Desoldering Pump
A desoldering pump, also known as a solder sucker, is a handheld tool that uses suction to remove molten solder from a joint. To use a desoldering pump:
- Heat up the solder joint with a soldering iron.
- Place the tip of the desoldering pump near the molten solder.
- Press the button on the desoldering pump to create suction and remove the solder.
Desoldering pumps are inexpensive and easy to use, making them a popular choice for hobbyists and professionals alike.
2. Desoldering Wick
Desoldering wick, also known as desoldering braid, is a copper braid that is used to absorb molten solder from a joint. To use desoldering wick:
- Place the desoldering wick over the solder joint.
- Heat up the wick and the joint with a soldering iron.
- The molten solder will be absorbed into the wick.
- Remove the wick and the solder will come with it.
Desoldering wick is effective for removing small amounts of solder, but it can be time-consuming for larger joints.
3. Desoldering Tweezers
Desoldering tweezers are a specialized tool that uses heated tips to melt and remove solder from a joint. To use desoldering tweezers:
- Place the tips of the tweezers on either side of the solder joint.
- Squeeze the tweezers to heat up the tips and melt the solder.
- Pull the tweezers away from the joint, taking the molten solder with them.
Desoldering tweezers are effective for removing solder from small, delicate components.
4. Desoldering Gun
A desoldering gun is a more advanced tool that combines a soldering iron with a vacuum pump to remove solder from a joint. To use a desoldering gun:
- Heat up the solder joint with the soldering iron tip.
- Pull the trigger on the gun to activate the vacuum pump.
- The molten solder will be sucked into the gun’s chamber.
Desoldering guns are fast and efficient, but they can be expensive and require some practice to use effectively.
5. Chip Quik
Chip Quik is a specialized alloy that is used to lower the melting point of solder, making it easier to remove. To use Chip Quik:
- Apply Chip Quik to the solder joint.
- Heat up the joint with a soldering iron until the Chip Quik melts and mixes with the solder.
- Use a desoldering pump or wick to remove the mixture.
Chip Quik is effective for removing large amounts of solder or for desoldering surface-mount components.
6. Soldering Iron and Solder Removal Tip
A soldering iron with a specialized solder removal tip can be used to remove solder from a joint. These tips have a hollow center that allows molten solder to be sucked up into the tip. To use a solder removal tip:
- Heat up the solder joint with the soldering iron.
- Place the solder removal tip over the molten solder.
- The solder will be sucked up into the tip.
- Remove the tip and the solder will come with it.
Solder removal tips are effective for removing small amounts of solder, but they can be slow for larger joints.
7. Solder Removal Flux
Solder removal flux is a specialized flux that is designed to help remove solder from a joint. It works by breaking down the surface tension of the molten solder, making it easier to remove. To use solder removal flux:
- Apply the flux to the solder joint.
- Heat up the joint with a soldering iron until the solder melts.
- Use a desoldering pump or wick to remove the molten solder.
Solder removal flux is effective for removing solder from hard-to-reach places or for cleaning up excess solder.
8. Hot Air Rework Station
A hot air rework station is a specialized tool that uses a focused stream of hot air to melt solder and remove components from a circuit board. To use a hot air rework station:
- Place the circuit board on the workbench.
- Position the nozzle of the hot air station over the component to be removed.
- Turn on the hot air and wait for the solder to melt.
- Use tweezers to remove the component from the board.
Hot air rework stations are effective for removing surface-mount components, but they require some skill and practice to use effectively.

Comparison of Solder Removal Techniques
| Technique | Ease of Use | Speed | Cost | Effectiveness |
|---|---|---|---|---|
| Desoldering Pump | Easy | Fast | Low | Moderate |
| Desoldering Wick | Moderate | Slow | Low | Moderate |
| Desoldering Tweezers | Moderate | Fast | High | High |
| Desoldering Gun | Difficult | Fast | High | High |
| Chip Quik | Moderate | Fast | Moderate | High |
| Soldering Iron and Removal Tip | Easy | Slow | Low | Low |
| Solder Removal Flux | Easy | Fast | Low | Moderate |
| Hot Air Rework Station | Difficult | Fast | High | High |

FAQs
1. What is the best solder removal technique for beginners?
For beginners, the desoldering pump and desoldering wick are the easiest and most affordable options. They are simple to use and don’t require a lot of skill or practice.
2. Can I reuse solder that I have removed?
It’s generally not recommended to reuse solder that has been removed, as it may contain impurities or contaminants that can affect the quality of the new joint. It’s best to use fresh solder for each new connection.
3. How do I avoid damaging components when removing solder?
To avoid damaging components when removing solder, it’s important to use the right technique and tools for the job. Avoid applying too much heat or force, and be careful not to pull on the component or the board. If you’re unsure, it’s best to seek the advice of an experienced technician.
4. What safety precautions should I take when removing solder?
When removing solder, it’s important to take safety precautions to avoid injury or damage. Wear safety glasses to protect your eyes from solder splatter, and use a fume extractor to remove harmful fumes. Avoid touching the hot soldering iron tip or the molten solder, and work in a well-ventilated area.
5. Can I use a regular soldering iron to remove solder?
While it’s possible to use a regular soldering iron to remove solder, it’s not the most effective method. A soldering iron is designed to melt solder and create a new joint, not to remove existing solder. Using a soldering iron to remove solder can be slow and ineffective, and may damage the board or components. It’s best to use a specialized solder removal tool for the best results.
Conclusion
Solder removal is an important skill for anyone working with electronics, and there are several techniques and tools available to make the process easier and more effective. Whether you’re a beginner or an experienced technician, it’s important to choose the right technique and tools for the job, and to take safety precautions to avoid injury or damage.
By mastering the art of solder removal, you’ll be able to repair, modify, and salvage electronic components with confidence and skill. With practice and patience, you’ll be able to tackle even the most challenging solder removal tasks and take your electronics projects to the next level.
No responses yet