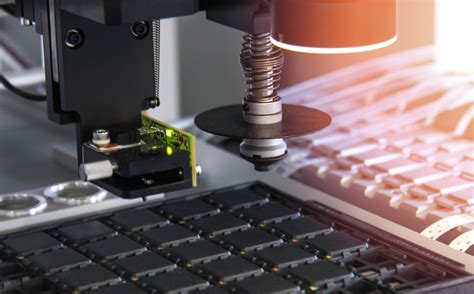
Introduction to PCB Soldering
PCB (Printed Circuit Board) soldering is an essential skill for anyone involved in electronic projects, repairs, or manufacturing. It is the process of joining electronic components to a PCB using solder, a low-melting alloy that creates a strong electrical and mechanical bond. Proper PCB soldering ensures the reliability and longevity of electronic devices.
In this comprehensive guide, we will cover everything you need to know about PCB soldering, including the tools and materials required, different soldering techniques, and best practices to achieve perfect solder joints every time.
Tools and Materials for PCB Soldering
To get started with PCB soldering, you’ll need the following tools and materials:
Soldering Iron
A soldering iron is the most crucial tool for PCB soldering. It consists of a heated metal tip that melts the solder, allowing it to flow onto the PCB and component leads. When choosing a soldering iron, consider the following factors:
- Wattage: A soldering iron with a wattage between 30W and 60W is suitable for most PCB soldering tasks.
- Temperature control: Adjustable temperature control allows you to set the ideal temperature for different types of solder and components.
- Tip size and shape: Select a tip size and shape that matches the size of the components and PCB pads.
Solder
Solder is a low-melting alloy that typically consists of tin and lead. However, due to environmental and health concerns, lead-free solder is becoming increasingly popular. When Choosing Solder, consider the following factors:
- Alloy composition: Common solder alloys include Sn63/Pb37 (63% tin, 37% lead) and Sn96.5/Ag3.0/Cu0.5 (96.5% tin, 3% silver, 0.5% copper) for lead-free solder.
- Diameter: Solder wire comes in various diameters, with 0.5mm to 1mm being the most common for PCB soldering.
- Flux core: Flux is a chemical that helps remove oxides and improve solder flow. Solder wire with a flux core is recommended for easier soldering.
Soldering Iron Stand
A soldering iron stand provides a safe place to rest your hot soldering iron when not in use. It also helps to keep the soldering iron tip clean and prevents accidental burns.
Solder Wick
Solder wick, also known as desoldering braid, is a copper braid used to remove excess solder from PCBs and component leads. It is especially useful for correcting soldering mistakes or removing solder bridges.
Flux
In addition to the flux core in solder wire, you may need to use additional flux for more challenging soldering tasks. Flux helps to remove oxides, improve solder flow, and promote better adhesion between the solder and the surfaces being joined.
Tweezers and Pliers
Tweezers and pliers are essential for handling small electronic components and holding them in place during soldering.
Safety Equipment
Always prioritize safety when soldering. Use the following safety equipment:
- Safety glasses to protect your eyes from solder splashes and fumes.
- A well-ventilated workspace or a fume extractor to minimize exposure to solder fumes.
- Heat-resistant gloves to protect your hands from burns.

Soldering Techniques
There are two main soldering techniques used in PCB soldering: through-hole soldering and surface mount soldering.
Through-Hole Soldering
Through-hole soldering involves soldering components with long leads that pass through holes in the PCB. The steps for through-hole soldering are as follows:
- Insert the component leads through the appropriate holes in the PCB.
- Bend the leads slightly to hold the component in place.
- Apply heat to the component lead and PCB pad simultaneously using the soldering iron.
- Feed solder into the joint, allowing it to melt and flow around the lead and pad.
- Remove the soldering iron and let the solder cool and solidify.
- Trim the excess component leads with wire cutters.
Surface Mount Soldering
Surface mount soldering involves soldering components directly onto the surface of the PCB without using through-holes. Surface mount components are smaller and have shorter leads or no leads at all. The steps for surface mount soldering are as follows:
- Apply a small amount of solder paste to the PCB pads using a solder paste stencil or dispenser.
- Place the surface mount component onto the solder paste using tweezers.
- Apply heat to the component and PCB pad simultaneously using the soldering iron.
- The solder paste will melt and flow, creating a bond between the component and PCB pad.
- Remove the soldering iron and let the solder cool and solidify.

Best Practices for PCB Soldering
To achieve reliable and high-quality solder joints, follow these best practices:
- Keep the soldering iron tip clean and tinned by regularly wiping it on a damp sponge or brass wire sponge.
- Use the appropriate soldering iron temperature for the type of solder and components being used.
- Apply heat to both the component lead and PCB pad simultaneously to ensure even heat distribution.
- Use just enough solder to create a strong joint without creating solder bridges or excessive solder buildup.
- Inspect solder joints visually for a smooth, shiny appearance and proper solder flow around the component lead and PCB pad.
- Avoid moving the component or PCB while the solder is cooling to prevent disturbing the solder joint.
- Use flux when necessary to improve solder flow and create stronger joints.
- Work in a well-ventilated area and use safety equipment to protect yourself from solder fumes and burns.

Common PCB Soldering Problems and Solutions
Even with the best practices, problems can arise during PCB soldering. Here are some common issues and their solutions:
| Problem | Cause | Solution |
|---|---|---|
| Cold solder joint | Insufficient heat, poor solder flow | Reheat the joint and apply more solder |
| Solder bridge | Excessive solder, components too close together | Use solder wick to remove excess solder |
| Solder not adhering | Dirty or oxidized surfaces, insufficient flux | Clean surfaces and use additional flux |
| Overheated components | Excessive heat application | Use a lower soldering iron temperature and minimize heat exposure |
| Lifted pads | Excessive heat or pulling on component leads | Use a lower soldering iron temperature and avoid pulling on components |
FAQ
- What is the difference between lead-based and lead-free solder?
-
Lead-based solder contains a mixture of tin and lead, while lead-free solder uses alternative alloys such as tin, silver, and copper. Lead-free solder is becoming more common due to environmental and health concerns.
-
Can I use a regular household iron for PCB soldering?
-
No, a regular household iron is not suitable for PCB soldering. A dedicated soldering iron with temperature control and a precise tip is necessary for accurate and reliable soldering.
-
How do I know if my solder joint is good?
-
A good solder joint should have a smooth, shiny appearance with a concave shape. The solder should flow evenly around the component lead and PCB pad without any gaps or excessive buildup.
-
What should I do if I accidentally create a solder bridge?
-
To remove a solder bridge, use solder wick to absorb the excess solder. Place the solder wick on top of the bridge and apply heat with the soldering iron. The solder will melt and be absorbed into the wick.
-
How often should I replace my soldering iron tip?
- Soldering iron tips should be replaced when they become worn, pitted, or excessively oxidized. The lifespan of a tip depends on factors such as usage frequency, soldering temperature, and the type of solder used. Regular cleaning and tinning can help extend the life of a soldering iron tip.
Conclusion
PCB soldering is a crucial skill for anyone working with electronic circuits. By understanding the tools, materials, techniques, and best practices involved in PCB soldering, you can create reliable and high-quality solder joints. Remember to prioritize safety, use the appropriate tools and materials, and practice regularly to improve your soldering skills. With patience and attention to detail, you’ll be able to tackle any PCB soldering project with confidence.
No responses yet