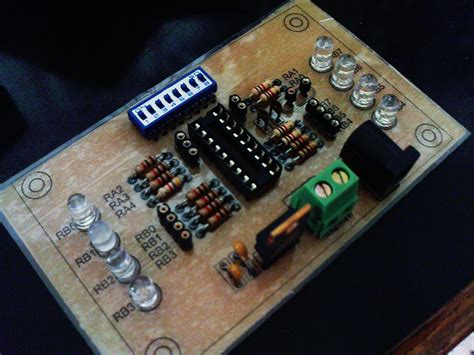
What is a PCB?
A printed circuit board (PCB) is a flat board made of insulating material, such as fiberglass or plastic, with conductive copper traces printed on its surface. These traces connect various electronic components, such as resistors, capacitors, and integrated circuits (ICs), to form a complete electronic circuit. PCBs are used in almost all electronic devices, from smartphones and computers to home appliances and industrial equipment.
Advantages of PCBs
- Compact and space-efficient
- Reliable and durable
- Easy to mass-produce
- Facilitate complex circuit designs
Tools and Materials Required for DIY PCB
Before you start making your own PCBs, you’ll need to gather the necessary tools and materials. Here’s a list of the essential items you’ll need:
Tools
- Laser printer or photocopy machine
- UV exposure box or sunlight
- Etching tank or plastic container
- Drill or Dremel tool
- Soldering iron and solder
- Safety gear (gloves, goggles, and mask)
Materials
- Copper-clad board (single or double-sided)
- Photoresist film or pre-sensitized PCB board
- Developing solution (sodium hydroxide or potassium carbonate)
- Etching solution (ferric chloride or ammonium persulfate)
- Acetone or isopropyl alcohol for cleaning
- Electronic components for your circuit

Designing Your PCB
The first step in creating your own PCB is to design your circuit. You can use various software tools, such as KiCad, Eagle, or EasyEDA, to create a schematic diagram and layout your PCB. If you’re a beginner, it’s recommended to start with simple circuits and gradually move on to more complex designs as you gain experience.
Schematic Design
- Create a new project in your chosen PCB design software
- Add the necessary components to your schematic, such as resistors, capacitors, and ICs
- Connect the components according to your circuit diagram
- Assign appropriate values and footprints to each component
PCB Layout
- Switch to the PCB layout editor in your software
- Arrange the components on the board, keeping in mind the size and shape of your PCB
- Route the traces between the components, ensuring proper spacing and width
- Add any necessary text, labels, or logos to your PCB
- Generate Gerber files for manufacturing

Transferring Your Design to the PCB
Once you have your PCB design ready, it’s time to transfer it to the copper-clad board. There are two common methods for transferring your design: using a laser printer and photoresist film, or using a pre-sensitized PCB board.
Laser Printer and Photoresist Film Method
- Print your PCB design on a transparency film using a laser printer
- Clean the copper-clad board with acetone or isopropyl alcohol
- Apply the photoresist film to the copper-clad board, ensuring no air bubbles are trapped
- Place the transparency film with your PCB design on top of the photoresist film
- Expose the board to UV light for the recommended time (usually 2-5 minutes)
- Develop the board in the developing solution until the exposed areas are removed
- Rinse the board with water and dry it
Pre-Sensitized PCB Board Method
- Print your PCB design on a transparency film using a laser printer
- Remove the protective film from the pre-sensitized PCB board
- Place the transparency film with your PCB design on top of the pre-sensitized board
- Expose the board to UV light for the recommended time (usually 2-5 minutes)
- Develop the board in the developing solution until the exposed areas are removed
- Rinse the board with water and dry it

Etching Your PCB
After transferring your design to the PCB, it’s time to etch away the unwanted copper, leaving only your circuit traces.
- Prepare your etching solution according to the manufacturer’s instructions
- Place your PCB in the etching tank or container, ensuring it’s completely submerged
- Agitate the solution gently to ensure even etching
- Check the PCB periodically until all the unwanted copper is removed
- Remove the PCB from the etching solution and rinse it with water
- Clean the remaining photoresist from the PCB using acetone or isopropyl alcohol
Drilling and Soldering Components
With your PCB etched, you can now drill holes for through-hole components and solder them in place.
Drilling Holes
- Mark the locations for the holes using a permanent marker
- Use a drill or Dremel tool with an appropriate bit size to drill the holes
- Ensure the holes are clean and free of burrs
Soldering Components
- Insert the component leads through the appropriate holes on the PCB
- Heat the component lead and the PCB pad simultaneously with your soldering iron
- Apply solder to the joint, ensuring a good connection
- Trim any excess component leads with wire cutters
Testing and Troubleshooting Your PCB
After soldering all the components, it’s crucial to test your PCB to ensure it functions as intended.
- Visually inspect your PCB for any shorts, cold solder joints, or missing components
- Use a multimeter to test for continuity between the appropriate points on your PCB
- Power up your PCB with the correct voltage and current
- Test the functionality of your circuit
- If you encounter any issues, refer to your schematic and PCB layout to troubleshoot the problem
Advanced Techniques and Tips
As you gain experience in DIY PCB manufacturing, you may want to explore more advanced techniques to improve the quality and functionality of your boards.
Solder Mask and Silkscreen
- Apply a solder mask to your PCB to protect the copper traces from oxidation and accidental shorts
- Add a silkscreen layer to your PCB to label components and provide visual guides
Surface Mount Components (SMD)
- Use surface mount components to create smaller and more compact PCBs
- Learn specialized soldering techniques, such as reflow soldering or using a hot air station
Multi-Layer PCBs
- Create more complex circuits by designing multi-layer PCBs
- Use vias to connect traces between layers
- Ensure proper layer alignment and registration during manufacturing
Frequently Asked Questions (FAQ)
-
Q: Can I use any printer to print my PCB design on the transparency film?
A: It’s best to use a laser printer, as inkjet printers may not produce the required opacity for the UV exposure process. -
Q: How long should I expose my PCB to UV light?
A: The exposure time depends on various factors, such as the type of photoresist, the power of your UV light source, and the complexity of your design. Generally, 2-5 minutes is sufficient, but it’s best to consult the manufacturer’s guidelines or experiment with different exposure times. -
Q: Can I reuse the etching solution?
A: Yes, you can reuse the etching solution multiple times, but its effectiveness will diminish over time. When the etching process becomes significantly slower, it’s time to replace the solution. -
Q: What should I do if my PCB doesn’t work after soldering the components?
A: First, visually inspect your PCB for any obvious issues, such as short circuits or missing components. Then, use a multimeter to test for continuity and correct component placement. If the problem persists, refer to your schematic and PCB layout to troubleshoot the issue systematically. -
Q: How can I improve the quality of my DIY PCBs?
A: To improve the quality of your PCBs, ensure that you have a clean and well-ventilated workspace, use high-quality materials and tools, and follow best practices for PCB design and manufacturing. Continuously learn and experiment with new techniques, and don’t be discouraged by initial failures – practice makes perfect!
Conclusion
Creating your own PCBs at home is a rewarding and educational experience that opens up a world of possibilities for your electronic projects. By following the steps outlined in this guide and practicing your skills, you’ll soon be designing and manufacturing high-quality PCBs for your unique applications. Remember to prioritize safety, be patient, and most importantly, have fun exploring the exciting world of DIY PCB manufacturing!
No responses yet