Introduction to Ultrasonic Sensors
Ultrasonic sensors are electronic devices that use sound waves to measure distance or detect objects. They have become increasingly popular in various applications, from robotics and automation to automotive and industrial systems. In this comprehensive guide, we will explore the fundamentals of ultrasonic sensors, their working principle, and how to design and implement an ultrasonic sensor circuit.
What is an Ultrasonic Sensor?
An ultrasonic sensor is a device that emits high-frequency sound waves and measures the time it takes for the waves to bounce back after hitting an object. By calculating the time of flight (TOF) and the speed of sound, the sensor can determine the distance between itself and the object.
Ultrasonic sensors typically operate at frequencies above 20 kHz, which is beyond the range of human hearing. This makes them ideal for applications where non-invasive distance measurement or object detection is required.
Applications of Ultrasonic Sensors
Ultrasonic sensors find applications in various fields, including:
- Robotics: Used for obstacle avoidance, navigation, and mapping.
- Automotive: Employed in parking assist systems, blind spot detection, and collision avoidance.
- Industrial automation: Utilized for level sensing, presence detection, and quality control.
- Consumer electronics: Found in devices like smartphone Proximity Sensors and automatic faucets.
How Ultrasonic Sensors Work
Operating Principle
Ultrasonic sensors work on the principle of echo ranging, similar to how bats or dolphins navigate. The sensor consists of two main components: an ultrasonic transmitter and an ultrasonic receiver.
- Transmission: The ultrasonic transmitter emits a high-frequency sound wave burst.
- Propagation: The sound waves travel through the medium (usually air) at the speed of sound.
- Reflection: When the sound waves encounter an object, they reflect back towards the sensor.
- Reception: The ultrasonic receiver detects the reflected sound waves.
- Calculation: The sensor measures the time between the transmission and reception of the sound waves and calculates the distance using the speed of sound.
Factors Affecting Ultrasonic Sensor Performance
Several factors can influence the performance and accuracy of ultrasonic sensors:
- Temperature: The speed of sound varies with temperature, affecting the distance calculation. Compensation techniques are often employed to mitigate this effect.
- Humidity: High humidity levels can absorb sound waves, reducing the sensor’s range and accuracy.
- Surface properties: The reflectivity and texture of the target object’s surface can impact the strength of the reflected signal.
- Angle of incidence: The angle at which the sound waves strike the object affects the reflection pattern and the sensor’s ability to detect the object.
- Interference: Other ultrasonic sources or background noise can interfere with the sensor’s operation.

Ultrasonic Sensor Circuit Design
Components Required
To build an ultrasonic sensor circuit, you will need the following components:
- Ultrasonic sensor module (e.g., HC-SR04)
- Microcontroller (e.g., Arduino)
- Jumper wires
- Breadboard (optional)
Circuit Diagram
Here’s a simple circuit diagram for connecting an HC-SR04 ultrasonic sensor to an Arduino:
+-----------+         +--------------------+
|         Vcc|---------|Vcc                 |
|         GND|---------|GND                 |
|        TRIG|---------|Digital Pin (e.g., 7)|
|        ECHO|---------|Digital Pin (e.g., 6)|
+-----------+         +--------------------+
   HC-SR04                   Arduino
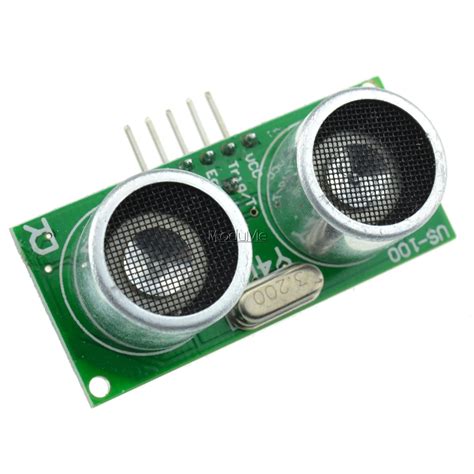
Ultrasonic Sensor Module (HC-SR04)
The HC-SR04 is a popular and affordable ultrasonic sensor module. It has the following specifications:
| Parameter | Value |
|---|---|
| Operating Voltage | 5V DC |
| Operating Current | 15mA |
| Operating Frequency | 40kHz |
| Measuring Range | 2cm to 400cm |
| Measuring Angle | 15 degrees |
| Trigger Input Pulse Width | 10μs |
| Dimension | 45mm x 20mm x 15mm |
Microcontroller (Arduino)
Arduino is an open-source microcontroller platform widely used for prototyping and hobby projects. It provides an easy-to-use development environment and a wide range of libraries for interfacing with sensors and actuators.
For this ultrasonic sensor circuit, you can use any Arduino board, such as the Arduino Uno or Arduino Nano.
Code Implementation
Here’s a sample Arduino code for reading distance from the HC-SR04 ultrasonic sensor:
const int trigPin = 7;
const int echoPin = 6;

void setup() {
  pinMode(trigPin, OUTPUT);
  pinMode(echoPin, INPUT);
  Serial.begin(9600);
}

void loop() {
  long duration, distance;

  // Send a 10μs trigger pulse
  digitalWrite(trigPin, LOW);
  delayMicroseconds(2);
  digitalWrite(trigPin, HIGH);
  delayMicroseconds(10);
  digitalWrite(trigPin, LOW);

  // Measure the duration of the echo pulse
  duration = pulseIn(echoPin, HIGH);

  // Calculate the distance in centimeters
  distance = duration * 0.034 / 2;

  // Print the distance to the serial monitor
  Serial.print("Distance: ");
  Serial.print(distance);
  Serial.println(" cm");

  delay(100);
}
This code sends a trigger pulse to the ultrasonic sensor, measures the duration of the echo pulse, and calculates the distance in centimeters. The distance is then printed to the serial monitor.

Ultrasonic Sensor Calibration and Testing
Calibration
To ensure accurate distance measurements, it’s important to calibrate the ultrasonic sensor. Follow these steps:
- Measure a known distance (e.g., 50cm) from the sensor using a ruler or measuring tape.
- Place an object at the measured distance.
- Run the ultrasonic sensor code and compare the reported distance with the actual distance.
- If there is a discrepancy, adjust the distance calculation formula in the code accordingly.
Testing
Once calibrated, test the ultrasonic sensor circuit in various scenarios:
- Range test: Measure distances at different ranges within the sensor’s specified range (e.g., 2cm to 400cm for HC-SR04).
- Angle test: Test the sensor’s performance at different angles of incidence.
- Surface test: Evaluate the sensor’s ability to detect objects with different surface properties (e.g., smooth, rough, reflective).
- Interference test: Check the sensor’s performance in the presence of other ultrasonic sources or background noise.

Advanced Ultrasonic Sensor Techniques
Multiple Sensor Arrays
Using multiple ultrasonic sensors in an array configuration can provide more comprehensive distance and object detection capabilities. By strategically placing sensors at different angles and positions, you can create a 2D or 3D map of the environment.
Sensor Fusion
Combining ultrasonic sensors with other types of sensors, such as infrared sensors or cameras, can enhance the overall sensing capabilities of a system. Sensor fusion techniques allow for the integration and correlation of data from multiple sensors to provide more accurate and reliable results.
Noise Filtering and Signal Processing
To improve the accuracy and reliability of ultrasonic sensor readings, various noise filtering and signal processing techniques can be employed. These include:
- Averaging: Taking multiple readings and calculating the average to reduce the impact of random noise.
- Median filtering: Selecting the median value from a set of readings to eliminate outliers.
- Kalman filtering: Using a mathematical model to estimate the true state of the system based on noisy measurements.
- Fourier analysis: Analyzing the frequency components of the received signal to extract relevant information.
Troubleshooting Common Issues
Inaccurate Readings
If you encounter inaccurate distance readings, consider the following:
- Check the calibration of the sensor and ensure it is properly calibrated for the specific environment.
- Verify that the sensor is positioned correctly and aligned with the target object.
- Ensure that the target object has a suitable surface for reflecting sound waves.
- Investigate potential sources of interference, such as other ultrasonic devices or background noise.
Inconsistent Readings
Inconsistent readings can be caused by several factors:
- Fluctuations in temperature or humidity affecting the speed of sound.
- Variations in the target object’s position or orientation.
- Interference from other ultrasonic sources or electrical noise.
- Faulty or damaged sensor components.
To mitigate inconsistent readings, consider implementing noise filtering techniques, using shielded cables, and ensuring a stable operating environment.
No Readings
If the ultrasonic sensor fails to provide any readings, check the following:
- Verify that the sensor is properly powered and connected to the microcontroller.
- Check the wiring connections for any loose or faulty connections.
- Ensure that the code is correctly uploaded to the microcontroller and running without errors.
- Test the sensor with a known working configuration to isolate any issues.
Frequently Asked Questions (FAQ)
-
What is the maximum range of an ultrasonic sensor?
The maximum range of an ultrasonic sensor depends on the specific model and its specifications. For example, the HC-SR04 has a measuring range of 2cm to 400cm. -
Can ultrasonic sensors detect objects of any material?
Ultrasonic sensors can detect objects made of various materials, including metal, plastic, wood, and fabric. However, the detectability depends on the surface properties and the angle of incidence of the sound waves. -
Are ultrasonic sensors affected by lighting conditions?
Unlike optical sensors, ultrasonic sensors are not affected by lighting conditions. They can operate in dark or bright environments without any impact on their performance. -
How do I choose the right ultrasonic sensor for my application?
When selecting an ultrasonic sensor, consider factors such as the required measuring range, accuracy, resolution, operating frequency, and environmental conditions. Consult the sensor’s datasheet and compare specifications to find the most suitable sensor for your specific application. -
Can I use multiple ultrasonic sensors simultaneously?
Yes, you can use multiple ultrasonic sensors simultaneously. However, you need to ensure proper synchronization and multiplexing to avoid interference between the sensors. Techniques like time-division multiplexing or frequency-division multiplexing can be employed to enable the simultaneous operation of multiple sensors.
Conclusion
Ultrasonic sensors are versatile and reliable devices for measuring distance and detecting objects in various applications. By understanding the operating principle, designing the appropriate circuit, and implementing the necessary code, you can effectively integrate ultrasonic sensors into your projects.
Remember to consider factors such as calibration, testing, and troubleshooting to ensure optimal performance and accuracy. With the knowledge gained from this comprehensive guide, you are well-equipped to explore the exciting possibilities of ultrasonic sensing in your future endeavors.
No responses yet