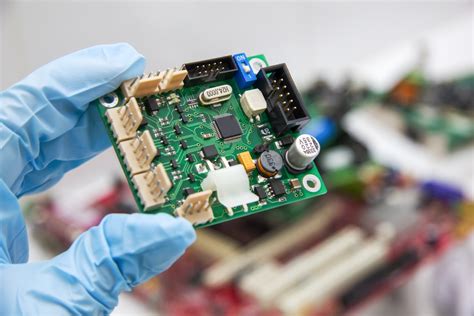
Introduction
LED lighting has become increasingly popular in recent years due to its energy efficiency, long lifespan, and versatility. As a result, the demand for custom LED PCB assemblies has grown significantly. However, the process of designing and manufacturing custom LED PCBs can be complex and prone to failures if not done correctly. In this article, we will discuss seven ways to prevent the case of failing custom LED PCB Assembly.
1. Choose the Right PCB Material
Importance of Selecting the Appropriate PCB Material
The choice of PCB material is crucial in determining the success of your custom LED PCB assembly. Different materials have varying properties that affect the performance, reliability, and longevity of the final product. Selecting the appropriate PCB material ensures that your LED assembly can withstand the intended operating conditions and meet the required specifications.
Common PCB Materials for LED Applications
- FR-4: A popular and cost-effective choice for general-purpose LED PCBs
- Aluminum: Provides excellent thermal dissipation for high-power LED applications
- Metal Core PCB (MCPCB): Offers superior heat transfer and thermal management
- Flexible PCBs: Suitable for applications requiring bendable or conformable LED assemblies
Factors to Consider When Selecting PCB Material
- Thermal conductivity: Ensures efficient heat dissipation from the LEDs
- Dielectric strength: Prevents electrical breakdown and short circuits
- Thermal expansion coefficient: Minimizes stress and warping during temperature changes
- Mechanical strength: Withstands physical stresses during assembly and operation
- Cost: Balances performance requirements with budget constraints
By carefully considering these factors and selecting the appropriate PCB material for your custom LED application, you can significantly reduce the risk of failure and ensure optimal performance.

2. Optimize PCB Layout and Design
Importance of PCB Layout and Design Optimization
A well-optimized PCB layout and design are essential for the success of your custom LED PCB assembly. Proper layout and design ensure efficient current distribution, minimize signal interference, and enhance thermal management. By optimizing your PCB layout and design, you can improve the reliability, performance, and longevity of your LED assembly.
Key Considerations for LED PCB Layout and Design
- Current Distribution:
- Ensure even current distribution to all LEDs for uniform brightness
- Use appropriate trace widths and copper weights to handle the required current
-
Implement current-limiting resistors or constant current drivers
-
Signal Integrity:
- Minimize crosstalk and electromagnetic interference (EMI) between traces
- Keep sensitive signal traces away from high-current paths
-
Use ground planes and proper shielding techniques
-
Thermal Management:
- Provide adequate copper pours and thermal vias for heat dissipation
- Place thermal pads or heat sinks on high-power LEDs
-
Consider the use of thermal interface materials (TIMs) for better heat transfer
-
Component Placement:
- Optimize component placement for efficient routing and heat dissipation
- Consider the mechanical constraints and assembly requirements
- Ensure proper spacing between components for ease of manufacturing
Best Practices for LED PCB Layout and Design
- Use a grid-based layout for consistent component placement and routing
- Follow the manufacturer’s recommendations for LED footprints and pad sizes
- Implement proper grounding techniques, such as star grounding or ground planes
- Use symmetrical and balanced layouts for better current distribution and signal integrity
- Conduct thorough design reviews and simulations to identify and resolve potential issues
By following these best practices and considering the key aspects of LED PCB layout and design, you can significantly reduce the risk of failure and ensure the optimal performance of your custom LED PCB assembly.

3. Select Reliable Components
Importance of Component Selection
The reliability and performance of your custom LED PCB assembly heavily depend on the quality and reliability of the components used. Selecting reliable components from reputable manufacturers ensures that your LED assembly can withstand the intended operating conditions and meet the required specifications. Using subpar or counterfeit components can lead to premature failures, reduced performance, and increased maintenance costs.
Key Components in LED PCB Assembly
- LEDs:
- Choose LEDs from reputable manufacturers with proven track records
- Consider factors such as luminous flux, color temperature, forward voltage, and viewing angle
-
Ensure that the selected LEDs meet the required specifications and standards
-
Drivers and Control Circuitry:
- Select LED drivers with appropriate current and voltage ratings
- Consider dimming capabilities, efficiency, and compatibility with the selected LEDs
-
Opt for reliable control circuitry components, such as microcontrollers and sensors
-
Passive Components:
- Use high-quality resistors, capacitors, and inductors from trusted manufacturers
- Ensure that the selected components have appropriate ratings and tolerances
-
Consider the temperature and voltage ratings of the passive components
-
Connectors and Wiring:
- Choose connectors with suitable current ratings and reliability
- Use high-quality wiring with appropriate gauge and insulation properties
- Ensure proper crimping and soldering techniques for reliable connections
Strategies for Ensuring Component Reliability
- Source from reputable suppliers:
- Purchase components from authorized distributors or directly from the manufacturers
-
Avoid sourcing from unknown or untrusted suppliers to minimize the risk of counterfeit components
-
Conduct thorough component testing:
- Perform incoming quality control (IQC) checks on received components
- Test components for functionality, performance, and reliability
-
Implement a robust testing and validation process to identify potential issues early
-
Establish a reliable supply chain:
- Develop long-term relationships with trusted component suppliers
- Regularly monitor and assess the performance and quality of suppliers
- Implement traceability and documentation processes to ensure component authenticity
By selecting reliable components from reputable sources, conducting thorough testing, and establishing a robust supply chain, you can significantly reduce the risk of component-related failures in your custom LED PCB assembly.

4. Implement Robust Manufacturing Processes
Importance of Manufacturing Process Control
Implementing robust manufacturing processes is crucial for ensuring the quality and reliability of your custom LED PCB assembly. Well-controlled and optimized manufacturing processes minimize defects, improve consistency, and enhance the overall performance of the final product. By implementing strict process controls and adhering to industry standards, you can significantly reduce the risk of manufacturing-related failures.
Key Manufacturing Processes in LED PCB Assembly
- Solder Paste Printing:
- Use high-quality solder paste with the appropriate composition and particle size
- Ensure proper solder paste printing parameters, such as stencil thickness and aperture size
-
Implement regular stencil cleaning and maintenance to prevent solder paste contamination
-
Component Placement:
- Use automated pick-and-place machines for precise and consistent component placement
- Ensure proper alignment and orientation of components
-
Implement vision systems for real-time placement verification and error detection
-
Reflow Soldering:
- Optimize reflow soldering profiles based on the components and PCB characteristics
- Control the temperature gradient and peak temperatures to prevent thermal stress
-
Implement proper cooling rates to minimize component and solder joint damage
-
Inspection and Testing:
- Conduct visual inspections to identify any visible defects or anomalies
- Perform automated optical inspection (AOI) to detect component and solder joint issues
- Implement in-circuit testing (ICT) and functional testing to verify electrical performance
Best Practices for Manufacturing Process Control
- Establish and document standard operating procedures (SOPs):
- Develop detailed SOPs for each manufacturing process step
- Ensure that all operators are trained and adhere to the established SOPs
-
Regularly review and update SOPs based on process improvements and lessons learned
-
Implement statistical process control (SPC):
- Monitor key process parameters and establish control limits
- Use statistical tools to identify process variations and trends
-
Take corrective actions when process parameters deviate from the established limits
-
Conduct regular process audits and assessments:
- Perform periodic audits to ensure compliance with SOPs and industry standards
- Identify areas for improvement and implement corrective and preventive actions (CAPA)
-
Continuously monitor and optimize manufacturing processes based on audit findings
-
Invest in equipment maintenance and calibration:
- Establish a regular maintenance schedule for all manufacturing equipment
- Ensure that equipment is properly calibrated and validated
- Address any equipment issues promptly to minimize the impact on product quality
By implementing robust manufacturing processes, establishing strict process controls, and following best practices, you can significantly reduce the risk of manufacturing-related failures in your custom LED PCB assembly.
5. Conduct Thorough Testing and Quality Control
Importance of Testing and Quality Control
Conducting thorough testing and quality control is essential for ensuring the reliability and performance of your custom LED PCB assembly. Comprehensive testing at various stages of the manufacturing process helps identify defects, verify functionality, and ensure compliance with specified requirements. By implementing robust quality control measures, you can catch and address issues early, reducing the risk of failures in the final product.
Types of Testing in LED PCB Assembly
- In-Circuit Testing (ICT):
- Verify the electrical connectivity and component functionality on the PCB
- Identify short circuits, open circuits, and component value deviations
-
Ensure proper electrical performance of the PCB assembly
-
Functional Testing:
- Test the PCB assembly under real-world operating conditions
- Verify the functionality of the LED assembly, including brightness, color, and control features
-
Ensure that the assembly meets the specified performance requirements
-
Burn-In Testing:
- Subject the PCB assembly to elevated temperatures and extended operating periods
- Identify early failures and component weaknesses
-
Ensure the long-term reliability of the LED assembly
-
Environmental Testing:
- Expose the PCB assembly to various environmental conditions, such as temperature, humidity, and vibration
- Verify the assembly’s resilience and robustness under extreme conditions
- Ensure that the LED assembly can withstand the intended operating environment
Quality Control Measures
- Incoming Quality Control (IQC):
- Inspect and test incoming components and materials
- Verify the quality and conformance of components to specified requirements
-
Reject any subpar or non-conforming components
-
In-Process Quality Control (IPQC):
- Monitor and inspect the PCB assembly at various stages of the manufacturing process
- Verify the accuracy and consistency of solder paste printing, component placement, and soldering
-
Identify and address any process-related issues promptly
-
Outgoing Quality Control (OQC):
- Conduct final inspections and testing on the finished LED PCB assemblies
- Verify the overall quality, functionality, and compliance with customer requirements
-
Ensure that only conforming products are shipped to the customer
-
Traceability and Documentation:
- Maintain detailed records of testing and quality control activities
- Implement a traceability system to track components, materials, and processes
- Document any issues, corrective actions, and quality metrics for continuous improvement
By conducting thorough testing at various stages and implementing comprehensive quality control measures, you can significantly reduce the risk of failures and ensure the reliability and performance of your custom LED PCB assembly.
6. Consider Thermal Management
Importance of Thermal Management
Thermal management is a critical aspect of custom LED PCB assembly design and manufacturing. LEDs generate a significant amount of heat during operation, and excessive heat can lead to reduced performance, shortened lifespan, and even failure of the LED assembly. Effective thermal management ensures that the generated heat is efficiently dissipated, maintaining the LEDs within their optimal operating temperature range.
Thermal Management Techniques for LED PCB Assembly
- PCB Material Selection:
- Choose PCB materials with high thermal conductivity, such as aluminum or metal core PCBs (MCPCBs)
-
Ensure that the selected material can effectively transfer heat away from the LEDs
-
Copper Pours and Thermal Vias:
- Incorporate sufficient copper pours on the PCB to distribute heat evenly
- Use thermal vias to transfer heat from the LED pads to the other layers of the PCB
-
Optimize the size, number, and placement of thermal vias for efficient heat dissipation
-
Heat Sinks and Thermal Interface Materials:
- Attach heat sinks to the PCB to increase the surface area for heat dissipation
- Use thermal interface materials (TIMs) between the LED and heat sink to enhance thermal conductivity
-
Select heat sinks with appropriate size, material, and fin design for optimal heat dissipation
-
Airflow and Ventilation:
- Ensure adequate airflow around the LED assembly to facilitate convective cooling
- Incorporate ventilation holes or slots in the enclosure to allow hot air to escape
- Consider the use of fans or other active cooling solutions for high-power LED applications
Thermal Simulation and Analysis
- Thermal Modeling:
- Create thermal models of the LED PCB assembly using simulation software
- Simulate the heat generation and dissipation under various operating conditions
-
Identify potential hot spots and areas of concern in the thermal design
-
Thermal Testing:
- Conduct thermal testing on prototype assemblies to validate the thermal design
- Measure the temperature at critical points on the PCB and components
-
Verify that the LED assembly operates within the specified temperature limits
-
Iterative Design Optimization:
- Analyze the results of thermal simulations and testing
- Identify opportunities for improvement in the thermal design
- Modify the PCB layout, component placement, or cooling solutions based on the analysis
- Repeat the simulation and testing process until the desired thermal performance is achieved
By considering thermal management techniques, conducting thermal simulations, and performing thorough thermal testing, you can ensure that your custom LED PCB assembly operates within safe temperature limits, reducing the risk of heat-related failures and enhancing the overall reliability and performance of the LED system.
7. Foster Collaboration and Communication
Importance of Collaboration and Communication
Effective collaboration and communication among all stakeholders involved in the custom LED PCB assembly process are essential for preventing failures and ensuring a successful outcome. Open and transparent communication helps align expectations, identify potential issues early, and facilitate timely resolution of problems. By fostering a collaborative environment, you can leverage the expertise of all team members and streamline the design, manufacturing, and testing processes.
Key Stakeholders in Custom LED PCB Assembly
- Design Engineers:
- Responsible for creating the schematic, PCB layout, and component selection
- Collaborate with other engineers to ensure the design meets functional and performance requirements
-
Communicate design intent and constraints to the manufacturing team
-
Manufacturing Engineers:
- Oversee the manufacturing process and ensure adherence to quality standards
- Provide feedback on design for manufacturability (DFM) and assembly feasibility
-
Collaborate with design engineers to optimize the manufacturing process
-
Quality Assurance Team:
- Develop and implement quality control procedures and testing plans
- Monitor and report on product quality and process performance
-
Collaborate with design and manufacturing teams to address quality issues and implement improvements
-
Suppliers and Vendors:
- Provide components, materials, and manufacturing services
- Communicate lead times, technical specifications, and quality requirements
- Collaborate with the design and manufacturing teams to ensure timely delivery and conformance to specifications
Best Practices for Collaboration and Communication
- Establish Clear Communication Channels:
- Define roles and responsibilities for each stakeholder
- Implement a centralized communication platform, such as project management software or collaboration tools
-
Regularly schedule meetings and progress updates to keep all stakeholders informed
-
Foster Cross-Functional Collaboration:
- Encourage open dialogue and knowledge sharing among different teams
- Conduct design reviews and manufacturing feasibility assessments with all relevant stakeholders
-
Promote a culture of continuous improvement and problem-solving
-
Document and Share Knowledge:
- Maintain comprehensive design documentation, including schematics, BOMs, and assembly instructions
- Create and share manufacturing process specifications and quality control plans
-
Establish a centralized repository for project-related information and lessons learned
-
Encourage Feedback and Continuous Improvement:
- Solicit feedback from all stakeholders throughout the project lifecycle
- Conduct post-project reviews to identify successes, challenges, and areas for improvement
- Implement a formal process for capturing and incorporating feedback into future projects
By fostering a collaborative environment, establishing clear communication channels, and promoting cross-functional teamwork, you can minimize misunderstandings, identify and address issues promptly, and ensure that your custom LED PCB assembly project stays on track and meets the desired quality and performance objectives.
Frequently Asked Questions (FAQ)
- What are the most common causes of failure in custom LED PCB assemblies?
-
Some of the most common causes of failure in custom LED PCB assemblies include poor thermal management, subpar component quality, manufacturing defects, improper PCB layout and design, and inadequate testing and quality control.
-
How can I ensure the reliability of the components used in my custom LED PCB assembly?
-
To ensure component reliability, source components from reputable suppliers, conduct thorough incoming quality control (IQC) checks, perform component testing, and establish a reliable supply chain with traceability and documentation processes.
-
What are the key considerations for optimizing the PCB layout and design for LED applications?
-
Key considerations for optimizing the PCB layout and design include ensuring even current distribution, minimizing signal interference, implementing proper thermal management techniques, optimizing component placement, and following best practices for routing and grounding.
-
How can I
No responses yet