
What is an Arduino?
An Arduino is an open-source microcontroller board that allows users to create interactive electronic projects. It consists of a programmable circuit board (microcontroller) and an integrated development environment (IDE) for writing and uploading code to the board. Arduino boards can read inputs from various sensors and control outputs such as LEDs, motors, and displays.
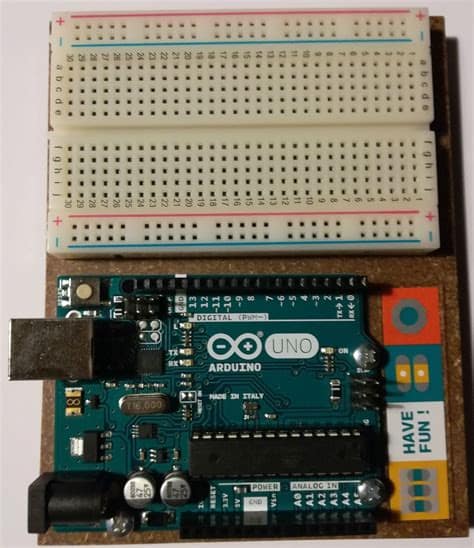
Arduino Essentials: Hardware Components
To fully grasp the capabilities of an Arduino board, it’s essential to understand its hardware components. Let’s take a closer look at the key elements that make up an Arduino:
Microcontroller
The heart of an Arduino board is the microcontroller, which is a small computer on a single integrated circuit. It processes the code, handles input and output, and controls the overall functionality of the board. Common microcontrollers used in Arduino boards include:
- ATmega328P (Arduino Uno)
- ATmega2560 (Arduino Mega)
- ATmega32U4 (Arduino Leonardo)
Input/Output Pins
Arduino boards feature a set of digital and analog input/output (I/O) pins that allow the microcontroller to interact with the outside world. These pins can be configured as either inputs or outputs, depending on the project requirements.
- Digital I/O Pins: Used for reading digital sensors or controlling digital outputs (e.g., LEDs, buttons)
- Analog Input Pins: Used for reading analog sensors (e.g., temperature, light, potentiometers)
- PWM (Pulse Width Modulation) Pins: Used for generating analog-like signals to control servos, LEDs, etc.
Power Supply
Arduino boards can be powered through the USB connection or an external power supply. The power requirements depend on the specific board and the connected peripherals. Most Arduino boards operate at 5V, while some, like the Arduino Due, operate at 3.3V.
Communication Interfaces
Arduino boards offer various communication interfaces for connecting with other devices, such as computers, sensors, or other Arduino boards. Common interfaces include:
- USB: Used for programming the board and serial communication with a computer
- I2C (Inter-Integrated Circuit): A two-wire interface for connecting multiple devices
- SPI (Serial Peripheral Interface): A synchronous serial data protocol for communicating with one or more peripheral devices

Arduino Essentials: Software and Programming
Arduino programming is based on a simplified version of C++, making it accessible to beginners while still offering advanced features for experienced programmers. The Arduino IDE provides an intuitive environment for writing, compiling, and uploading code to the board.
Arduino IDE
The Arduino IDE is a cross-platform application that runs on Windows, macOS, and Linux. It includes a code editor, a message area, a text console, a toolbar with common functions, and a series of menus. The IDE allows you to write code, compile it, and upload it to the Arduino board with just a few clicks.
Arduino Language
The Arduino programming language is based on C++, with some simplifications and modifications to make it more beginner-friendly. It includes built-in functions for controlling the Arduino hardware, such as:
pinMode(): Configures a pin as an input or outputdigitalRead(): Reads the state of a digital pindigitalWrite(): Writes a HIGH or LOW value to a digital pinanalogRead(): Reads the value from an analog pinanalogWrite(): Writes an analog value (PWM) to a pin
Arduino Libraries
Arduino libraries are pre-written code modules that extend the functionality of the Arduino IDE and simplify complex tasks. They provide an easy way to interface with sensors, displays, and other peripherals without having to write low-level code from scratch. Some popular Arduino libraries include:
- LiquidCrystal: For controlling LCD displays
- Servo: For controlling servo motors
- Wire: For I2C communication
- SPI: For SPI communication
To use a library in your Arduino sketch, simply include it at the beginning of your code using the #include directive, like this:
#include <LiquidCrystal.h>

LiquidCrystal lcd(12, 11, 5, 4, 3, 2);

void setup() {
  lcd.begin(16, 2);
  lcd.print("Arduino Essentials!");
}

void loop() {
  // Your code here
}

Arduino Essentials: Sensors and Actuators
One of the key strengths of Arduino is its ability to interact with a wide range of sensors and actuators, enabling you to create projects that can sense and respond to the environment. Let’s explore some common sensors and actuators used with Arduino:
Sensors
Sensors allow your Arduino to gather data from the surrounding environment. Some popular sensors include:
- Temperature Sensors (e.g., DHT11, DS18B20)
- Light Sensors (e.g., photoresistors, TSL2561)
- Motion Sensors (e.g., PIR, ultrasonic)
- Pressure Sensors (e.g., BMP180, MPX4115A)
To use a sensor with your Arduino, you typically connect it to the appropriate input pins and use the corresponding library functions to read the sensor data. For example, to read temperature and humidity data from a DHT11 sensor:
#include <DHT.h>

#define DHTPIN 2
#define DHTTYPE DHT11

DHT dht(DHTPIN, DHTTYPE);

void setup() {
  Serial.begin(9600);
  dht.begin();
}

void loop() {
  float temp = dht.readTemperature();
  float humidity = dht.readHumidity();

  Serial.print("Temperature: ");
  Serial.print(temp);
  Serial.print(" °C, Humidity: ");
  Serial.print(humidity);
  Serial.println("%");

  delay(2000);
}
Actuators
Actuators allow your Arduino to interact with the physical world by controlling devices such as motors, servos, and LEDs. Some common actuators include:
- DC Motors
- Servo Motors
- Stepper Motors
- LEDs
- Relays
To control an actuator with your Arduino, you typically connect it to the appropriate output pins and use the corresponding library functions or built-in functions to send control signals. For example, to control a servo motor:
#include <Servo.h>

Servo myServo;

void setup() {
  myServo.attach(9);
}

void loop() {
  myServo.write(0);
  delay(1000);
  myServo.write(90);
  delay(1000);
  myServo.write(180);
  delay(1000);
}
Arduino Essentials: Communication Protocols
Arduino boards can communicate with other devices using various communication protocols. Understanding these protocols is essential for creating projects that involve multiple devices or for sending data to and from your Arduino. Let’s take a closer look at some common communication protocols:
Serial Communication
Serial communication is a simple and widely used protocol for sending data between an Arduino and a computer or other devices. It uses the board’s USB connection or dedicated RX and TX pins for communication. To use serial communication in your Arduino sketch, you can use the Serial object and its associated functions:
void setup() {
  Serial.begin(9600);
}

void loop() {
  if (Serial.available() > 0) {
    char incomingByte = Serial.read();
    Serial.print("Received: ");
    Serial.println(incomingByte);
  }
}
I2C Communication
I2C (Inter-Integrated Circuit) is a synchronous, multi-master, multi-slave, packet-switched, single-ended, serial communication protocol. It is commonly used for connecting multiple devices, such as sensors and displays, to an Arduino using just two wires: SDA (data) and SCL (clock). To use I2C communication in your Arduino sketch, you can use the Wire library:
#include <Wire.h>

void setup() {
  Wire.begin();
}

void loop() {
  Wire.beginTransmission(0x68);
  Wire.write(0x00);
  Wire.endTransmission();

  Wire.requestFrom(0x68, 6);

  while (Wire.available()) {
    char data = Wire.read();
    Serial.print(data);
  }

  delay(1000);
}
SPI Communication
SPI (Serial Peripheral Interface) is a synchronous serial communication protocol used for short-distance communication between an Arduino and peripheral devices. It uses four wires: MOSI (Master Out Slave In), MISO (Master In Slave Out), SCK (Serial Clock), and SS (Slave Select). To use SPI communication in your Arduino sketch, you can use the SPI library:
#include <SPI.h>

void setup() {
  SPI.begin();
}

void loop() {
  SPI.beginTransaction(SPISettings(14000000, MSBFIRST, SPI_MODE0));

  digitalWrite(SS, LOW);
  SPI.transfer(0x55);
  digitalWrite(SS, HIGH);

  SPI.endTransaction();

  delay(1000);
}
Arduino Essentials: Power Management
Proper power management is crucial for ensuring the stability and longevity of your Arduino projects. Here are some key considerations for managing power in your Arduino designs:
Voltage Regulator
Most Arduino boards have an onboard voltage regulator that converts the input voltage (from the USB connection or external power supply) to the operating voltage of the microcontroller (usually 5V or 3.3V). When using an external power supply, ensure that it provides a clean, stable voltage within the acceptable range for your specific Arduino board.
Power Consumption
To optimize power consumption in your Arduino projects, consider the following tips:
- Use low-power components whenever possible (e.g., LEDs, sensors)
- Put the microcontroller to sleep when not in use
- Disable unused peripherals and features
- Lower the clock speed if high performance is not required
- Use efficient coding practices to minimize processing time
Battery-Powered Projects
When designing battery-powered Arduino projects, choose the appropriate battery type and capacity based on your project’s power requirements and expected runtime. Some common battery options include:
- Alkaline Batteries (AA, AAA)
- Lithium-Ion Batteries (Li-Ion)
- Lithium-Polymer Batteries (LiPo)
- Rechargeable Nickel-Metal Hydride Batteries (NiMH)
To extend battery life, implement power-saving techniques and use a voltage regulator or battery management system to ensure stable power delivery.
Arduino Essentials: Project Ideas and Examples
Now that you’ve learned the essentials of Arduino, it’s time to put your knowledge into practice. Here are some project ideas and examples to inspire your own creations:
Beginner Projects
- Blinking LED: Create a simple circuit that blinks an LED at a specified interval.
- Temperature and Humidity Monitor: Use a DHT11 sensor to measure and display temperature and humidity data.
- Ultrasonic Distance Sensor: Build a Proximity Sensor using an ultrasonic module and display the distance on an LCD.
Intermediate Projects
- Weather Station: Combine multiple sensors (temperature, humidity, pressure) to create a comprehensive weather monitoring system.
- Bluetooth-Controlled Robot: Build a robot that can be controlled wirelessly via Bluetooth using a smartphone app.
- RFID Access Control System: Design a system that grants access based on RFID tags and logs access events.
Advanced Projects
- Autonomous Drone: Create a drone that can navigate autonomously using GPS, sensors, and advanced control algorithms.
- Smart Home Automation System: Develop a centralized system to control and monitor various home appliances and systems (lighting, HVAC, security).
- Wearable Health Monitor: Design a wearable device that tracks vital signs and provides real-time health data and alerts.
Remember, these are just a few examples of the countless possibilities with Arduino. Let your creativity and imagination guide you as you develop your own unique projects.
FAQ
-
What is the difference between Arduino and Raspberry Pi?
Arduino is a microcontroller board designed for simple, low-power projects, while Raspberry Pi is a single-board computer capable of running a full operating system and handling more complex tasks. -
Can I use Arduino for commercial projects?
Yes, Arduino is open-source hardware, which means you can use it for both personal and commercial projects without any licensing fees. -
How do I choose the right Arduino board for my project?
Consider your project requirements, such as the number of I/O pins needed, processing power, memory, and any specific features (e.g., Wi-Fi, Bluetooth). Consult the Arduino board comparison chart to find the best match for your needs. -
What programming language do I need to learn for Arduino?
Arduino programming is based on a simplified version of C++. If you are familiar with C or C++, you’ll find Arduino programming relatively easy to learn. -
Where can I find help and support for my Arduino projects?
There are numerous online resources available, including the official Arduino website, forums, tutorials, and project-sharing platforms like Instructables and Hackster.io. Additionally, many local communities and makerspaces offer workshops, classes, and support for Arduino enthusiasts.
Conclusion
Arduino has revolutionized the way we approach electronics and programming, making it more accessible and enjoyable for people of all skill levels. By understanding the essentials of Arduino, including its hardware components, software, sensors, actuators, communication protocols, and power management, you are well-equipped to start creating your own innovative projects.
Remember, the key to success with Arduino is experimentation, persistence, and a willingness to learn. Don’t be afraid to try new things, make mistakes, and seek help when needed. With the vast array of resources and supportive community available, you’ll never be alone on your Arduino journey.
So, grab your Arduino board, start tinkering, and let your imagination run wild. The possibilities are endless, and the only limit is your creativity. Happy making!
No responses yet