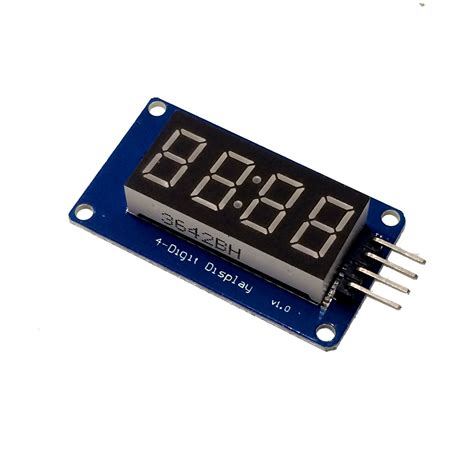
Introduction to 7 Segment Display
A 7 segment display is an electronic device that can display numbers and some letters by lighting up different combinations of seven segments. It is commonly used in digital clocks, calculators, and various other electronic devices to display numerical information.
What is a 7 Segment Display?
A 7 segment display consists of seven LED segments arranged in a rectangular fashion, as shown below. Each segment is labeled with a letter from a to g, and by lighting up different combinations of these segments, various numbers and letters can be displayed.
a
f b
g
e c
d
In addition to the seven segments, a 7 segment display also has a decimal point (DP) which can be used to display numbers with decimal places.
Types of 7 Segment Displays
There are two main types of 7 segment displays:
- Common Cathode (CC) Display
- Common Anode (CA) Display
The difference between these two types lies in the way the LED segments are connected internally.
Common Cathode (CC) Display
In a common cathode display, all the cathodes of the LED segments are connected together and brought out as a single pin. To light up a segment, a logic HIGH is applied to the corresponding anode through a current limiting resistor while keeping the cathode at logic LOW.
Common Anode (CA) Display
In a common anode display, all the anodes of the LED segments are connected together and brought out as a single pin. To light up a segment, a logic LOW is applied to the corresponding cathode through a current limiting resistor while keeping the anode at logic HIGH.
7 Segment Display Pinout
A typical 7 segment display has 10 pins in total – 8 pins for the segments (a-g and DP) and 2 pins for the common terminal (cathode or anode).
| Pin Number | Function |
|---|---|
| 1 | Segment E |
| 2 | Segment D |
| 3 | Common |
| 4 | Segment C |
| 5 | DP |
| 6 | Segment B |
| 7 | Segment A |
| 8 | Common |
| 9 | Segment F |
| 10 | Segment G |

How a 7 Segment Display Works
A 7 segment display works by lighting up different combinations of the seven segments to display numbers and letters. Each segment is an individual LED that can be turned on or off independently.
To display a particular number or letter, the corresponding segments are turned on while the others are turned off. For example, to display the number ‘7’, segments a, b, and c are turned on while the others remain off.
Driving a 7 Segment Display
To drive a 7 segment display, a microcontroller or a dedicated IC like the MAX7219 can be used. The microcontroller or IC sends the appropriate signals to the segments to display the desired character.
When using a microcontroller, each segment of the display is connected to a separate I/O pin of the microcontroller through a current limiting resistor. The microcontroller then sends HIGH or LOW signals to the appropriate pins to turn the segments on or off.
Here’s an example of how to display the number ‘4’ on a common cathode display using an Arduino:
int a = 2;
int b = 3;
int c = 4;
int d = 5;
int e = 6;
int f = 7;
int g = 8;

void setup() {
  pinMode(a, OUTPUT);
  pinMode(b, OUTPUT);
  pinMode(c, OUTPUT);
  pinMode(d, OUTPUT);
  pinMode(e, OUTPUT);
  pinMode(f, OUTPUT);
  pinMode(g, OUTPUT);
}

void loop() {
  digitalWrite(a, HIGH);
  digitalWrite(b, HIGH);
  digitalWrite(c, LOW);
  digitalWrite(d, HIGH);
  digitalWrite(e, HIGH);
  digitalWrite(f, LOW);
  digitalWrite(g, HIGH);
  delay(1000);
}
In this example, the segments are connected to pins 2-8 of the Arduino. The setup() function sets these pins as outputs. The loop() function then turns on segments b, c, f, and g while turning off segments a, d, and e to display the number ‘4’. The delay(1000) function is used to keep the number displayed for 1 second.
Multiplexing 7 Segment Displays
When using multiple 7 segment displays to display numbers with more than one digit, multiplexing is often used to reduce the number of I/O pins required.
In multiplexing, the common pins of the displays are connected to the microcontroller through a transistor. The segments of all the displays are connected together in parallel. To display a number, the microcontroller rapidly switches between the displays, turning on the appropriate segments for each display one at a time.
For example, to display the number ’42’ using two 7 segment displays, the microcontroller would first turn on the transistor for the first display and light up segments b, c, f, and g to display ‘4’. It would then turn off the first display, turn on the second display, and light up segments a, b, d, e, and g to display ‘2’. This process is repeated rapidly, giving the illusion that both numbers are displayed simultaneously.

Applications of 7 Segment Displays
7 segment displays have a wide range of applications, including:
-
Digital Clocks: 7 segment displays are commonly used in digital clocks to display the time.
-
Calculators: Many calculators use 7 segment displays to show the result of calculations.
-
Meters: 7 segment displays are often used in meters like multimeters and Frequency Counters to display the measured value.
-
Elevators: The floor number in an elevator is often displayed using a 7 segment display.
-
Scoreboard: 7 segment displays are used in scoreboards to display the score and other information.
-
Vending Machines: The price and other information in vending machines are often displayed using 7 segment displays.
-
Microwave Ovens: The cooking time and power level in microwave ovens are usually displayed using 7 segment displays.

Frequently Asked Questions (FAQ)
-
What is the difference between a common cathode and common anode display?
In a common cathode display, all the cathodes of the segments are connected together and the segments are lit by applying a HIGH signal to the corresponding anode. In a common anode display, all the anodes are connected together and the segments are lit by applying a LOW signal to the corresponding cathode. -
How many pins does a 7 segment display have?
A typical 7 segment display has 10 pins – 8 pins for the segments and decimal point, and 2 pins for the common terminal. -
Can a 7 segment display show all the letters of the alphabet?
No, a 7 segment display can only display some letters of the alphabet like A, C, E, F, H, L, P, and U. It cannot display letters like B, D, G, J, K, M, N, Q, R, S, T, V, W, X, Y, and Z. -
What is multiplexing in the context of 7 segment displays?
Multiplexing is a technique used to drive multiple 7 segment displays using a fewer number of I/O pins. In multiplexing, the common pins of the displays are rapidly switched while the segments are turned on or off as needed to create the illusion that all the displays are on simultaneously. -
Can a 7 segment display be directly connected to a microcontroller?
No, a 7 segment display cannot be directly connected to a microcontroller. Current limiting resistors are needed in series with each segment to prevent damage to the LEDs and the microcontroller.
Conclusion
7 segment displays are a simple and effective way to display numerical information in electronic devices. By understanding how they work and how to interface them with a microcontroller, you can use them in your own projects to add a numerical display.
This article has covered the basics of 7 segment displays, including their structure, types, pinout, and how they work. It has also provided a simple example of how to drive a 7 segment display using an Arduino, and discussed the technique of multiplexing for driving multiple displays.
With this knowledge, you should be able to incorporate 7 segment displays into your electronic projects with ease. Whether you’re building a clock, a calculator, or any other device that needs to display numbers, 7 segment displays are a reliable and straightforward solution.
No responses yet